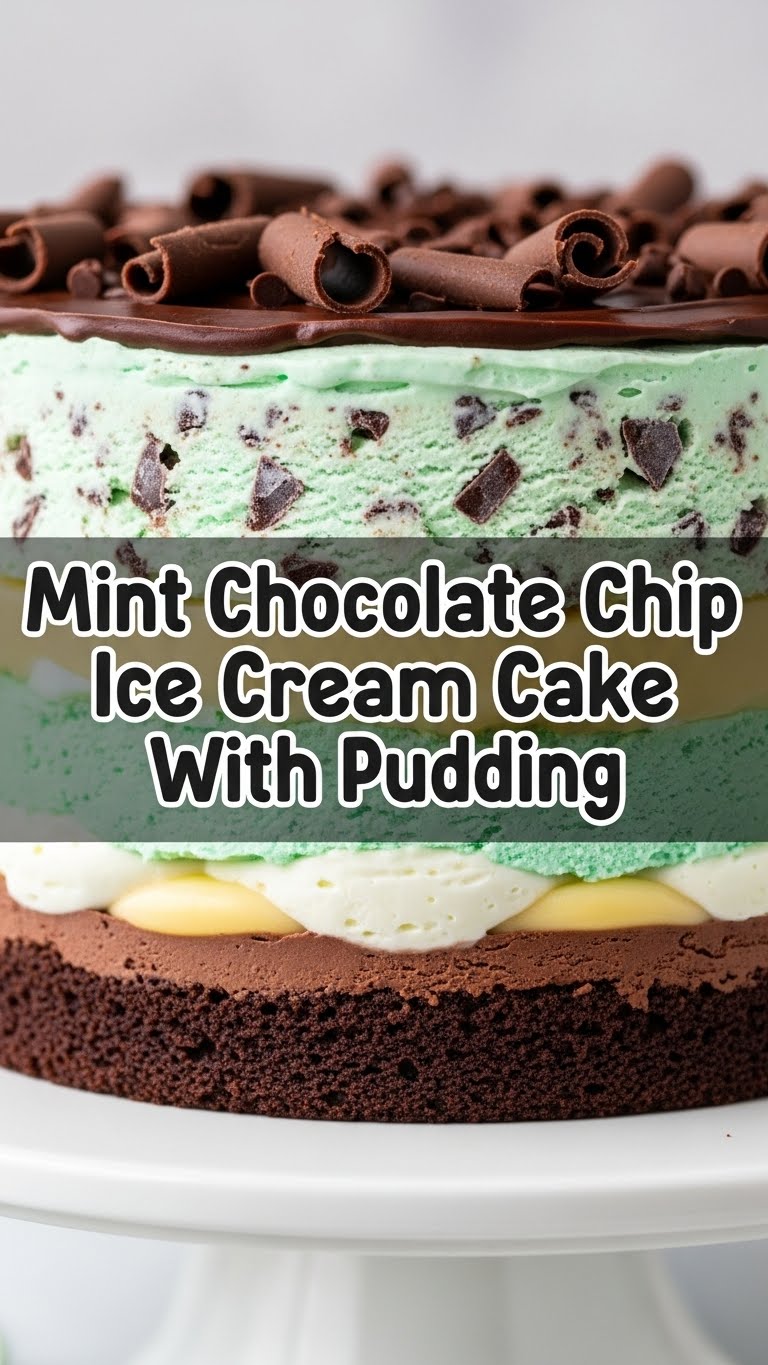
So you’re craving something ridiculously good, refreshingly cool, and pretty much guaranteed to make anyone say, “Woah, you made that?!” but you also don’t want to spend your entire weekend playing chef? Girl, I feel you. And guess what? I’ve got your back with a recipe so easy, it’s practically a magic trick. We’re talking Mint Chocolate Chip Ice Cream Cake with Pudding, and it’s about to become your new favorite dessert, no intense culinary skills required. Seriously, if I can do it, you can *definitely* do it. Let’s get this party started!
Why This Recipe is Awesome
Okay, buckle up, buttercup, because this isn’t just *any* ice cream cake. This is THE ice cream cake. Why? Let me count the ways (or just list a few, because we’re not writing a dissertation here):
- It’s got that crunchy cookie crust that makes you wanna do a little happy dance.
- Mint chocolate chip ice cream. Enough said, right? It’s basically a hug in frozen form.
- There’s a creamy, dreamy pudding layer, because why stop at just ice cream when you can have *more* velvety goodness?
- It’s idiot-proof. Seriously, if you can open a package and spread stuff, you’re golden. I mean, I didn’t mess it up, so that’s saying something.
- It looks super impressive, but the effort level is hilariously low. You get all the credit for none of the major sweat. Win-win!
- Perfect for any occasion – or, let’s be real, for a Tuesday night when you just deserve something epic.
Ingredients You’ll Need
Get ready to grab some goodies. No obscure, fancy stuff here, just good old supermarket heroes.
- 1 (14.3 oz) package Oreo cookies (or similar chocolate sandwich cookies): Because every epic cake needs a crumbly, delicious foundation. The good stuff.
- 6 tablespoons unsalted butter, melted: For binding that crumbly goodness into a proper crust. Don’t skimp, butter is your friend!
- 1/2 gallon (about 2 quarts) Mint Chocolate Chip Ice Cream: The star of the show! Make sure it’s slightly softened, not rock hard straight from the freezer.
- 2 (3.4 oz) packages instant vanilla pudding mix: Or chocolate, if you’re feeling wild, but vanilla plays nice with mint. Instant is key; we’re not trying to boil milk and stir here.
- 3 cups cold milk: To whip up that pudding. Whole milk gives the best creamy texture, IMO.
- 1 (8 oz) container frozen whipped topping (like Cool Whip), thawed: For that airy, dreamy top layer or mix-in. Who doesn’t love a cloud of sweetness?
- Optional toppings: Extra chocolate chips, hot fudge sauce, mint sprigs, chocolate syrup. Go wild, it’s your masterpiece!
Step-by-Step Instructions
Alright, let’s turn these ingredients into a masterpiece. Get a 9×13 inch pan ready!
- Crush the Cookies: Grab those Oreos. You can throw them in a food processor for a quick blitz or put them in a zip-top bag and smash ’em with a rolling pin (or a wine bottle, no judgment!). You want fine crumbs.
- Make the Crust: In a medium bowl, combine the crushed Oreo crumbs and melted butter. Mix it up until the crumbs are evenly moistened. Press this mixture firmly into the bottom of your 9×13 inch pan. Use the back of a spoon or your clean hands to get a nice, even layer. Pop it in the freezer for about 15-20 minutes to firm up.
- Layer 1 – Ice Cream Power: Take your slightly softened mint chocolate chip ice cream and spread about half of it evenly over the chilled cookie crust. Don’t worry if it’s not perfectly smooth; it’s going to freeze! Return the pan to the freezer for at least 30 minutes to firm up again. This is crucial for neat layers.
- Whip Up the Pudding: While your ice cream layer is chilling, whisk together the instant pudding mixes and cold milk in a large bowl. Whisk for about 2 minutes until it starts to thicken. Fold in about half of the thawed whipped topping. This makes your pudding layer extra light and dreamy.
- Layer 2 – Pudding Perfection: Carefully spread the pudding mixture over the firm ice cream layer. Try to be gentle so you don’t mix the layers. Back to the freezer it goes for another 30-60 minutes, or until the pudding is set.
- Layer 3 – More Ice Cream Fun: Spread the remaining mint chocolate chip ice cream over the set pudding layer. Again, gently does it.
- The Grand Finale (Optional but Recommended): Top the entire cake with the remaining whipped topping. You can spread it smoothly or create fun swirls with a spoon. If you’re using extra toppings like chocolate chips or drizzles, sprinkle/drizzle them now.
- Freeze for Glory: Cover the pan with plastic wrap (foil works too!) and freeze for a minimum of 4-6 hours, or even better, overnight. The longer it freezes, the cleaner your slices will be!
- Serve and Shine: When ready to serve, remove from the freezer and let it sit at room temperature for about 5-10 minutes to soften slightly. This makes slicing much easier. Slice, serve, and bask in the “oohs” and “aahs”!
Common Mistakes to Avoid
We’re all human, we make mistakes. But here are a few rookie errors to steer clear of to ensure your cake is nothing short of legendary:
- Not softening the ice cream enough: Trying to spread rock-hard ice cream is a workout no one asked for. Let it sit out for 10-15 minutes until it’s spreadable but not melty.
- Not freezing between layers: Thinking you can skip those crucial freezer steps? Nope. You’ll end up with a messy, Frankenstein monster of a cake instead of distinct, beautiful layers. Patience, my friend!
- Over-mixing the pudding: Instant pudding sets fast. Whisk for the recommended time (usually 2 minutes) and then stop. Over-whisking can make it thin out again.
- Using warm milk for pudding: Cold milk is your friend for instant pudding. Don’t use lukewarm or room temp milk unless you want a soupy mess.
- Not covering the cake while freezing: Freezer burn is a real buzzkill. Always cover your cake tightly with plastic wrap to protect that deliciousness.
Alternatives & Substitutions
Feeling creative? Or maybe you just can’t find mint chocolate chip (gasp!). Here are some ideas to mix things up:
- Cookie Crust: Not a fan of Oreos? Use Graham crackers, Nilla Wafers, or even chocolate chip cookies for the crust. Just adjust the butter amount if needed.
- Ice Cream Flavor: This is where you can truly customize! Chocolate, vanilla, strawberry, coffee, cookies and cream… The possibilities are endless! Just pick something that pairs well with chocolate (and pudding!).
- Pudding Flavor: Chocolate pudding instead of vanilla is a no-brainer if you want to amp up the chocolate factor. Cheesecake pudding mix could also be a fun, tangy twist!
- Whipped Topping: If you’re feeling extra fancy, you can make your own homemade whipped cream. Just be aware it might not hold up as long in the freezer as the store-bought stuff.
- Mix-ins/Toppings: Peanut butter cups, chopped candy bars, crushed peppermints, mini marshmallows – go wild!
FAQ (Frequently Asked Questions)
Got questions? I’ve got (casual) answers!
- Can I use light ice cream? Technically yes, but why hurt your soul like that? Kidding! (Mostly.) It’ll work, but might be a bit icier.
- How far in advance can I make this? This cake is a rockstar for making ahead! You can easily assemble it 2-3 days before you plan to serve it. Just keep it tightly covered in the freezer.
- What’s the best way to store leftovers? If there *are* leftovers (highly doubtful), just cover the pan tightly with plastic wrap and pop it back in the freezer. It’ll stay good for about a week.
- My ice cream is too hard to spread, help! Let it sit on the counter for 10-15 minutes. If you’re impatient, microwave it for 10-15 seconds at a time, stirring between, but be super careful not to melt it completely.
- Do I *have* to use instant pudding? Yes, for this recipe’s ease and quick set time, instant is the way to go. Cooking pudding takes longer and requires more steps, which defeats our “easy breezy” vibe.
- Can I make this in a springform pan? Absolutely! It’ll look extra fancy when you release it. Just make sure to press the crust well up the sides a bit.
Final Thoughts
And there you have it, folks! Your very own Mint Chocolate Chip Ice Cream Cake With Pudding. You’ve officially conquered a dessert that looks like it took hours, but was actually a breeze. Now go impress someone—or yourself—with your new culinary skills. You’ve earned every single delicious bite. Don’t forget to send me a slice… or at least a pic! Happy eating!


