So, you’ve got tiny humans (or just really particular grown-ups who act like tiny humans) who need feeding, and the idea of making anything complicated makes you want to crawl under a blanket? Been there, done that, bought the t-shirt. But what if I told you there’s a way to whip up something adorable, satisfying, and shockingly easy that even *you* (yes, you!) won’t mess up? Enter the glorious world of mini sandwiches!
Why This Recipe is Awesome
Because let’s be real, who has time for culinary masterpieces when you’re juggling life, work, and the incessant demands for “SNAAAACKS!”? This recipe is basically your culinary superhero. It’s **idiot-proof**, truly, I didn’t even burn anything, which is a win in my book. It requires zero cooking (unless you count toasting bread, which, let’s not get ahead of ourselves). Plus, mini things are just inherently cuter, right? They’re perfect for lunchboxes, playdates, or when you just want to feel fancy without actually *being* fancy. And the best part? The kids actually EAT THEM. Miracles happen, people.
Ingredients You’ll Need
Gather ’round, fellow non-chefs! Here’s your shopping list for sandwich domination. Don’t worry, it’s not intimidating.
- Soft Sliced Bread: White, whole wheat, whatever your little darlings (or you) prefer. Crusts optional (we’ll get to that).
- Butter or Cream Cheese: The unsung hero. Keeps things from getting dry and adds a layer of yummy.
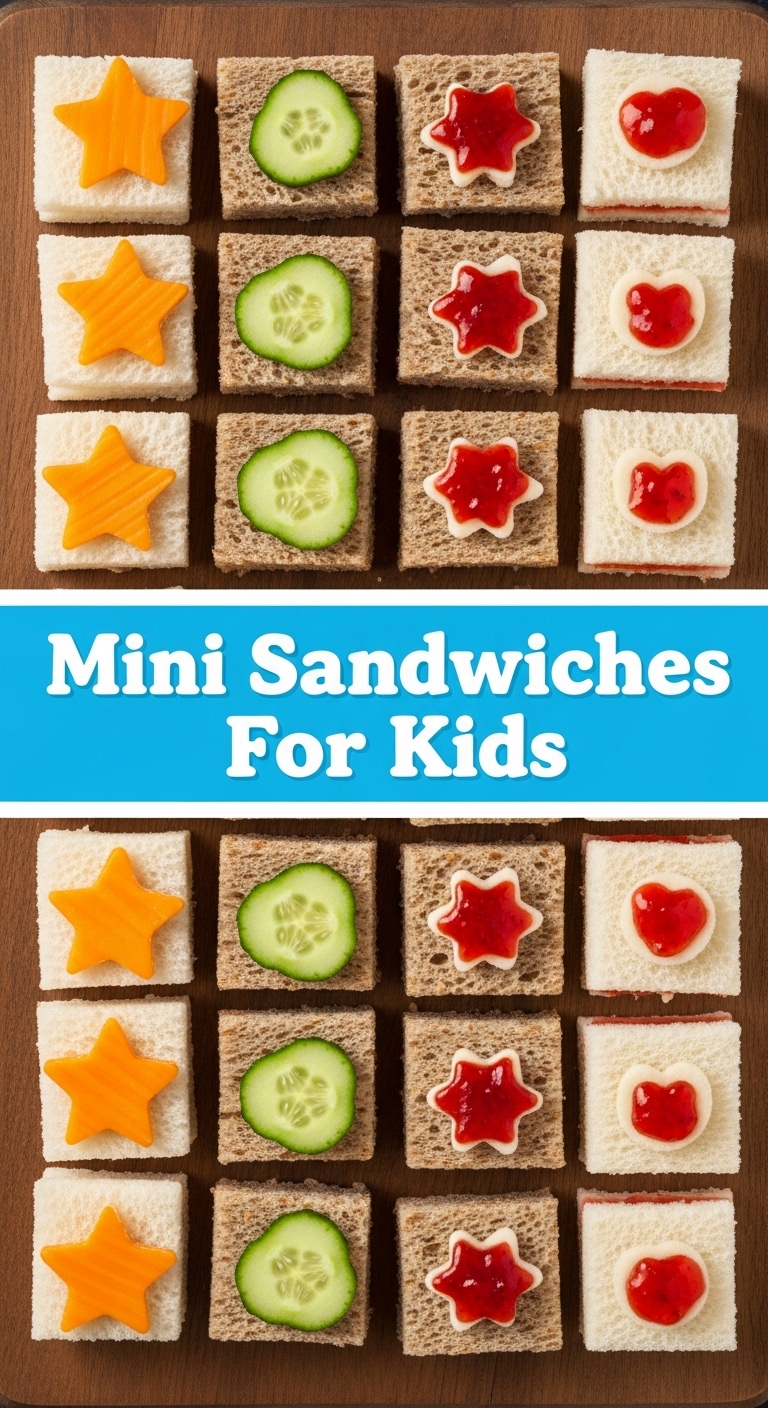
- Your Favorite Sandwich Fillings: This is where the magic happens!
- Peanut Butter (or other nut/seed butter) & Jelly (a classic for a reason).
- Deli Meat (ham, turkey, chicken) & Cheese (cheddar, Swiss, provolone – whatever melts their little hearts).
- Tuna Salad or Egg Salad (for the slightly more adventurous tiny palates).
- Hummus & Cucumber (hello, healthy vibes!).
- Optional Fun Stuff: Lettuce, tomato slices, thin cucumber slices, fruit slices (for PB&J).
- Cookie Cutters (or a Knife): For shaping your tiny masterpieces. The funnier the shape, the better, IMO.
Step-by-Step Instructions
Get ready to feel like a culinary genius in about 5 minutes flat. Seriously, it’s that fast.
- Prep Your Bread: Lay out your slices of bread. If you’re fancy (or your kids are picky), now’s the time to *gently* cut off the crusts. Don’t throw them away! Save ’em for breadcrumbs or a quick snack for yourself later. No judgment.
- Spread the Love: Take two slices of bread. Spread one side of each slice generously with butter or cream cheese. This is your moisture barrier and flavor base. Don’t skimp!
- Add Your Filling: On one of the buttered/cream-cheesed slices, spread your chosen filling. Keep it relatively thin and even, especially if you’re layering with meat or cheese. You don’t want a filling avalanche.
- Top it Off: Place the other buttered/cream-cheesed slice on top, spread-side down onto the filling. Give it a gentle press.
- Cut into Minis: Now for the fun part! Grab your cookie cutters (stars, hearts, dinosaurs – go wild!). Press firmly into the sandwich to cut out your mini shapes. Alternatively, use a sharp knife to cut into quarters or even smaller squares/triangles. **Pro tip: if using a knife, aim for small, bite-sized pieces.**
- Repeat & Arrange: Keep going until all your sandwiches are cut and ready. Arrange them on a plate, looking all adorable and delicious. Ta-da!
Common Mistakes to Avoid
Even an “idiot-proof” recipe has a few pitfalls. Learn from my… observations.
- Over-stuffing: Thinking more filling equals more deliciousness? Rookie mistake. It just makes the mini sandwiches impossible to eat without exploding. Keep it light, folks.
- Using stale bread: If your bread is stiff, your mini sandwiches will be sad, crusty little discs. **Always use fresh, soft bread** for maximum squishiness.
- Skipping the butter/cream cheese layer: “It’s just extra calories!” you might think. Wrong! It’s the protective shield against soggy fillings and the secret to a richer flavor. Don’t you dare skip it.
- Not pressing hard enough with cookie cutters: You want a clean cut, not a jagged mess that makes your mini sandwich look like it went ten rounds with a badger. Press firmly!
Alternatives & Substitutions
This recipe is a canvas, my friend! Feel free to paint your own culinary masterpiece (or just, you know, make different sandwiches).
- Bread Swaps: Not a fan of regular sliced bread? Try mini bagels, pita bread cut into triangles, or even wraps. Just make sure whatever you use is soft enough to cut easily. English muffins are also a fun option if you toast them first.
- Filling Fun: The world is your oyster! Sliced avocado, cream cheese with finely diced bell peppers, turkey & cranberry sauce (holiday vibes!), or even leftover shredded chicken mixed with a little mayo. Get creative!
- Shape Shifters: No cookie cutters? A sharp knife works perfectly for squares, rectangles, or triangles. Or go freehand for abstract art. Who’s judging? (Hint: not me.)
- Vegan/Dairy-Free Options: Easily swap butter for a dairy-free spread and regular cream cheese for a plant-based alternative. Most deli meats have vegan counterparts these days too!
FAQ (Frequently Asked Questions)
- Can I make these ahead of time? You totally can! For best results, I’d say **no more than 2-3 hours in advance**, especially if your fillings are moist. Store them in an airtight container in the fridge.
- How do I prevent the bread from getting soggy? Ah, the age-old sandwich dilemma! The butter/cream cheese barrier is key here. Also, if using very wet fillings (like sliced tomato), place them between slices of cheese or lettuce to create an extra buffer.
- My kids only eat crust-less bread. What do I do with the crusts? Don’t toss ’em! You can toast them and blend them into breadcrumbs, make croutons, or even just eat them yourself with a bit of butter. Waste not, want not!
- What if my kids have allergies? Absolutely! This recipe is super adaptable. Use nut-free butter, gluten-free bread, or dairy-free cheeses and spreads as needed. Always double-check ingredient labels.
- Can I use fancy artisanal bread? Well, technically yes, but why make life harder for yourself? Those thick, rustic loaves are tough to cut with cookie cutters and might overwhelm the “mini” aspect. Stick to the soft, classic stuff for ease.
- Are these just for kids? Pfft, absolutely not! These are perfect for adult parties, baby showers, or when you’re just feeling peckish and want a cute snack. No age limit on deliciousness.
Final Thoughts
So there you have it, folks! The secret to making mini sandwiches that are both ridiculously easy and ridiculously cute. You’ve officially leveled up your snack game without even breaking a sweat. Now go impress someone—or yourself—with your new culinary skills. You’ve earned it! And maybe make a few extra for yourself. You deserve a tiny treat, too.


