So you’re craving something ridiculously tasty but too lazy to spend forever in the kitchen, huh? Same. And honestly, who has time for complicated culinary acrobatics when all you want is pure, unadulterated, frosty bliss? Not me, and probably not you either! That’s why we’re diving headfirst into the glorious, simple world of the *easy* milkshake. Forget fancy techniques; we’re talking blend, sip, and sigh in satisfaction. Let’s do this!
Why This Recipe is Awesome
Okay, buckle up, because this isn’t just a recipe; it’s a lifestyle choice. Why is this milkshake recipe superior to all others, you ask? Because it’s practically **idiot-proof**. Seriously, even if your usual kitchen “skill” involves accidentally setting off the smoke detector with toast, you’re going to nail this. It takes like, 3 minutes max, and the cleanup is basically just rinsing a blender. You get maximum deliciousness for minimum effort. It’s the culinary equivalent of getting paid to nap. Plus, it’s totally customizable, so you can pretend you’re a mad scientist chef without any actual risk of explosions. Win-win-win, if you ask me!
Ingredients You’ll Need
Get ready for a shocker, these are so easy you’ll wonder if I’m pranking you. (I’m not, BTW.)
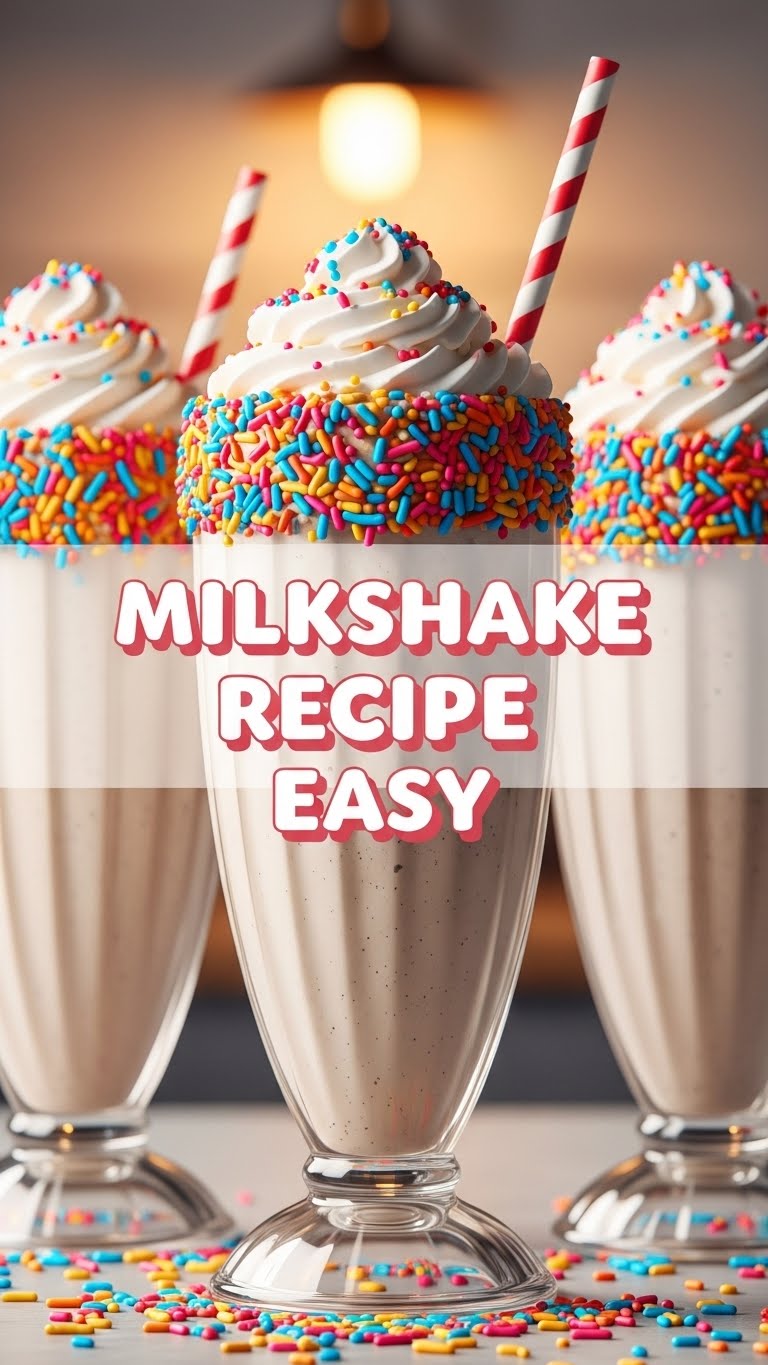
- Ice Cream: The undisputed king (or queen!) of this operation. About 2-3 generous scoops per serving. Pick your absolute favorite flavor – vanilla, chocolate, strawberry, cookie dough… the world is your oyster!
- Milk: Your trusty liquid sidekick. About 1/4 to 1/2 cup per serving, depending on how thick you like it. Whole milk makes it extra creamy, but any milk (dairy or non-dairy!) works.
- Flavor Enhancer (Optional but highly recommended!):
- Chocolate Syrup: Because life’s too short for plain vanilla. A good squeeze.
- Fresh Fruit: A handful of berries, a sliced banana, whatever makes your heart sing.
- Cookies: Oreos, chocolate chip, speculoos… crumble ’em in!
- Nut Butter: A spoonful of peanut butter or almond butter for extra richness.
- Toppings (Because why not?): Whipped cream, sprinkles, an extra drizzle of syrup, a cherry on top. Go wild!
Step-by-Step Instructions
- Gather Your Arsenal: First things first, grab your blender. This isn’t just a pretty kitchen appliance today; it’s your magic wand. Also, get out your ingredients so they’re ready for their big moment.
- Scoop in the Good Stuff: Plop those glorious scoops of ice cream right into the blender. Don’t be shy. This is where the magic truly begins.
- Pour in the Liquid Love: Now, add your milk. Start with about 1/4 cup. You can always add more if it’s too thick, but you can’t take it out once it’s in! We’re aiming for milkshake, not ice cream soup.
- Add Your Flavor Flare: If you’re using chocolate syrup, fruit, cookies, or anything else, toss it in now. This is your chance to make it *your* milkshake.
- Blend Away! Secure that lid (super important, trust me!) and start blending on a low setting, then gradually increase to medium-high. Watch it transform into a smooth, creamy vortex of deliciousness. Blend until it’s perfectly smooth and has that classic milkshake texture.
- Taste Test (The Best Part): Give it a quick taste. Is it perfect? Need more sweetness? A bit more milk to thin it? Now’s your last chance to adjust!
- Serve It Up: Pour your masterpiece into a tall glass. Add your fabulous toppings. Don’t forget to take a picture for the ‘gram (or just admire your handiwork).
Common Mistakes to Avoid
Look, we all make mistakes. But with these pro tips, you can avoid the common pitfalls of novice milkshake-making:
- Too Much Milk, Too Soon: This is probably the biggest rookie mistake. You’ll end up with a watery, sad excuse for a shake. Always start with less milk and add tiny splashes until you get your desired consistency. Remember: you can always add, but you can’t subtract!
- Not Securing the Lid: Oh, the horror. Unless you want your kitchen to look like a dairy explosion went off, double-check that lid. Seriously.
- Over-Blending: While you want it smooth, don’t blend it into oblivion. Over-blending can melt the ice cream and make your milkshake less thick and frosty. Just blend until combined and smooth.
- Using Rock-Hard Ice Cream: If your ice cream is fresh out of a sub-zero freezer, let it sit on the counter for a couple of minutes to soften slightly. This makes blending so much easier and prevents chunky bits.
Alternatives & Substitutions
The beauty of a milkshake is its versatility! Here are a few ideas to get your creative juices flowing:
- Dairy-Free Delight: Easily swap regular milk for almond, soy, oat, or coconut milk. And guess what? There are amazing dairy-free ice creams out there now! Hello, vegan milkshake party!
- Healthy-ish Boost: Want to feel a *little* less guilty? Toss in a handful of spinach (you won’t taste it, promise!), a scoop of protein powder, or a tablespoon of chia seeds. Bam! Instant “health” points.
- Flavor Frenzy: Don’t limit yourself to the usual. Try coffee ice cream with a shot of espresso for a coffee shake, or blend in some caramel sauce and a pinch of sea salt for a salted caramel dream. You can even add a tiny bit of mint extract for a shamrock shake vibe!
- Boozy Shakes (Adults Only!): For a grown-up treat, add a shot of Kahlua, Bailey’s, rum, or even a splash of bourbon. Trust me on this one; it’s a game-changer for those evenings when “just a milkshake” isn’t quite enough.
FAQ (Frequently Asked Questions)
Got questions? I’ve got answers (and a little sass).
- Q: Can I use a spoon instead of a blender? A: Well, technically yes, if you’re aiming for a “melted ice cream soup with chunks” experience. But for a smooth, creamy milkshake? **No, get a blender.** Seriously.
- Q: How do I make my milkshake thicker? A: Easy peasy! Add more ice cream, or use less milk. You can also toss in a handful of ice cubes, but be careful not to dilute the flavor too much.
- Q: What if my milkshake is too thin? A: Pop it back in the blender and add another scoop (or two) of ice cream. Blend for a few seconds until it thickens up.
- Q: Can I make this ahead of time? A: You *can*, but I wouldn’t recommend it. Milkshakes are best enjoyed immediately before they start to separate or melt. It takes literally minutes to make, so just do it fresh!
- Q: What’s the best ice cream flavor for a basic milkshake? A: IMO, a really good vanilla or chocolate is foundational. But “best” is subjective! Experiment to find *your* champion flavor.
- Q: Can I add fresh fruit? Do I need to freeze it first? A: Absolutely add fresh fruit! Freezing it first helps keep the milkshake colder and thicker, but it’s not strictly necessary. Just know fresh fruit might make it a tad thinner.
- Q: What if I don’t have whipped cream for a topping? A: Oh no, a tragedy! Kidding! A drizzle of chocolate syrup, some sprinkles, or even just a little extra ice cream on top will do the trick. Or just enjoy it naked; it’s still delicious!
Final Thoughts
So there you have it, folks! The easiest, most delightful milkshake recipe you’ll ever encounter. You’ve just unlocked a new level of culinary prowess with minimal effort. Go forth and blend! Share it with a friend, treat yourself after a long day, or just make it because it’s Tuesday and you deserve it. Now go impress someone—or yourself—with your new milkshake-making skills. You’ve earned it!


