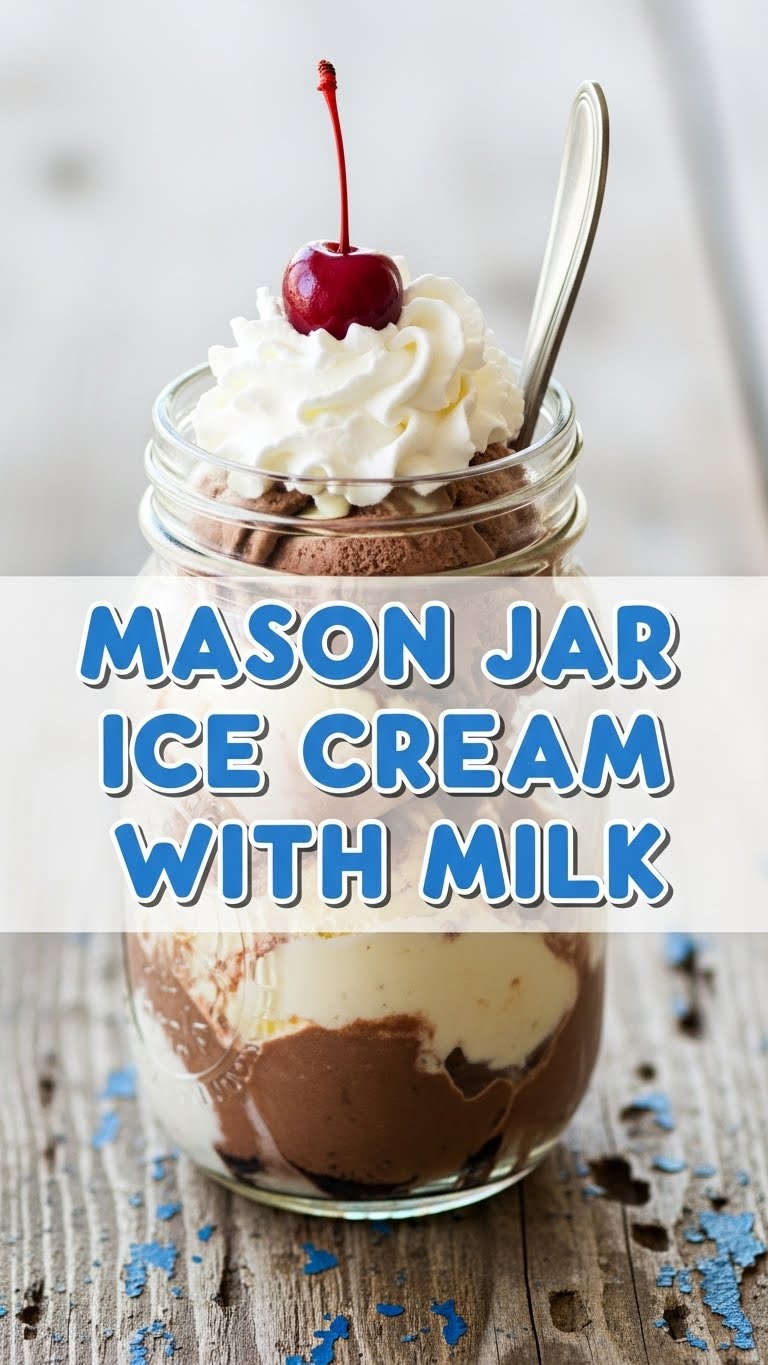
So you’re craving something tasty but too lazy to spend forever in the kitchen, huh? Same. Like, who has time for fancy ice cream makers and churning and all that jazz when a Netflix binge is calling? Not me, friend. But what if I told you that you could whip up some legit, creamy ice cream with just a few ingredients, a jar, and your arms? Yeah, your arms. Get ready to meet your new favorite, ridiculously easy dessert: Mason Jar Ice Cream with Milk!
Why This Recipe is Awesome
Okay, let’s be real. In the pantheon of dessert recipes, this one is basically the chill, laid-back cousin who shows up in sweatpants and still looks fabulous. Why is it awesome? Because it’s **idiot-proof**. Seriously, even I, the queen of kitchen catastrophes (ask me about the time I tried to make a three-tiered cake), haven’t messed this up. You don’t need a fancy ice cream machine taking up precious counter space, just a trusty Mason jar and some elbow grease. Plus, minimal cleanup! No big bowls, no endless utensils. It’s fast, it’s fun, and it delivers creamy, dreamy ice cream faster than you can say “where’s my spoon?”
Ingredients You’ll Need
Gather ’round, my fellow lazy gourmands! Here’s what you’ll need for this magical concoction. These are basic pantry staples, so you probably already have most of them. If not, a quick trip to the store won’t break the bank!
- 1 cup whole milk: Don’t skimp here! Whole milk gives you that creamy texture you crave. Skim milk? Nah, that’s just sad ice cream.
- 1 cup heavy cream: This is where the magic happens, folks. The higher the fat, the smoother your ice cream. Embrace the creaminess!
- 1/4 cup granulated sugar: Sweetness is key, my friend. Adjust to your personal sweet tooth, but this is a good starting point.
- 1 teaspoon vanilla extract: The OG flavor MVP. Use good quality stuff; it makes a difference.
- A pinch of salt: Just a tiny bit! It actually enhances the other flavors. Don’t skip it.
- A pint-sized (or larger) Mason jar with a lid: Make sure it’s clean and seals well. This is your ice cream machine, after all!
Step-by-Step Instructions
Alright, let’s get this party started! Seriously, these steps are so easy, you could probably do them in your sleep (but please don’t, you might drop the jar).
- Combine Your Crew: Grab your Mason jar. Pour in the whole milk, heavy cream, granulated sugar, vanilla extract, and that tiny pinch of salt.
- Seal the Deal: Screw the lid on **tightly**. You do not want ice cream exploding all over your kitchen. Trust me on this one.
- Shake It Like a Polaroid Picture: Now for the fun part! Shake that jar with gusto! Imagine you’re at a concert, or maybe just really annoyed at your boss. You’ll need to shake for about 3-5 minutes, or until the mixture has thickened considerably and looks… well, like soft-serve ice cream. Your arms will get a mini-workout, bonus!
- Pop It in the Freezer: Once it’s thick and fluffy, open the jar (carefully!) and give it a little stir with a spoon if you want. Then, pop the entire jar, lid on, into your freezer.
- Chill Out: Let it chill for at least 2-3 hours. For a firmer ice cream, leave it for 4 hours or more. If you’re impatient (like me!), you can sneak a spoonful after 2 hours. Just make sure it’s adequately frozen.
- Serve and Enjoy: Once it’s reached your desired consistency, grab a spoon and dive in! You just made ice cream, you culinary genius!
Common Mistakes to Avoid
Even though this recipe is super forgiving, there are a few rookie errors that can derail your creamy dreams. Learn from my mistakes, so you don’t have to:
- Not Shaking Enough: This isn’t a gentle lullaby, people! You need to shake vigorously. If you just gently jiggle it, you’ll end up with sweetened cream, not ice cream. **Shake until it’s noticeably thicker!**
- Using the Wrong Jar Size: A pint-sized jar is perfect for a single serving. If you’re trying to double the recipe in a tiny jar, you won’t have enough room for the air to incorporate, which is key for creaminess. Leave some headspace!
- Skipping the Fat: Trying to go “light” with skim milk or low-fat cream? Bless your heart, but you’re just making a very icy, sad dessert. **Full-fat dairy is your friend here.**
- Not Chilling Long Enough: Patience, young grasshopper. Pulling it out too early means soupy ice cream. Let it do its thing in the freezer.
Alternatives & Substitutions
Feeling adventurous? This basic recipe is a fantastic canvas for all sorts of delicious additions. Get creative!
- Flavor Boosts: Instead of just vanilla, try almond extract, peppermint extract (hello, mint chip!), or a dash of coffee extract. For chocolate lovers, melt a tablespoon of cocoa powder into a tiny bit of warm milk before adding it to the mix.
- Mix-Ins: Once it’s partially frozen (or even before it goes in!), stir in mini chocolate chips, sprinkles, crushed cookies (Oreos, anyone?), chopped nuts, or fruit purees. Just remember, don’t overload it!
- Dairy-Free Option: Want to go plant-based? You can totally substitute full-fat coconut milk (the kind in the can, not the carton) and full-fat coconut cream. The texture will be slightly different, but still delicious and creamy.
- Sweetener Swap: You can use honey or maple syrup instead of granulated sugar, but start with a bit less and adjust to taste, as they have different sweetness levels.
FAQ (Frequently Asked Questions)
Got questions? I’ve got answers. Probably. Let’s get to it!
- Can I use low-fat milk? Well, technically yes, but why hurt your soul like that? **For real creaminess, stick to whole milk and heavy cream.** It makes all the difference!
- How long does this ice cream last in the freezer? TBH, it usually doesn’t last long enough to find out in my house! But if you manage to resist, it’s best enjoyed within a week. After that, it might start to get a bit icy.
- Do I need to add rock salt or ice to the jar? Nope! That’s for those old-school churn methods. This recipe relies on the simple magic of high-fat dairy, sugar, and vigorous shaking. No extra fuss needed!
- Why isn’t my ice cream getting thick? Uh oh! Did you shake it enough? Or maybe your ingredients weren’t cold to begin with? **Make sure everything is super cold before shaking**, and then shake like your life depends on it!
- Can I make a bigger batch? You can, but it’s best to do it in multiple pint jars. A really large jar might not chill evenly, and it’s definitely harder to shake effectively. IMO, individual portions are half the fun!
- What if I don’t have a Mason jar? Any container with a **tight-fitting lid** that can withstand vigorous shaking and freezing will work. An old jam jar, a clean plastic container, you get the idea. Just ensure it seals well, FYI.
Final Thoughts
See? I told you it was easy! You just conquered the world of homemade ice cream with zero fancy gadgets and minimal effort. Go ahead, pat yourself on the back, you deserve it. This Mason Jar Ice Cream isn’t just a dessert; it’s a testament to your ability to create deliciousness even when you’re feeling a little (or a lot) lazy. Now go impress someone—or yourself—with your new culinary skills. You’ve earned it!


