So, you’ve got those sad, spotty bananas sitting on your counter, giving you the side-eye, practically begging for a glorious transformation, huh? And you’re craving something warm, comforting, and utterly delicious, but you also don’t want to spend all day slaving away? Welcome to my life, friend. Lucky for us, Martha Stewart, the queen of domestic perfection (and let’s be real, often aspirational but sometimes totally attainable), has a banana bread recipe that’s practically a hug in loaf form. And guess what? It’s Martha’s Classic Banana Bread, but we’re making it *our* kind of classic: easy, fun, and totally foolproof. Let’s bake something delicious!
Why This Recipe is Awesome
Okay, first things first: why *this* banana bread? Because it’s Martha. Kidding (mostly). But seriously, this recipe is a winner because it delivers that perfect balance of moist, tender crumb and rich banana flavor without being overly complicated. It’s also incredibly forgiving, which is great for those of us who might, *ahem*, sometimes forget a step or two. Plus, it uses up those ridiculously overripe bananas that nobody in their right mind would eat plain, turning them into pure gold. It’s basically alchemy, but with less danger and more deliciousness. It’s practically idiot-proof, even I didn’t mess it up!
Ingredients You’ll Need
Gather ’round, my fellow kitchen adventurers! Here’s your treasure map to banana bread bliss. No exotic spices or unicorn tears, promise.
- 1½ cups all-purpose flour: The backbone of our bread. Don’t worry, it doesn’t need to be fancy artisan flour. Regular stuff works like a charm.
- 1 teaspoon baking soda: Our magical leavening agent. Gives it that nice lift.
- ½ teaspoon salt: Balances everything out. Don’t skip it, unless you like bland bread (who does?).
- ½ cup (1 stick) unsalted butter, softened: Room temperature, people! This is crucial for that creamy texture. Seriously, don’t rush it with melted butter unless you want dense bricks.
- ¾ cup granulated sugar: Sweetness! Adjust to your banana’s sweetness, but this is a good starting point.
- 2 large eggs: Binders, baby! Also, make sure they’re room temp too, if you’re feeling extra Martha-y.
- 1 teaspoon pure vanilla extract: Because everything is better with vanilla. It’s just a fact.
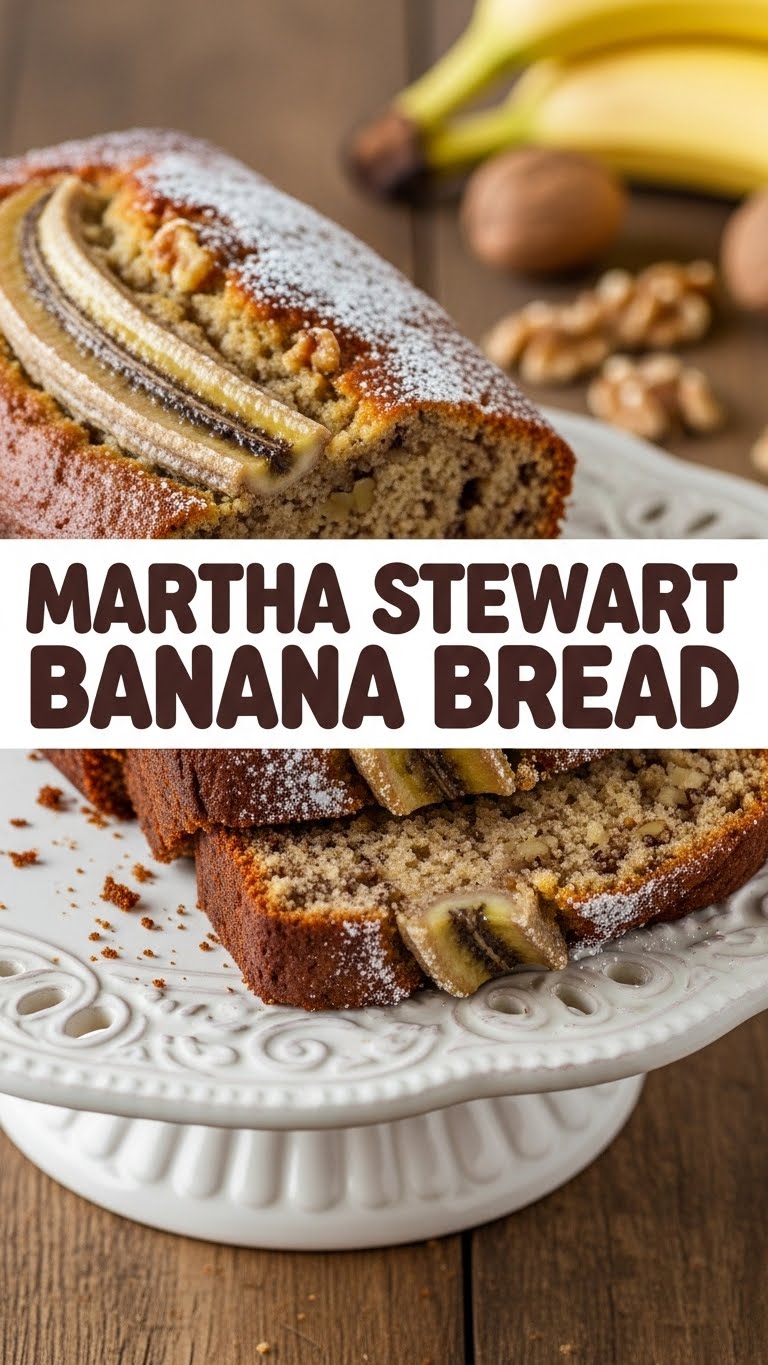
- 1 cup mashed ripe bananas (about 2-3 medium): THE STARS OF THE SHOW! The spottier, the better. Seriously, practically black is ideal.
- Optional: ½ cup chopped walnuts or chocolate chips: For when you’re feeling extra fancy, or just want more excuses to eat chocolate.
Step-by-Step Instructions
- Get That Oven Hot: Preheat your oven to 350°F (175°C). Then, lightly butter and flour a 9×5-inch loaf pan. Don’t be shy; a well-greased pan is a happy pan.
- Mix the Dry Stuff: In a medium bowl, whisk together the flour, baking soda, and salt. Set it aside for a sec. We’ll get back to it.
- Cream the Wet Stuff: In a larger bowl, using an electric mixer (or a strong arm, go you!), beat the softened butter and sugar together until light and fluffy. This usually takes about 2-3 minutes.
- Add the Eggs & Vanilla: Beat in the eggs, one at a time, making sure each is fully incorporated before adding the next. Stir in the vanilla extract. Your kitchen should be smelling pretty good right about now!
- Banana Time! Stir in the mashed bananas. Don’t overmix here; just combine until they’re happily blended into the buttery goodness. If you’re adding walnuts or chocolate chips, fold them in now.
- Combine & Conquer: Gradually add the dry ingredients to the wet ingredients, mixing on low speed until *just* combined. Stop as soon as you don’t see any dry streaks of flour. Overmixing is the enemy of tender banana bread!
- Bake It Up: Pour the batter into your prepared loaf pan. Pop it into the preheated oven and bake for about 55-65 minutes.
- Check for Doneness: The bread is ready when a wooden skewer or toothpick inserted into the center comes out clean. If the top starts browning too much, you can loosely tent it with foil.
- Cool Down: Let the bread cool in the pan for about 10 minutes before inverting it onto a wire rack to cool completely. Patience is a virtue, especially when warm banana bread is involved.
Common Mistakes to Avoid
Look, we all make mistakes. I once mistook salt for sugar and made savory cookies. It was an experience. Here are a few banana bread blunders to steer clear of:
- Using under-ripe bananas: This is a cardinal sin. Your bread will lack flavor and sweetness. Only use bananas that are super ripe, almost black. They’re not going bad, they’re just getting ready for their big moment!
- Overmixing the batter: The biggest culprit for tough, dry banana bread. Mix just until combined, seriously. A few lumps are fine, even preferred.
- Not softening your butter: Trying to cream cold butter is like trying to convince a toddler to eat broccoli. It’s a struggle. Softened butter incorporates air, making your bread light and fluffy.
- Opening the oven door too often: Resist the urge to peek every five minutes! You’ll drop the oven temperature, which can lead to a sunken loaf.
- Forgetting to grease the pan: Rookie mistake, my friend. Unless you want your delicious creation permanently fused to the pan, grease it generously.
Alternatives & Substitutions
Feeling rebellious? Or just ran out of something? Here are some ways to shake things up:
- Add-ins: Go wild! Chocolate chips (dark chocolate is my personal faves), chopped nuts (walnuts, pecans), shredded coconut, dried cranberries, or even a swirl of Nutella before baking.
- Dairy Swap: No butter? You can use an equal amount of oil (like vegetable or canola) for a super moist crumb, though you’ll miss a bit of that buttery flavor. For a richer taste, add a couple of tablespoons of sour cream or Greek yogurt to the batter; it makes it incredibly moist.
- Sugar Swap: Brown sugar can replace granulated sugar for a deeper, molasses-y flavor. Maple syrup or honey could also work, but you might need to slightly reduce other liquids.
- Flour Power: Want to try whole wheat? Substitute up to half of the all-purpose flour with whole wheat flour for a nuttier, heartier loaf. Don’t go 100% unless you’re aiming for a denser texture.
FAQ (Frequently Asked Questions)
- “Can I use frozen bananas?” Absolutely! Just thaw them completely and drain any excess liquid before mashing. They’ll be super soft and perfect.
- “My banana bread is raw in the middle, what gives?” Probably needed more baking time! Oven temperatures can vary. Next time, bake a bit longer or try reducing the oven temp slightly and baking for an extended period. Also, make sure your pan isn’t too small for the amount of batter.
- “How do I store this masterpiece?” At room temperature, wrapped tightly in plastic wrap or in an airtight container, it’s good for 3-4 days. In the fridge, it’ll last up to a week.
- “Can I freeze banana bread?” YES! This is a pro move. Let it cool completely, then wrap it tightly in plastic wrap, then foil. It’ll keep beautifully for up to 3 months. Just thaw at room temperature.
- “Why is my banana bread dry?” Likely culprits: overmixing the batter, too much flour, or overbaking. Remember: mix *just* until combined!
Final Thoughts
There you have it! A ridiculously easy, incredibly delicious Martha Stewart-approved banana bread recipe, served up with a side of my usual shenanigans. You’ve now got the power to transform those sad, spotty bananas into a warm, comforting slice of heaven. Go forth and bake, my friend! Now go impress someone—or yourself—with your new culinary skills. You’ve earned it!


