So, you’re eyeing that bakery display, dreaming of a warm, gooey cinnamon roll, but also thinking, “Ugh, effort”? And maybe you’ve got some maple syrup chilling in the back of the fridge, feeling a little neglected? My friend, you’ve come to the right place. We’re about to make some ridiculously delicious Maple Glaze Cinnamon Rolls, and guess what? It’s easier than deciding what to binge-watch next.
Why This Recipe is Awesome
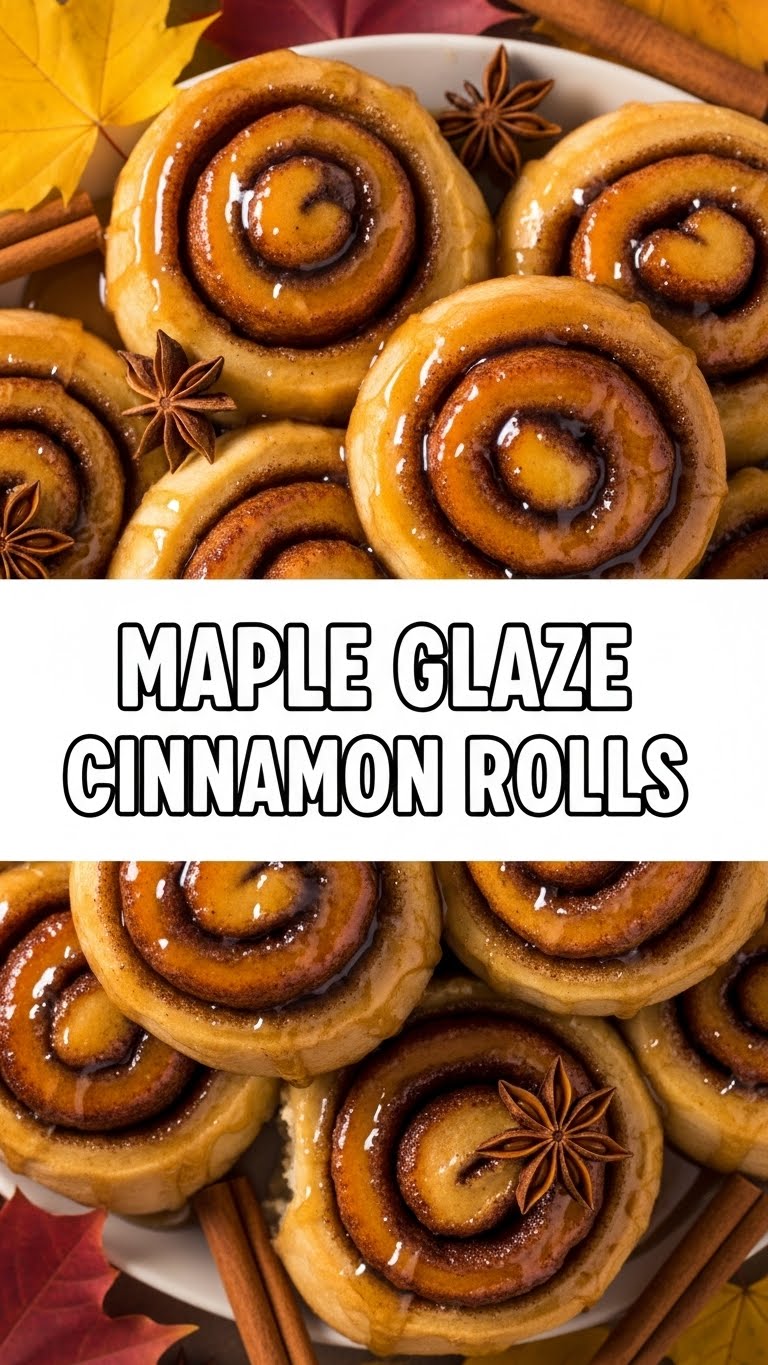
Seriously, this isn’t just *another* cinnamon roll recipe. This is THE cinnamon roll recipe. Why? Because it’s got that classic comforting vibe, but then BAM! A maple glaze swoops in and elevates it to legendary status. Plus, it’s pretty much **idiot-proof**. I made it, and my kitchen is usually where good ingredients go to die. So yeah, if I can do it, you absolutely can. Get ready for compliments, high-fives, and probably a few crumbs on your face.
Ingredients You’ll Need
Alright, gather your troops! Here’s what you’ll need to transform into a baking superstar. Don’t worry, nothing too fancy, just good stuff.
- For the Dough (the pillowy cloud part):
- 2 ¼ teaspoons (1 packet) Active Dry Yeast: The little magic makers. Make sure they’re not expired, unless you like flat disappointment.
- ½ cup Warm Milk (around 105-115°F / 40-46°C): Not too hot, not too cold. Think baby bathwater.
- ¼ cup Granulated Sugar: Sweetness for the yeast, and for you.
- ¼ cup Unsalted Butter, melted: Because butter makes everything better, duh.
- 1 Large Egg: The binder, the unifier.
- ½ teaspoon Salt: Don’t skip this! It balances everything out.
- 2 ½ – 3 cups All-Purpose Flour: Start with 2.5 cups, add more if your dough is being clingy.
- For the Filling (the gooey, spicy center):
- ½ cup Brown Sugar, packed: Dark or light, your call.
- 2 tablespoons Ground Cinnamon: The star of the show!
- ¼ cup Unsalted Butter, softened: Let it hang out on the counter for a bit.
- For the Maple Glaze (the reason we’re all here):
- 1 cup Powdered Sugar (Confectioners’ Sugar): The finer, the better.
- 3 tablespoons Maple Syrup (pure, please!): None of that “pancake syrup” impostor stuff.
- 1-2 tablespoons Milk (or cream): To thin it out just right.
- ½ teaspoon Vanilla Extract: A little hug for the maple.
Step-by-Step Instructions
Deep breaths, you got this. Follow these steps, and soon your kitchen will smell like heaven.
- Awaken the Yeast: In a large bowl, gently combine the warm milk, yeast, and a pinch of that granulated sugar. Let it chill for 5-10 minutes until it looks foamy. That foam means your yeast is alive and ready to party!
- Mix the Wet Stuff: Add the melted butter, remaining granulated sugar, egg, and salt to the yeast mixture. Give it a good whisk until everything is happily combined.
- Bring in the Flour: Gradually add the flour, about ½ cup at a time, mixing with a wooden spoon or a stand mixer with a dough hook. Once it’s too thick to stir, turn it out onto a lightly floured surface.
- Knead It Out: Knead the dough for 5-7 minutes. It should become smooth, elastic, and not super sticky. If it’s too sticky, add a tiny bit more flour. Too dry? A splash more milk.
- First Rise (The Beauty Sleep): Lightly grease your mixing bowl, pop the dough back in, and turn it once to coat. Cover the bowl with plastic wrap or a clean kitchen towel. Let it rise in a warm spot for about 1-1.5 hours, or until it’s doubled in size. This is where the magic happens!
- Prep the Filling: While your dough is napping, mix the softened butter, brown sugar, and cinnamon in a small bowl until it forms a lovely paste.
- Roll It Out: Once the dough has doubled, gently punch it down (it’s satisfying!). On a lightly floured surface, roll it into a large rectangle, roughly 12×18 inches. Don’t overthink the exact dimensions, just aim for a nice, even sheet.
- Spread the Gooey Goodness: Evenly spread the cinnamon-sugar-butter mixture all over your dough rectangle, leaving a small border on one of the longer edges (about half an inch).
- Roll ‘Em Up: Starting from the long edge *without* the border, carefully roll the dough into a tight log. Pinch the seam gently to seal it once you reach the end.
- Slice and Dice: Use a sharp knife or, even better, unflavored dental floss (seriously, it gives cleaner cuts!) to slice the log into 12 equal rolls, about 1.5 inches thick.
- Second Rise (Almost There!): Arrange the rolls in a lightly greased 9×13-inch baking dish. Cover again and let them rise for another 30-45 minutes, or until they look puffy and cozy, almost touching each other. Meanwhile, **preheat your oven to 375°F (190°C)**.
- Bake ‘Em Up: Pop the rolls into your preheated oven and bake for 20-25 minutes, or until they’re golden brown and smell absolutely irresistible.
- Whip Up the Glaze: While the rolls are cooling slightly (but still warm!), whisk together the powdered sugar, maple syrup, vanilla extract, and 1 tablespoon of milk in a medium bowl until smooth. Add more milk, a tiny bit at a time, until you reach your desired drizzly consistency.
- Glaze and Devour: Drizzle (or generously slather, no judgment here) the warm maple glaze over the warm cinnamon rolls. Serve immediately and prepare for pure bliss.
Common Mistakes to Avoid
Listen, we’ve all been there. Don’t make these rookie errors, okay? Learn from my past kitchen catastrophes!
- Killing the Yeast: Hot milk is a no-go. If it’s too hot, you’ll murder your yeast, and then your dough won’t rise. Aim for warm, not scalding.
- Over-flouring the Dough: Adding too much flour makes your rolls tough and dry. Start with less and add only if needed. **A slightly sticky dough is better than a dry one!**
- Not Letting Them Rise Enough: Patience, young padawan! If you rush the rising times, your rolls will be dense and sad. Give them their full time to puff up.
- Uneven Slices: If you cut your rolls at different thicknesses, some will burn while others are still doughy. Use that dental floss trick, it’s a game-changer.
- Forgetting to Preheat the Oven: Baking rolls in a cold oven is like trying to run a race when you haven’t warmed up. They won’t bake evenly or brown properly. **Always preheat!**
Alternatives & Substitutions
Feeling a little adventurous, or just missing an ingredient? No stress, we can totally hack this. Think of it as customizing your perfect roll!
- No Maple Syrup? While the maple glaze is *the* star here, you could go classic with a simple vanilla glaze (powdered sugar, milk, vanilla). Or, for a zesty twist, try an orange cream cheese frosting – equally divine, IMO.
- Butter Swap? Margarine can work in a pinch for the dough and filling, but honestly, butter’s flavor and texture are superior. For the glaze, stick with butter or cream cheese.
- Different Flour? Bread flour will give you a chewier roll, which some people love! Whole wheat flour will make them denser, so maybe stick to all-purpose for your first go.
- Nutty Toppings: A sprinkle of chopped pecans or walnuts over the cinnamon-sugar filling before rolling adds a fantastic crunch and extra layer of flavor. Just sayin’.
- Cream Cheese Glaze Instead? Absolutely! Beat softened cream cheese (4oz) with powdered sugar (1 cup), softened butter (2 tbsp), vanilla (½ tsp), and a splash of milk until smooth. It’s a classic for a reason!
FAQ (Frequently Asked Questions)
Got questions? I’ve probably asked them myself. Here are some of the usual suspects:
- Can I make the dough ahead of time? You betcha! After the first rise, punch down the dough, cover it tightly, and pop it in the fridge overnight. The next day, let it come to room temperature for about 30-60 minutes before rolling and continuing with the recipe. Lazy morning magic!
- What if my dough isn’t rising? Oh no! First, check your yeast’s expiration date. Second, make sure your milk wasn’t too hot (killing the yeast) or too cold (putting it to sleep). Try moving the bowl to a warmer spot – sometimes an oven with just the light on is perfect.
- Can I use unbleached flour? Totally! Unbleached all-purpose flour works perfectly and is often preferred by bakers for its consistent results and natural quality.
- How do I store leftover cinnamon rolls? Ha! “Leftover.” Good one. If by some miracle you have any, store them in an airtight container at room temperature for up to 2-3 days. Reheat briefly in the microwave or oven for that fresh-baked feel.
- My glaze is too thin/thick. Help! Easy fix! Too thin? Whisk in a little more powdered sugar. Too thick? Add milk, half a teaspoon at a time, until it’s just right. You’re the boss of that glaze!
- Can I freeze them? Yes, both before and after baking! To freeze unbaked: place sliced rolls in the baking dish, cover tightly, and freeze for up to a month. Thaw in the fridge overnight, then let rise and bake. To freeze baked: let cool completely, then wrap individually and freeze. Thaw and reheat.
Final Thoughts
See? That wasn’t so scary, was it? You just whipped up a batch of glorious, maple-glazed cinnamon rolls that will make your house smell incredible and your taste buds sing. Whether you’re sharing them with friends, bribing your boss, or just hoarding them for yourself (no judgment here, I’ve done it), you deserve a pat on the back. Now go impress someone—or yourself—with your new culinary skills. You’ve earned it!


