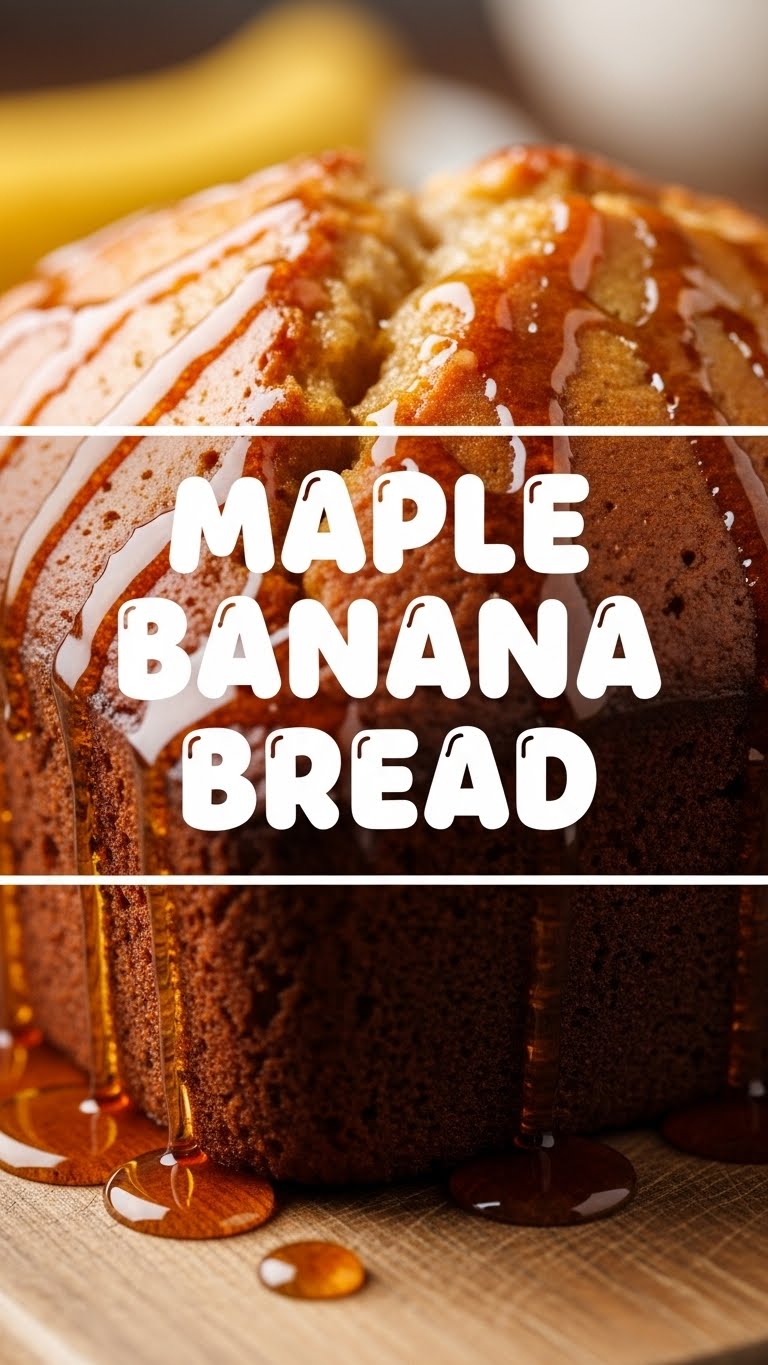
So, you’re staring into your kitchen, feeling a tiny rumble in your tummy, and those bananas on the counter are doing that look-at-me-I’m-getting-too-ripe dance? Yeah, I know the feeling. Instead of tossing ’em (blasphemy!), let’s turn them into something utterly magical: Maple Banana Bread. And no, you don’t need a culinary degree for this one. Promise. It’s so good, you’ll want to high-five yourself.
Why This Recipe is Awesome
First off, it’s banana bread, but with a grown-up, fancy-pants twist thanks to maple syrup. No, seriously. It adds this depth of flavor that’ll make you wonder why you ever bothered with plain old sugar. Plus, it’s basically idiot-proof. I’ve made this on mornings when my brain was still trying to locate my coffee, and it turned out glorious. Less stress, more deliciousness. What’s not to love, right? It’s the kind of recipe that makes you look like a baking superstar without, you know, actually having to *be* one.
Ingredients You’ll Need
- 3 very ripe bananas: The browner, the better. Don’t be shy. These are the stars, after all. If they’re black, even better.
- 1/2 cup unsalted butter: Melted. Because everything’s better with butter. FYI, this is where the good fats live.
- 1/2 cup pure maple syrup: None of that “pancake syrup” imposter stuff. We’re classy here; go for the real deal.
- 1 large egg: Room temp is best, but if you forget, don’t sweat it. It’s not rocket science.
- 1 tsp vanilla extract: The good stuff, please. It really makes a difference.
- 1 1/2 cups all-purpose flour: The backbone of our bread.
- 1 tsp baking soda: To give it that glorious lift.
- 1/2 tsp salt: Balances all that sweetness. It’s science, baby!
- Optional: 1/2 cup chopped walnuts or chocolate chips: Because sometimes you just need a little extra pizzazz. YOLO.
Step-by-Step Instructions
- First things first: Preheat your oven to 350°F (175°C). Lube up a loaf pan (9×5 inch) with some butter or non-stick spray. Don’t skip this, unless you enjoy a wrestling match with your baked goods later.
- Grab those ripe bananas and mash ’em up in a medium bowl. A fork works perfectly. We’re going for chunky, not baby food – a few lumps add character!
- Melt the butter, then pour it into the mashed bananas. Stir in the maple syrup, egg, and vanilla extract until they’re all hanging out nicely together.
- In a separate, smaller bowl, whisk together the flour, baking soda, and salt. Make sure it’s well combined; nobody wants a lump of baking soda in their bite.
- Now, gently add the dry ingredients to the wet ingredients. Mix just until combined. Seriously, stop when you don’t see dry streaks anymore. Overmixing is the enemy of tender bread.
- If you’re feeling wild, fold in those walnuts or chocolate chips now. Or don’t. Your bread, your rules.
- Pour the batter into your prepared loaf pan. Give it a gentle tap on the counter to level it out.
- Bake for 50-60 minutes. You’ll know it’s done when a toothpick inserted into the center comes out clean or with just a few moist crumbs.
- Let it cool in the pan for about 10 minutes (patience, young padawan), then transfer it to a wire rack to cool completely. Or, if you’re like me, cut a slice immediately and burn your tongue. Worth it.
Common Mistakes to Avoid
- Not using ripe bananas: Green bananas? Hard pass. They won’t give you that sweet, intense banana flavor we crave. Wait until they’re spotty brown, almost black. Trust me on this; it’s the secret sauce.
- Overmixing the batter: This is a biggie! Overmixing develops the gluten too much, resulting in a tough, chewy bread instead of a tender, moist one. Mix until *just* combined. You heard me!
- Opening the oven door constantly: Stop peeking! Every time you open that door, the temperature drops, and your bread might sink. Give it at least 40 minutes before you even think about checking.
- Not greasing the pan: Unless you enjoy chiseling your bread out piece by piece, grease that pan. Thoroughly. It’s a small step that saves big headaches.
Alternatives & Substitutions
Feeling adventurous or missing an ingredient? No worries, I gotchu:
- No maple syrup? You could use brown sugar (about 1/2 cup, packed) for sweetness, but you’ll miss that glorious maple depth. Just sayin’, it won’t be quite the same level of yum.
- No butter? You can swap in 1/2 cup of melted coconut oil or a neutral oil like canola or vegetable oil. The texture might be slightly different, but it’ll still be delicious.
- Add-ins: Get creative! Shredded coconut, dried cranberries, a sprinkle of cinnamon or nutmeg… the world is your banana bread oyster. Just don’t go too crazy, okay?
- Gluten-free? Use your favorite 1:1 gluten-free flour blend. I haven’t personally tested it with this exact recipe, but GF banana bread is definitely a thing and often turns out great.
FAQ (Frequently Asked Questions)
- Can I use margarine instead of butter? Well, technically yes, but why hurt your soul like that? Butter just tastes better, IMO. But if that’s all you’ve got, go for it; I won’t judge (much).
- My bread sank in the middle! What happened? Usually, this means it wasn’t fully baked, or you opened the oven door too early. Next time, bake a little longer or resist the urge to peek!
- How do I store this deliciousness? At room temperature, tightly wrapped, for 2-3 days. Or in the fridge for up to a week. It also freezes beautifully! Just wrap it tightly and thaw when the craving hits.
- Can I make muffins instead? Absolutely! Just fill muffin liners about 2/3 full and bake for 20-25 minutes. Keep an eye on them, as baking times will vary.
- Is this actually healthy? Look, it’s got fruit in it, so… yes? In moderation, obviously. It’s a treat, not a salad. Let’s be real; it’s a hug in bread form.
- What’s the best way to eat it? Warm, with a smear of butter (more butter, why not?), alongside a cup of coffee or tea. Pure bliss!
Final Thoughts
And there you have it, folks! Your very own, incredibly delicious, Maple Banana Bread. See? I told you it wasn’t hard. Now go impress someone – or yourself – with your new culinary skills. Maybe make an extra loaf for your neighbor; they’ll love you forever. You’ve earned those bragging rights (and that first warm slice!). Enjoy, you magnificent baker, you!

