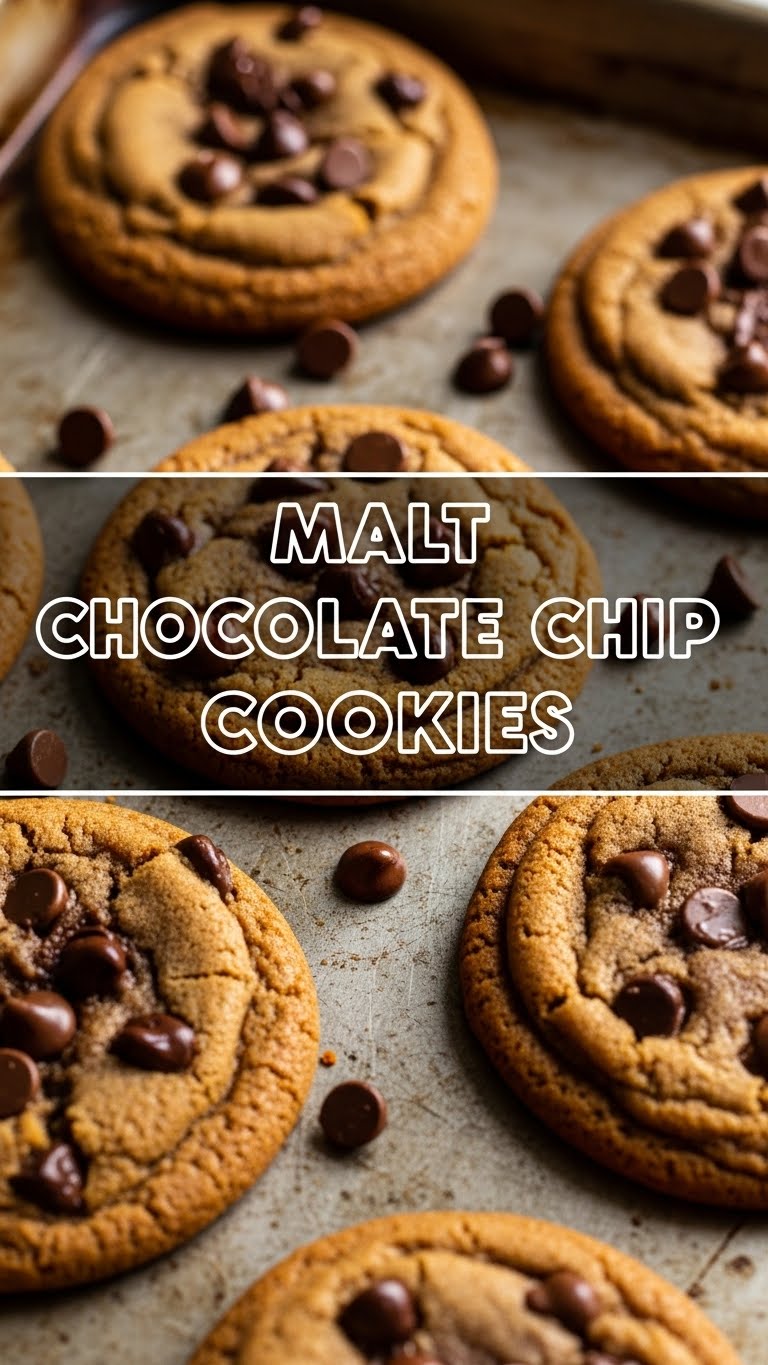
Listen up, buttercup. If your idea of a perfect evening involves sweatpants, a questionable Netflix binge, and a serious craving for something that screams ‘comfort but make it *fancy*,’ then you’ve stumbled into the right corner of the internet. Because today, we’re talking Malt Chocolate Chip Cookies. Yeah, you heard that right. It’s like your favorite childhood treat got a glow-up, and honestly, you deserve it.
Why This Recipe is Awesome
First off, it’s a chocolate chip cookie. Already a winner in life’s grand popularity contest. But then we went and added malt. It’s like your childhood milkshake grew up, got a degree in deliciousness, and is now ready to impress everyone. This isn’t just a cookie; it’s a hug in baked form. Plus, **it’s shockingly easy.** Like, ‘I almost messed this up but didn’t’ easy. So, yeah, no excuses. Even if your culinary skills usually peak at instant ramen, you can nail this. Trust me, I speak from experience.
Ingredients You’ll Need
Gather ’round, pantry explorers! Here’s what you’ll need to make these bad boys come to life:
- 1 cup (2 sticks) Unsalted Butter: Room temp, please! Not melted, not rock-hard. Just perfectly soft and agreeable.
- ¾ cup Granulated Sugar: The classic sweet stuff.
- ¾ cup Packed Light Brown Sugar: This is where the chewiness comes from. Don’t skimp on the packing!
- 2 Large Eggs: Also room temp, because apparently that makes a difference. Who knew? Science, I guess.
- 1 teaspoon Vanilla Extract: The good stuff. Don’t cheap out here; it’s the soul of the cookie.
- 2 ¼ cups All-Purpose Flour: The foundation. The backbone. The main event (after the chocolate and malt, obviously).
- ¼ cup Malt Powder: This is the secret sauce! Ovaltine or Horlicks work beautifully. Don’t skip it, unless you want just regular chocolate chip cookies (and who wants that when you can have *malt* chocolate chip cookies?).
- 1 teaspoon Baking Soda: For that perfect lift.
- ½ teaspoon Salt: Crucial for balancing all that sweetness. Seriously, it makes a huge difference.
- 1 ½ cups Chocolate Chips: The more, the merrier! I like a mix of milk and semi-sweet, but you do you. Live a little!
Step-by-Step Instructions
Alright, let’s get down to business. Put on your favorite apron (or just a t-shirt you don’t mind getting flour on) and let’s bake!
- Preheat & Prep: First things first, crank your oven to **375°F (190°C)**. Line a couple of baking sheets with parchment paper or silicone mats. You’ll thank yourself later for the easy cleanup.
- Cream it Good: In a large bowl (or a stand mixer if you’re fancy), beat together the room-temp butter, granulated sugar, and brown sugar. Beat ’em until they’re light and fluffy, about 2-3 minutes. This incorporates air and makes for a tender cookie.
- Egg-cellent Addition: Crack in one egg and mix until just combined, then add the second egg and do the same. Scrape down the sides of the bowl, then stir in the vanilla extract. Don’t be shy with the scraping!
- Dry Stuff First: In a separate bowl, whisk together your flour, malt powder, baking soda, and salt. Give it a good whisk to make sure everything is evenly distributed.
- Combine Forces: Gradually add the dry ingredients to the wet ingredients, mixing on low speed until *just* combined. **Whatever you do, don’t overmix!** Overmixing leads to tough cookies, and nobody wants a tough cookie.
- Chocolate Time: Fold in those glorious chocolate chips. Use a spatula for this so you don’t overdevelop the gluten.
- Chill Out: Now for the hardest part: cover the dough and pop it in the fridge for at least 30 minutes. **Seriously, don’t skip this!** A chilled dough spreads less and results in a chewier, more flavorful cookie. If you can wait an hour, even better.
- Bake ‘Em: Scoop rounded tablespoons of dough onto your prepared baking sheets, leaving a couple of inches between each cookie. Bake for 9-12 minutes, or until the edges are golden brown and the centers are still slightly soft. They’ll continue to set up as they cool.
- Cool Down: Let the cookies cool on the baking sheet for about 5 minutes before transferring them to a wire rack to cool completely. Or, you know, eat one warm. I won’t tell.
Common Mistakes to Avoid
We’ve all been there. Baking mishaps happen! But with a little heads-up, you can avoid these classic blunders:
- Warm Butter Gone Wild: Using butter that’s too soft (or even slightly melted) will make your cookies spread out like sad, flat pancakes. We want perfectly puffy, chewy cookies!
- Skipping the Chill: I know, I know, patience is a virtue you sometimes lack when cookies are involved. But seriously, **don’t skip chilling the dough!** It’s the secret to thick, chewy cookies and prevents them from turning into one giant cookie puddle.
- Overmixing Madness: Once the flour hits the wet ingredients, mix only until just combined. Overmixing develops the gluten too much, leading to tough, dry cookies. Nobody wants a cookie that fights back.
- Impatience is a Virtue, Except When Baking: Pulling them out of the oven too soon! They might look a little underdone in the center, but trust the process. Those edges should be golden, and they’ll firm up as they cool.
- The Oven Isn’t Ready: Thinking you don’t need to preheat the oven? Rookie mistake! A properly preheated oven ensures even baking from the get-go.
Alternatives & Substitutions
Feeling adventurous? Or maybe you just ran out of something. Here are some ideas:
- Chocolate Type: Go wild! Dark chocolate chunks, white chocolate, milk chocolate, or even a mix. Chopped up chocolate bars also work wonderfully.
- Malt Powder: Can you use less? Sure, but why would you dilute the awesome? If you’re out, these are just regular chocolate chip cookies. Still good, but you’ll miss that signature malt flavor.
- Add-ins: Throw in some chopped nuts (pecans, walnuts), toffee bits, or even crushed pretzels for a salty-sweet crunch. Get creative!
- Butter: *Technically* you could try a plant-based butter for a dairy-free version, but I haven’t tested it myself, so results may vary. For the best flavor and texture, good old dairy butter is king.
FAQ (Frequently Asked Questions)
Got questions? I’ve got (casual and hopefully helpful) answers!
- Can I use margarine instead of butter? Well, technically yes, but why hurt your soul like that? Butter tastes better, gives a superior texture, and is generally just a happier ingredient.
- My dough is too sticky, what gives? Did you chill it? That’s usually the main culprit. Or perhaps your butter was a smidge too soft to begin with. A little extra flour (like a tablespoon) can help, but chilling is your best bet.
- Do I *really* need malt powder? Uh, yeah, that’s kinda the whole point of these being “Malt” Chocolate Chip Cookies. Without it, they’re just chocolate chip cookies. Still delicious, but missing that unique, nostalgic *oomph*.
- Can I freeze the dough? Absolutely! Scoop the dough into balls, place them on a parchment-lined tray, and freeze until solid. Then transfer to a freezer-safe bag. Bake from frozen, adding an extra 2-4 minutes to the bake time. Future you will thank present you!
- How long do these cookies last? In my house? About 24 hours. Max. But technically, stored in an airtight container at room temperature, they’re good for 3-5 days. If they last that long.
- Why room temp eggs? What’s the big deal? Ah, the science! Room temperature eggs emulsify better with the butter and sugar, creating a smoother, more uniform dough. This leads to a better texture in your final cookie.
Final Thoughts
So there you have it, fellow baking enthusiast! You’re now armed with the knowledge (and hopefully the ingredients) to conquer the Malt Chocolate Chip Cookie. Go forth, bake some serious deliciousness, and maybe share one… or two… or just keep them all. No judgment here. You’ve earned this culinary win. Now go impress someone—or yourself—with your new skills. You’ve earned it!


