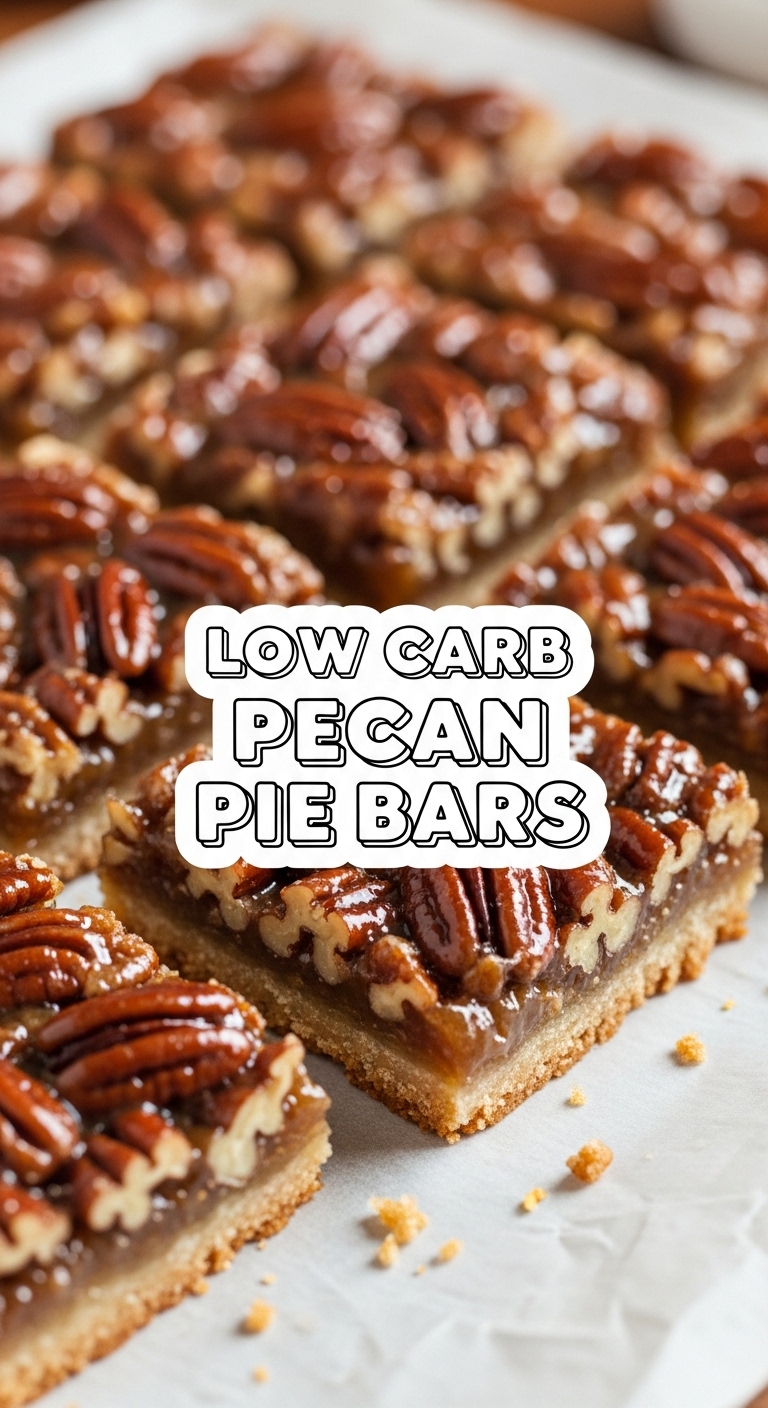
So you’re craving something tasty but too lazy to spend forever in the kitchen, huh? Same. And you’re also trying to avoid a sugar coma or a carb monster? Double same! Good news, friend, because I’ve got the dessert game-changer for you: Low Carb Pecan Pie Bars that taste like the real deal without making you feel like you need to run a marathon afterward.
Why This Recipe is Awesome
Okay, let’s be real. Pecan pie is delicious, but it’s also a carb bomb that can make you feel like you’ve eaten a small couch. These bars, however? They bring all the gooey, nutty, sweet goodness you crave, but without the sugar spike and subsequent nap. It’s like having your cake (or pie bar) and eating it too!
Plus, they’re in bar form, which automatically makes them less fussy than a whole pie. No tricky pie crust edges to crimp, no worrying about a soggy bottom. Just press, pour, bake, and slice. Frankly, it’s pretty much **idiot-proof** – even I didn’t mess it up! You’ll look like a culinary genius with minimal effort. Win-win, IMO.
Ingredients You’ll Need
Get ready to gather your culinary comrades. Here’s what’s on the roster for these glorious bars:
For the Crust (aka the “Who Knew Low Carb Could Taste This Good?” layer):
- 1 ½ cups Almond Flour: Your low-carb BFF. Don’t skimp on quality here; finely ground blanched almond flour is the way to go.
- ⅓ cup Granular Sweetener: Think erythritol, monk fruit blend, or your favorite sugar substitute. This isn’t pixie dust, it needs to be granular!
- ½ cup Cold Butter: Unsalted, cut into small cubes. This isn’t a “light” butter situation, people. Get the good stuff.
- 1 large Egg Yolk: Just one. Don’t let the white feel lonely; save it for an omelet later.
- Pinch of Salt: Because even sweet things need a little sass.
For the Pecan Filling (aka the “Where Has This Been All My Life?” layer):
- 1 ½ cups Pecan Halves: Or chopped, your call. These are the undeniable stars of the show, obviously.
- ½ cup Butter: Again, unsalted. More butter, more better, am I right?
- ½ cup Powdered Sweetener: Same as above, but powdered this time for that silky-smooth filling.
- ⅓ cup Sugar-Free Maple Syrup: The secret weapon! Don’t skip this; it’s the gooey magic that gives it that classic pecan pie texture.
- ¼ cup Heavy Cream: For richness. It’s low carb, so go wild! (Well, not *wild* wild.)
- 1 teaspoon Vanilla Extract: Pure, please. Imitation is just sad.
- ¼ teaspoon Xanthan Gum (optional, but highly recommended): A tiny sprinkle for extra goo factor. Like a magic thickening fairy dust!
Step-by-Step Instructions
Alright, apron on, let’s do this! These steps are so easy, you’ll wonder why you ever bought a store-bought dessert.
- Preheat & Prep: Get that oven fired up to 350°F (175°C). Line a 9×9 inch baking pan with parchment paper, leaving an overhang on the sides. You’ll thank me later when it’s time to lift those beauties out without a wrestling match.
- Crust Time!: In a medium bowl, combine the almond flour, granular sweetener, and salt. Cut in the cold butter with a pastry blender or your fingertips until the mixture resembles coarse, wet sand. Stir in the egg yolk until a soft dough forms. Don’t overmix!
- Press It Down: Press the dough evenly into the bottom of your prepared pan. **Poke holes all over the crust with a fork**—this prevents it from puffing up like a balloon during baking. Bake for 12-15 minutes, or until it’s lightly golden around the edges. Let it cool slightly while you move on to the next exciting stage.
- Filling Frenzy: While the crust is doing its thing, melt the ½ cup of butter in a medium saucepan over medium heat. Stir in the powdered sweetener, sugar-free maple syrup, heavy cream, and vanilla extract. Bring this glorious mixture to a gentle simmer, whisking constantly for about 2-3 minutes.
- Thicken It Up (Optional but Recommended): If you’re using xanthan gum (and you totally should!), sprinkle it in gradually while whisking vigorously for about 30 seconds. The mixture should slightly thicken. Remove from heat.
- Pecan Party: Stir in the pecan halves. Make sure they’re all coated in that glorious, caramel-like mixture. Oh, the aroma alone is heavenly!
- Assemble & Bake: Pour the pecan filling evenly over your pre-baked crust. Spread it out with a spatula if needed to ensure every inch is covered. Pop it back into the oven for another 20-25 minutes, or until the filling is bubbly and looks set.
- Cool Down, Buttercup: This is the hardest part! You absolutely MUST let these bars cool COMPLETELY on a wire rack before cutting. **This is crucial, people!** Seriously, resist the urge to dive in immediately. It needs to set up properly. Once cool (or even better, chilled for an hour or two in the fridge), lift from the pan using the parchment paper overhang and slice into perfect squares.
Common Mistakes to Avoid
Nobody’s perfect, but we can learn from past pie bar disasters. Steer clear of these rookie blunders:
- Skipping the parchment paper: Then trying to pry the bars out like a wild animal. Don’t be that person. You want clean edges, trust me.
- Not poking holes in the crust: Hello, puffy crust syndrome! It’s not a pillow, it’s a foundation for deliciousness. Poking ensures a flat, even base.
- Over-baking the crust: It’ll get tough and dry. We’re aiming for tender and subtly crisp, not cardboard-like. Keep an eye on it!
- Cutting them too soon: This is the most common mistake! The filling needs time to set and firm up. If you cut them warm, you’ll have a delicious, gooey mess… on your plate, not in bar form. (Unless you *want* a delicious gooey mess, then go for it, I won’t judge!)
- Forgetting the xanthan gum (if using): If you want that truly gooey, sticky pecan pie filling texture, the xanthan gum is your secret weapon. Without it, it might be a bit runnier.
Alternatives & Substitutions
Feeling creative? Or just missing an ingredient? Here are a few ways to tweak these beauties:
- Nut Swap: Not a pecan fan (gasp!)? You can totally use walnuts or a mix of nuts. Hazelnuts could be interesting too, if you’re feeling fancy and have them lying around.
- Sweetener Switch: If you have a different granular or powdered low-carb sweetener you prefer (like allulose), feel free to use it. Just **check the conversion ratio** as some are sweeter than others!
- Maple Syrup Alternative: Can’t find sugar-free maple syrup? You *could* try a very concentrated sugar-free caramel sauce, but the maple really gives it that classic pecan pie vibe. Another option is a sugar-free brown sugar substitute for a deeper flavor.
- Add-ins: Feeling spicy? A pinch of cinnamon or nutmeg in the filling can be lovely. A few drops of black walnut extract could also elevate the pecan flavor to next-level goodness. A tiny sprinkle of flaky sea salt on top after baking is also a pro move!
FAQ (Frequently Asked Questions)
- Q: Can I make these ahead of time?
A: Absolutely! They actually get better after a day or two in the fridge, giving the flavors time to meld. Plus, they’re even easier to cut when thoroughly chilled. Perfect for meal prep… I mean, dessert prep! - Q: How do I store these magical bars?
A: In an airtight container in the fridge for up to a week. If they last that long, that is. (Mine don’t make it past 2-3 days, for obvious reasons.) - Q: Can I freeze them?
A: You betcha! Wrap individual bars in parchment paper, then in foil, and stash ’em in a freezer bag for up to 2-3 months. Thaw in the fridge or at room temp. Instant low-carb dessert emergency kit! - Q: Why is my filling not thickening?
A: Did you simmer it long enough? Did you use the xanthan gum? It typically thickens quite a bit as it cools, but a little longer on the heat (gently, please!) can help, or a tiny bit more xanthan gum, added very carefully. - Q: My crust seems dry/crumbly. What gives?
A: This can happen if your butter wasn’t cold enough, you overmixed, or if you didn’t press it firmly enough. A tiny splash of ice water (like half a teaspoon) can sometimes help bring it together without making it tough. Don’t overwork the dough! - Q: Is this *really* low carb? It tastes too good!
A: Yep, it’s the real deal! Thanks to almond flour and sugar-free sweeteners, you get all the deliciousness without the carb overload. Enjoy your guilt-free indulgence, you smart cookie, you!
Final Thoughts
So there you have it, folks! Your new favorite low-carb dessert that’s ridiculously easy and unbelievably delicious. Go ahead, whip up a batch, and watch them disappear faster than you can say “keto-friendly.” You’re basically a culinary wizard now, wielding sugar-free magic.
Now go impress someone—or yourself—with your new culinary skills. You’ve earned it! And maybe save a bar for me, okay?

