So you’re craving something tasty but too lazy to spend forever in the kitchen, huh? Same. And if you’re trying to keep things low-carb, sometimes it feels like you’re stuck in a culinary desert. Fear not, my friend! I’ve got your back with a chicken tenderloin recipe that’s so ridiculously easy, delicious, and low-carb, you’ll wonder where it’s been all your life. Let’s get cooking!
Why This Recipe is Awesome
Okay, let’s be real. This isn’t just a recipe; it’s a **life hack** for those busy weeknights or when you just can’t be bothered but still want something genuinely good. What makes it so awesome? First off, it’s **idiot-proof**. Seriously, even I, the queen of kitchen mishaps, haven’t messed this one up. Secondly, it uses chicken tenderloins, which are basically the fast-food version of chicken breasts – super quick to cook and notoriously tender (hence the name, duh). And finally, it’s low-carb, packed with flavor, and versatile. You can pair it with pretty much anything, making your keto journey a walk in the park. No complicated steps, no obscure ingredients. Just pure, unadulterated deliciousness.
Ingredients You’ll Need
Gather ’round, pantry warriors! Here’s your simple shopping list. Don’t worry, nothing fancy or hard to pronounce:
- 1-1.5 lbs Chicken Tenderloins: The star of our show. Make sure they’re thawed if you’re using frozen.
- 1-2 tbsp Olive Oil or Avocado Oil: Your healthy fat sidekick for searing.
- The Flavor Squad (aka Spices):
- 1 tsp Garlic Powder (because garlic makes everything better, fight me.)
- 1 tsp Onion Powder (garlic’s bestie, adds depth.)
- 1 tsp Paprika (for that beautiful color and subtle sweetness.)
- ½ tsp Chili Powder (just a little kick, nothing too wild.)
- ½ tsp Salt (essential, don’t skimp!)
- ¼ tsp Black Pepper (freshly ground if you’re feeling fancy.)
- Optional: A squeeze of fresh lemon juice at the end (brightens everything up like a tiny culinary sunbeam!)
Step-by-Step Instructions
Get ready to feel like a five-star chef with minimal effort. Here’s how you whip up these bad boys:
- Pat ‘Em Dry: First things first, grab your chicken tenderloins and pat them *really* dry with paper towels. This is key for getting a beautiful sear, not a sad steam.
- Season Like a Pro: In a bowl, toss the chicken with the olive oil, garlic powder, onion powder, paprika, chili powder, salt, and pepper. Make sure every tenderloin is coated generously. We’re going for flavor, people!
- Heat That Pan: Place a large skillet (cast iron works wonders if you have one!) over medium-high heat. Let it get nice and hot for about 2-3 minutes. A hot pan equals a good sear!
- Sear ‘Em Up: Add the seasoned chicken to the hot skillet in a single layer. **Don’t overcrowd the pan!** You might need to do this in batches. Cook for about 3-4 minutes per side, until they’re golden brown and cooked through. The internal temperature should reach 165°F (74°C).
- Rest and Relish: Remove the chicken from the pan and let it rest on a plate for a few minutes. This allows the juices to redistribute, keeping your chicken moist and delicious. If you’re using lemon juice, give it a squeeze now!
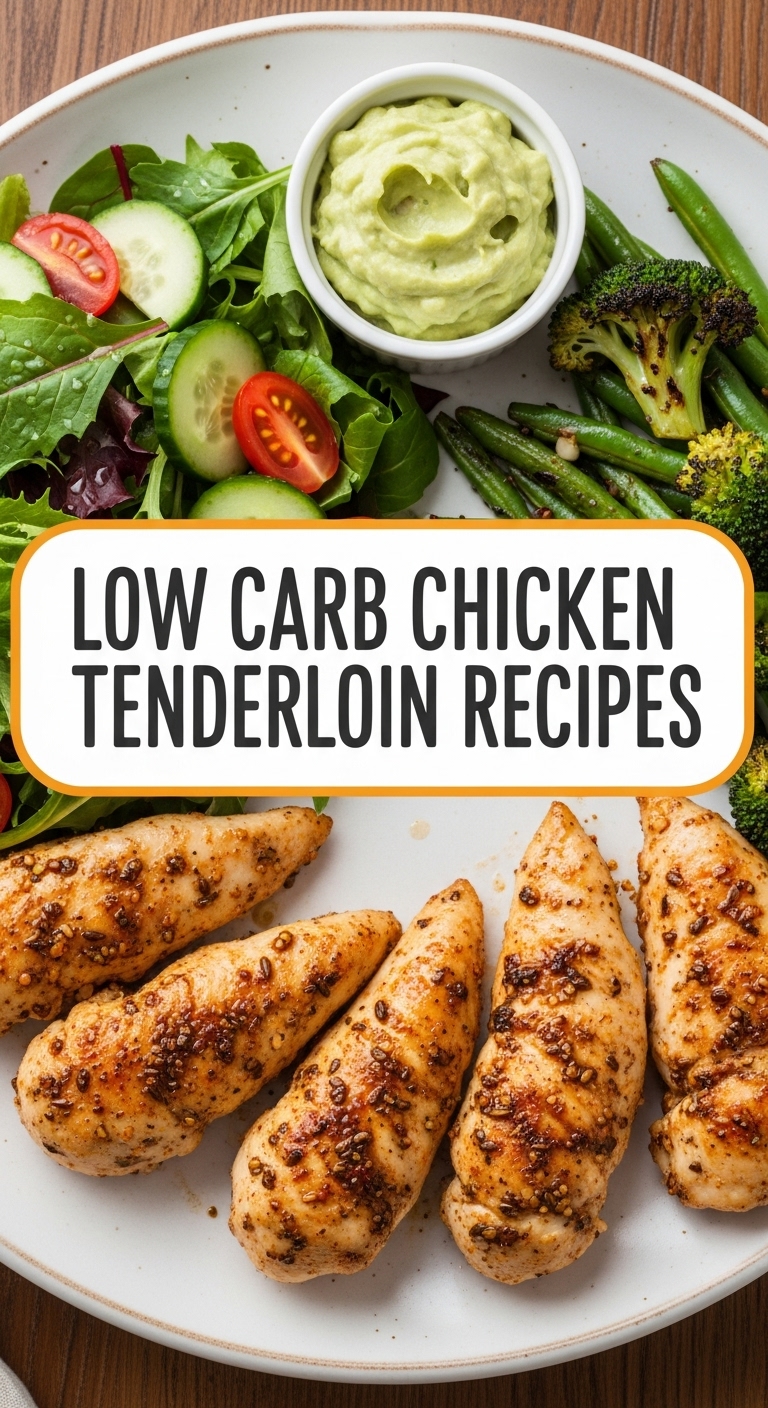
- Serve It Up: Dish out your perfectly cooked chicken tenders with your favorite low-carb side. Think a fresh green salad, steamed broccoli, or some roasted asparagus.
Common Mistakes to Avoid
Look, we all make mistakes. But with these tips, you won’t make *these* mistakes. You’re welcome.
- Crowding the Pan: This is probably the number one offender. When you cram too many tenderloins into one pan, the temperature drops, and instead of searing, your chicken will steam. And steamed chicken is, frankly, boring. **Cook in batches if necessary!**
- Overcooking: Dry chicken is a sad chicken. And a sad eater. Tenderloins cook fast, so keep an eye on them. The moment they hit 165°F (74°C) internally, they’re done.
- Forgetting to Season: Bland food is a crime. Don’t be a criminal. Season your chicken generously. Taste your seasoning mix if you’re unsure.
- Skipping the Rest: You just put in all that hard work cooking, don’t let the juices escape! Letting the chicken rest for a few minutes means a juicier, more tender bite.
Alternatives & Substitutions
Feeling adventurous? Or maybe you’re just out of paprika. No stress, my friend, we can adapt!
- Spice Swaps: Don’t have chili powder? Try a pinch of cayenne for more heat, or smoked paprika for a deeper flavor. Italian seasoning blend, cumin, oregano, or even a pre-made taco seasoning (check for added sugars!) would work great too. Go wild with your spice cabinet!
- Cooking Method:
- Air Fryer: Toss the seasoned tenders into your air fryer basket. Cook at 375°F (190°C) for 10-15 minutes, flipping halfway, until cooked through.
- Baking: Lay the seasoned tenders on a baking sheet. Bake at 400°F (200°C) for 15-20 minutes, flipping once, until done.
- Saucy Situation: Once cooked, these tenders are a fantastic canvas. Drizzle with a sugar-free BBQ sauce, a creamy mushroom sauce, or even a simple lemon-herb butter sauce for an extra kick.
FAQ (Frequently Asked Questions)
Got questions? I’ve got answers. (Mostly. I’m not a doctor or a professional chef, just a friend who likes food.)
- Can I marinate the chicken longer? Absolutely! For even more flavor, you can let the seasoned chicken sit in the fridge for 30 minutes to an hour, or even overnight. Just remember to bring it to room temperature for about 15 minutes before cooking for more even results.
- What if I don’t have fresh lemon? Can I use bottled? You *can*, but it won’t be quite the same. Fresh lemon gives that vibrant, zesty finish. If bottled is all you have, use it sparingly, or just skip it.
- How do I know for sure the chicken is cooked through without overcooking? **Your best friend here is an instant-read meat thermometer!** Insert it into the thickest part of the tenderloin; it should read 165°F (74°C). No thermometer? Cut into the thickest part – the juices should run clear and there should be no pink.
- Can I use chicken breasts instead? Yes, but you’ll need to adjust the cooking time. If they’re thick, slice them horizontally into thinner cutlets (or pound them thin) so they cook faster and more evenly.
- Is this recipe good for meal prep? Definitely! Cook a larger batch, let it cool completely, then store in an airtight container in the fridge for up to 3-4 days. It reheats well in the microwave or a skillet.
- What if my chicken tenders are super thin? They’ll cook even faster! Reduce the cooking time to about 2-3 minutes per side. Just keep an eye on them.
Final Thoughts
See? I told you it was easy! Now you have a delicious, low-carb, and ridiculously quick meal that tastes like you actually put in effort (your secret’s safe with me). Go forth and conquer that hunger monster! You’re basically a kitchen wizard now. Share it with friends, impress your family, or just hoard it all for yourself – no judgment here. You’ve earned it!


