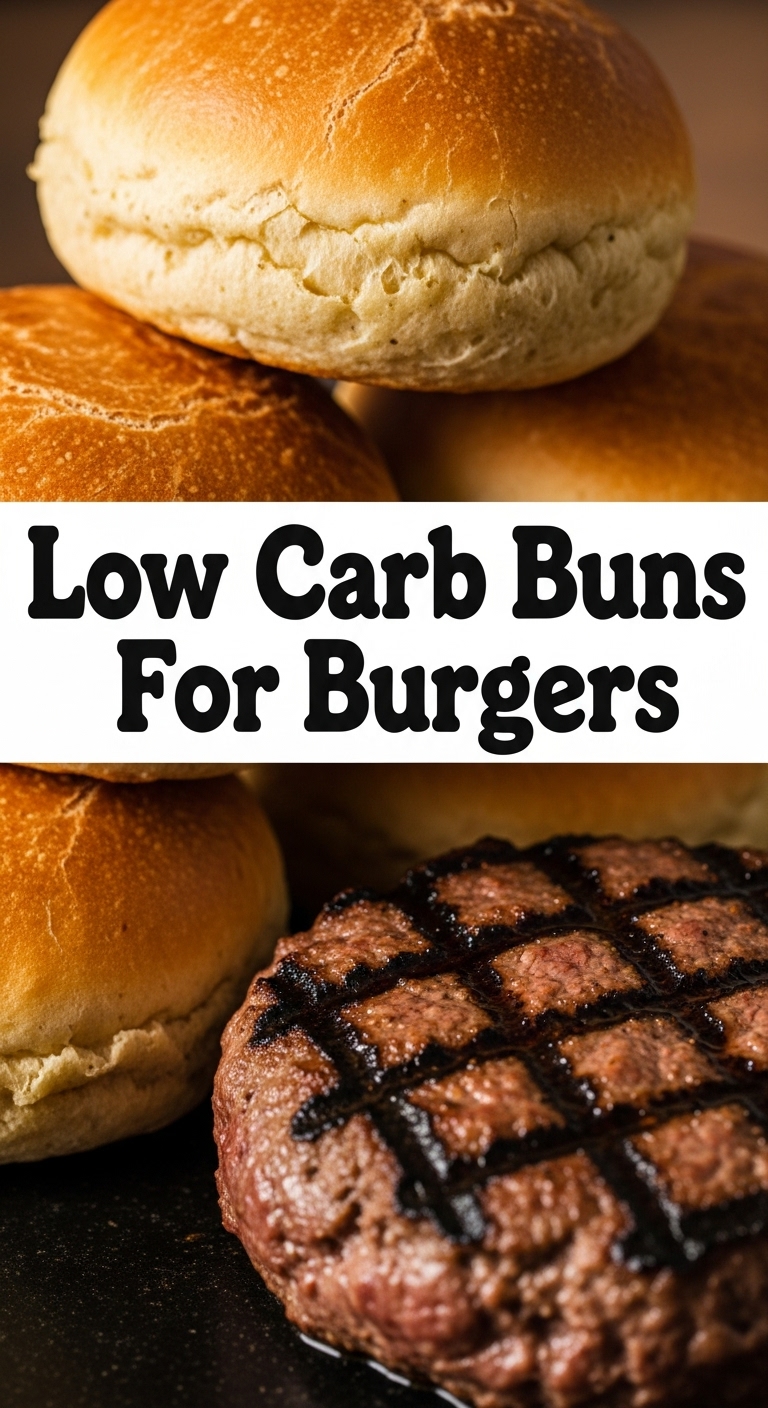
So, you’re staring down a juicy burger patty, practically salivating, but then your eyes drift to that sad, lonely lettuce leaf you were *going* to wrap it in. And you think, “Is this my life now? A life without glorious burger buns?” My friend, I’ve been there. We’ve all been there. And that, my carb-loving pal, is why we’re making some seriously epic **low-carb burger buns** today. No more compromising your burger dreams! Let’s get bready!
Why This Recipe is Awesome
Okay, let’s be real. There are a bazillion low-carb bun recipes out there, many of which taste like cardboard or spontaneously combust in the oven. Not these, my friend. This recipe is the MVP because:
- It’s practically **idiot-proof**. Seriously, even I didn’t mess it up, and my kitchen skills sometimes peak at microwaving leftovers.
- They actually **taste like buns**. No weird eggy texture, no almond-flour-only vibes. They’re surprisingly light and fluffy for a low-carb option.
- They **hold up to a juicy burger**. We’re talking sturdy, not soggy. You can actually *grip* your burger without it collapsing into a sad pile of ingredients.
- They’re ridiculously **quick to whip up**. We’re not talking all-day baking here.
- No carb coma! Enjoy your burger, feel satisfied, and skip the post-meal sluggishness. Winning!
Ingredients You’ll Need
Gather your magic potion components, chef!
- **1 ½ cups Almond Flour (super-fine, please!)**: Your low-carb BFF. Don’t cheap out on the super-fine, it makes a huge difference.
- **½ cup Psyllium Husk Powder**: This is the real MVP, the secret sauce for that amazing bready texture. **Do NOT skip or substitute this!**
- **2 tsp Baking Powder**: For that glorious lift. Make sure it’s fresh!
- **½ tsp Salt**: Because bland is boring, and your buns deserve flavor.
- **4 large Eggs**: Room temperature, if possible! They blend better and give a lighter texture. Trust me on this.
- **2 tbsp Apple Cider Vinegar**: Sounds weird, but it helps activate the psyllium and baking powder, making for a lighter, fluffier bun.
- **2 tbsp Melted Butter or Coconut Oil**: Fat equals flavor, baby! Go for unsalted butter or refined coconut oil if you prefer no coconut taste.
- **1 cup Hot Water**: Not boiling, just nice and hot, like a relaxing spa for your ingredients.
- **Optional: 1-2 tbsp Sesame Seeds**: For that authentic burger bun aesthetic.
Step-by-Step Instructions
Let’s get cooking! These steps are super simple, promise.
- **Get Prepped**: Preheat your oven to 350°F (175°C). Line a baking sheet with parchment paper. This is key, friend, for easy cleanup and no sticking.
- **Whisk the Dry**: In a large bowl, combine the almond flour, psyllium husk powder, baking powder, and salt. Give it a good whisk until everything is thoroughly mixed. No lumps allowed!
- **Add the Wet**: In a separate bowl, whisk together the room temperature eggs, apple cider vinegar, and melted butter (or coconut oil).
- **Combine the Magic**: Pour the wet ingredients into the dry ingredients. Stir them together until just combined.
- **Bring the Heat**: Now, add the hot water and stir vigorously until a thick dough forms. It will seem very wet at first, then quickly thicken. Don’t overmix, just get it combined.
- **Let it Chill (Briefly!)**: Let the dough sit for 5-10 minutes. This is where the psyllium husk powder really gets to work, absorbing the liquid and making the dough more manageable. It’s like magic, but with science!
- **Shape Your Buns**: With slightly wet hands (prevents sticking), divide the dough into 4-6 equal portions (depending on how big you want your buns). Roll each portion into a ball, then flatten slightly into bun shapes. Place them on your prepared baking sheet. If using, sprinkle the tops with sesame seeds.
- **Bake to Perfection**: Pop them into your preheated oven and bake for 30-40 minutes, or until they’re beautifully golden brown and sound hollow when tapped.
- **Cool Down**: **This is crucial!** Let the buns cool completely on a wire rack before slicing and serving. They firm up as they cool, giving you that perfect burger-holding structure. Patience, grasshopper!
Common Mistakes to Avoid
We all make mistakes, but let’s try to avoid these rookie errors, shall we?
- **Not preheating the oven**: Seriously, don’t do it. Your buns need that immediate heat to rise properly.
- **Skipping the psyllium husk powder**: Your buns will be sad, flat, and likely fall apart. **It’s non-negotiable for this recipe!**
- **Overmixing the dough**: Once the hot water is in, stir just until combined. Overmixing can lead to tough, dense buns.
- **Opening the oven door too soon**: Resist the urge to peek! Opening the oven door lets out heat, which can cause your buns to deflate.
- **Not letting them cool**: I know, I know, you’re hungry! But slicing them hot will make them gummy and not as sturdy. Let them chill, like you do on a Sunday afternoon.
Alternatives & Substitutions
While this recipe is pretty dialed in, sometimes you gotta work with what you’ve got!
- **Almond Flour**: If you absolutely must, you *might* be able to swap a portion for a smaller amount of coconut flour (coconut flour is super absorbent, so you’d use about 1/3 to 1/2 the amount of coconut flour for the almond flour). **However, this recipe is formulated for almond flour, and other flours will drastically change the texture.** IMO, stick with the almond.
- **Butter/Coconut Oil**: If you’re dairy-free, refined coconut oil is a perfect 1:1 substitute. Avocado oil could also work in a pinch.
- **Apple Cider Vinegar**: Lemon juice can be used as a substitute, also at 2 tbsp. The acidity is what we’re after.
- **Psyllium Husk Powder**: Look, I’m just gonna say it again. **DO NOT SUBSTITUTE THIS ONE.** Go buy it. It’s worth it, for real. Whole psyllium husks can be ground into a powder, but using them whole will give a different texture and absorbency. Stick to the powder for best results.
FAQ (Frequently Asked Questions)
Got questions? I’ve got (casual) answers!
- **Can I use whole psyllium husks instead of powder?** Well, you *can*, but they’ll absorb water differently and might give your buns a slightly tougher, less uniform texture. For the best “bready” feel, powder is your best bet.
- **How long do these low-carb buns last?** They’re best fresh, but will keep in an airtight container at room temperature for 2-3 days, or in the fridge for up to 5 days. You can also freeze them for longer storage (up to a month)!
- **My buns are flat! What happened?** Ah, the dreaded flat bun! This often means your baking powder isn’t fresh, or you didn’t let the dough rest long enough for the psyllium to do its magic. Make sure your psyllium is powder, not whole husks!
- **Can I add cheese to the dough?** Oh, you sly dog! Yes, you absolutely can! Mix in a couple of tablespoons of shredded cheddar or mozzarella with the dry ingredients for a cheesy bun. YUM.
- **Why do the eggs need to be room temperature?** Good question! Room temperature eggs emulsify better with the other ingredients, leading to a smoother batter and a lighter, fluffier end product. Cold eggs can make the dough denser.
- **Can I make these ahead of time for meal prep?** Absolutely! Bake a batch, let them cool completely, then store them. Reheat them gently in a toaster oven or microwave when you’re ready for burger time.
Final Thoughts
See? That wasn’t so scary, was it? You just whipped up a batch of delicious, low-carb burger buns that are ready to elevate your burger game from “sad lettuce wrap” to “culinary masterpiece.” Now go impress someone – or, more importantly, yourself – with your new culinary skills. You’ve earned that perfectly bunned burger. Go forth and conquer those cravings, chef! You got this!

