So, you’ve been cruising along on your low-carb journey, feeling amazing, but suddenly, the siren song of a perfectly toasted slice of bread hits you? Yeah, I’ve been there. You want something delicious, satisfying, and maybe a little bit chewy, but without the carb-induced guilt trip. And you’re probably too busy (or lazy, let’s be real) to spend an entire afternoon playing baker. Same!
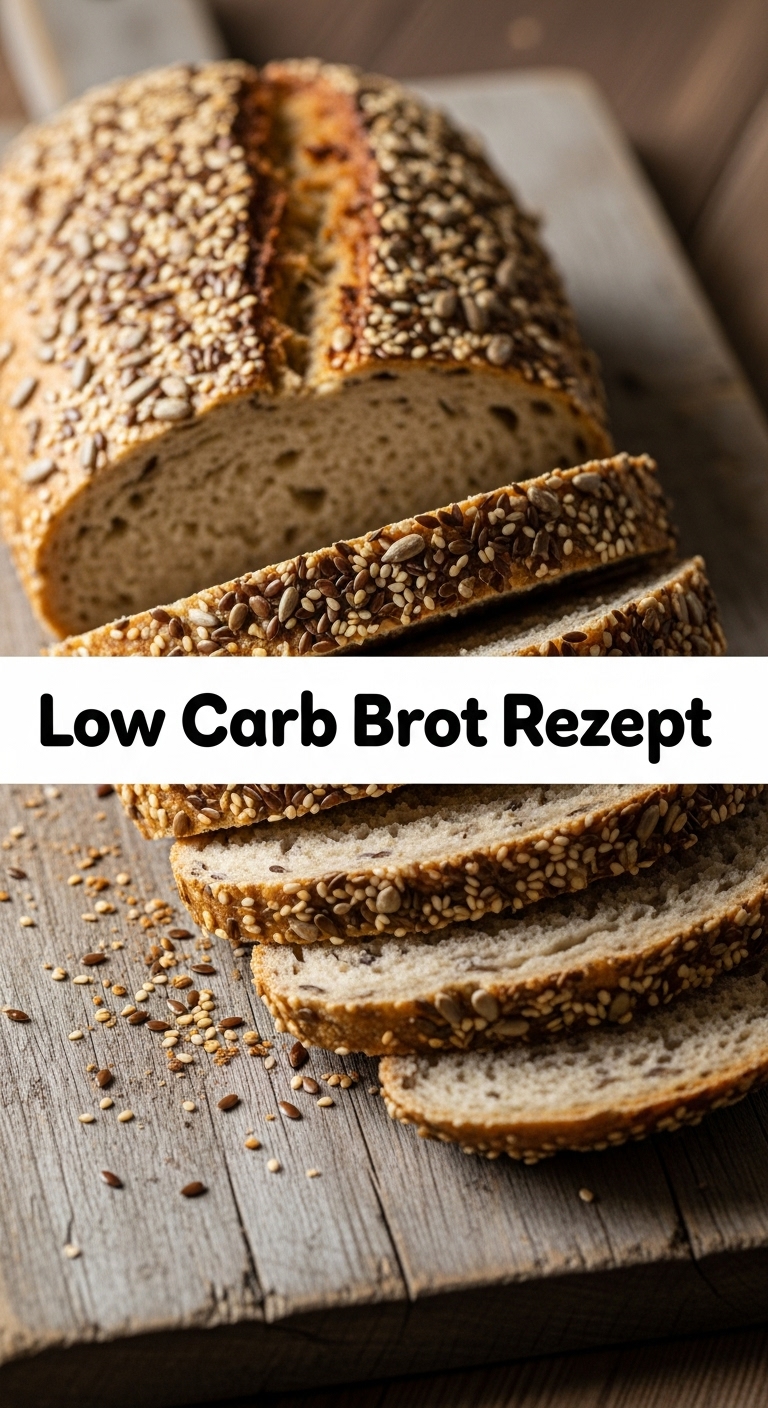
Good news, my carb-conscious comrade! I’ve got a recipe for you that’s not only a total game-changer but also so ridiculously easy, you’ll wonder why you ever deprived yourself. Say hello to your new best friend: a **Low Carb Brot Rezept** that’s basically a hug in bread form. You’re welcome.
Why This Recipe is Awesome
Let me count the ways this bread is about to become your kitchen MVP. First off, it’s **idiot-proof**. Seriously, if I can make it without setting off the smoke alarm or turning it into a hockey puck, you absolutely can too. It requires minimal effort, minimal ingredients, and zero advanced baking degrees. Think of it as the ultimate lazy person’s guide to gourmet low-carb living.
Beyond its sheer simplicity, this bread actually tastes GOOD. Like, “I can’t believe this is low-carb” good. It’s got a lovely texture, holds together beautifully, and is perfect for sandwiches, toast, or just, you know, staring at lovingly. Plus, it’s packed with fiber, which is always a win, IMO. No more sad, crumbly attempts at “health bread.” We’re making *real* bread here, just without the carb party.
Ingredients You’ll Need
Gather ’round, my aspiring bakers! Here’s your shopping list. Most of these are likely already lurking in your pantry if you’re living the low-carb life.
- **200g Almond Flour:** Your low-carb BFF. Make sure it’s superfine for the best texture.
- **50g Psyllium Husk Powder:** This is the magic binder. Don’t skip it, or your bread will be a sad, crumbly mess. Think of it as the gluten-free glue.
- **2 tsp Baking Powder:** For that lovely lift. Nobody wants flat bread, right?
- **1 tsp Salt:** Essential for flavor. Don’t be shy, but don’t overdo it either.
- **4 Large Eggs:** The OG binder and a bit of richness. Happy eggs make happy bread!
- **100ml Water (warm):** Not hot, not cold, just pleasantly warm.
- **2 tbsp Olive Oil (or melted coconut oil/butter):** Adds moisture and a nice crumb. Choose your fat weapon!
- **(Optional) 1 tsp Apple Cider Vinegar:** Helps activate the baking powder and gives a slight tang. Trust me on this one.
Step-by-Step Instructions
Alright, apron on (or not, I don’t judge), let’s get baking!
- **Preheat Your Oven & Prep Your Pan:** First things first, get that oven heated to **175°C (350°F)**. Line a small loaf pan (approx. 20cm/8 inches) with parchment paper. Leave a bit of overhang on the sides – it’ll be your little bread-lifting handles later!
- **Mix the Dry Stuff:** In a large bowl, whisk together your almond flour, psyllium husk powder, baking powder, and salt. Make sure there are no lumpy bits. You want everything well combined.
- **Whisk the Wet Stuff:** In a separate bowl, whisk the eggs, warm water, olive oil, and apple cider vinegar (if using). Whisk it really well until everything is fully incorporated and slightly frothy.
- **Combine & Conquer:** Pour the wet ingredients into the dry ingredients. Mix with a spoon or spatula until just combined. Don’t overmix! The dough will be quite thick and sticky, almost like a paste. This is normal.
- **Rest & Rise:** Let the dough sit for about 5-10 minutes. This gives the psyllium husk time to do its job and absorb the liquid, making the dough thicker and more manageable. You’ll notice it firming up.
- **Shape & Bake:** Scoop the dough into your prepared loaf pan. You can wet your hands slightly to smooth out the top if you want it to look extra pretty. Pop it into the preheated oven and bake for about **45-55 minutes**.
- **Check for Doneness:** The bread should be golden brown on top and sound hollow when tapped. A toothpick inserted into the center should come out clean. If it’s getting too dark, you can loosely tent it with foil for the last 10-15 minutes.
- **Cool Down, Buttercup:** This is the hardest part: let it cool completely in the pan on a wire rack for at least an hour, or even longer. **Seriously, resist the urge to cut into it immediately!** Patience is key here for the best texture.
Common Mistakes to Avoid
We’ve all been there, staring at a baking disasterpiece. Learn from my trials and tribulations, friends!
- **Ignoring the Psyllium Husk:** If you use whole psyllium husks instead of powder, or too little, or forget it entirely, your bread will be a crumbly mess. Stick to the powder, stick to the measurements.
- **Not Preheating the Oven:** Rookie mistake! A cold oven means uneven baking and a sad loaf. Always preheat!
- **Overmixing the Dough:** Once the wet and dry ingredients are combined, mix just enough to bring it all together. Overmixing can develop any potential “toughness” and prevent that airy texture.
- **Cutting It While It’s Hot:** I know, the smell is intoxicating. But cutting warm low-carb bread often results in a gummy, wet interior. Let it cool fully to set properly. Trust the process!
- **Using the Wrong Flour:** Don’t swap almond flour for coconut flour 1:1. They behave *very* differently. More on that in the next section!
Alternatives & Substitutions
Feeling adventurous? Here are some tweaks you can make, but proceed with caution, my culinary comrades!
- **Different Fats:** Instead of olive oil, you can totally use melted coconut oil or even butter for a richer flavor. Avocado oil is also a great neutral option.
- **Adding Seeds:** Want some extra crunch and nutrients? Fold in a couple of tablespoons of flax seeds, chia seeds, or sunflower seeds after step 4. They add a lovely texture!
- **Herbs & Spices:** For a savory loaf, mix in some dried rosemary, thyme, or garlic powder with your dry ingredients. Great for serving with soups!
- **Coconut Flour (Use with Extreme Caution!):** If you *must* use coconut flour, know this: it’s a super sponge. You’d likely only need about 1/4 to 1/3 of the amount of almond flour, and you’d need to significantly increase the liquid (eggs/water). Honestly, for this recipe, **stick to almond flour** for consistent results. It’s less of a headache.
- **Egg-Free?** This recipe relies heavily on eggs for structure. You *might* be able to get away with a flax egg (1 tbsp ground flax meal + 3 tbsp water per egg, let sit for 5 mins) for one or two eggs, but replacing all four would likely compromise the texture significantly.
FAQ (Frequently Asked Questions)
Got questions? I’ve got (mostly sarcastic) answers!
- **Can I make this in a bread machine?** Hmm, technically maybe? But this dough is quite thick and not like traditional bread machine dough. I haven’t tried it, and I’d recommend sticking to the oven for a guaranteed success. Why complicate perfection?
- **How long does this low-carb bread last?** If you don’t devour it all in one sitting (which is a strong possibility), it’ll stay fresh in an airtight container at room temperature for about 3-4 days. In the fridge, it’ll last a bit longer, maybe up to a week.
- **Can I freeze it?** Absolutely! Once it’s completely cooled, slice it up and freeze the slices in a freezer bag with parchment paper in between. Then you can just grab a slice and toast it whenever a craving strikes. It’s like magic!
- **My bread is really dense. What went wrong?** Probably over-mixing, not enough baking powder, or possibly old psyllium husk. Also, make sure your eggs aren’t super tiny!
- **Why does it smell a bit “eggy”?** The psyllium husk can sometimes give off a slightly sulfuric smell during baking, and with four eggs, it can be a tad eggy for some. It usually dissipates once cooled, and toasting helps. The apple cider vinegar can also help neutralize this a bit!
- **Can I use any other nut flour?** Hazelnut flour could work as a substitute for almond flour, but might yield a slightly denser loaf and a different flavor. Remember, baking is a science, so stick with what works for your first go!
Final Thoughts
And there you have it, my friend! Your ticket to low-carb bread bliss. This recipe is a lifesaver for those days when you just need something hearty and comforting without derailing your health goals. It’s simple, it’s delicious, and it proves that “low-carb” doesn’t have to mean “low-flavor.”
Now go forth and impress your friends, your family, or just your hungry self with your new culinary superpowers. You’ve earned this deliciousness. Happy baking (and eating)!
