So, you’ve scrolled past a million perfect-looking cakes on Instagram and thought, “Yeah, right, like *I* could make that.” Guess what? Today’s your day to prove Instagram wrong, without breaking a sweat (or a whisk). We’re talking about a layered cake that looks like a million bucks but secretly takes minimal effort. Get ready to impress everyone, including yourself, with this strawberry and truffle masterpiece!
Why This Recipe is Awesome
Because who doesn’t want to look like a culinary genius without actually being one? This cake is like your super-smart friend who makes everything look effortless. It’s shockingly simple, tastes like a dream, and honestly, it’s **pretty much impossible to mess up** unless you *really* try. Think fluffy cake, fresh strawberries, and decadent chocolate truffles all mingling in one bite. It’s basically a fancy party in your mouth, and you’re the VIP host. Plus, it’s a fantastic excuse to buy truffles. You know, for “the recipe.” 😉
Ingredients You’ll Need
Here’s your shopping list. Don’t overthink it; simplicity is our friend here!
- 1 box (approx. 15.25 oz) Yellow or Vanilla Cake Mix: Yeah, we’re cheating. Don’t tell anyone. It’s our little secret.
- Ingredients for cake mix: Usually eggs, vegetable oil, and water. Follow your box’s instructions like it’s gospel.
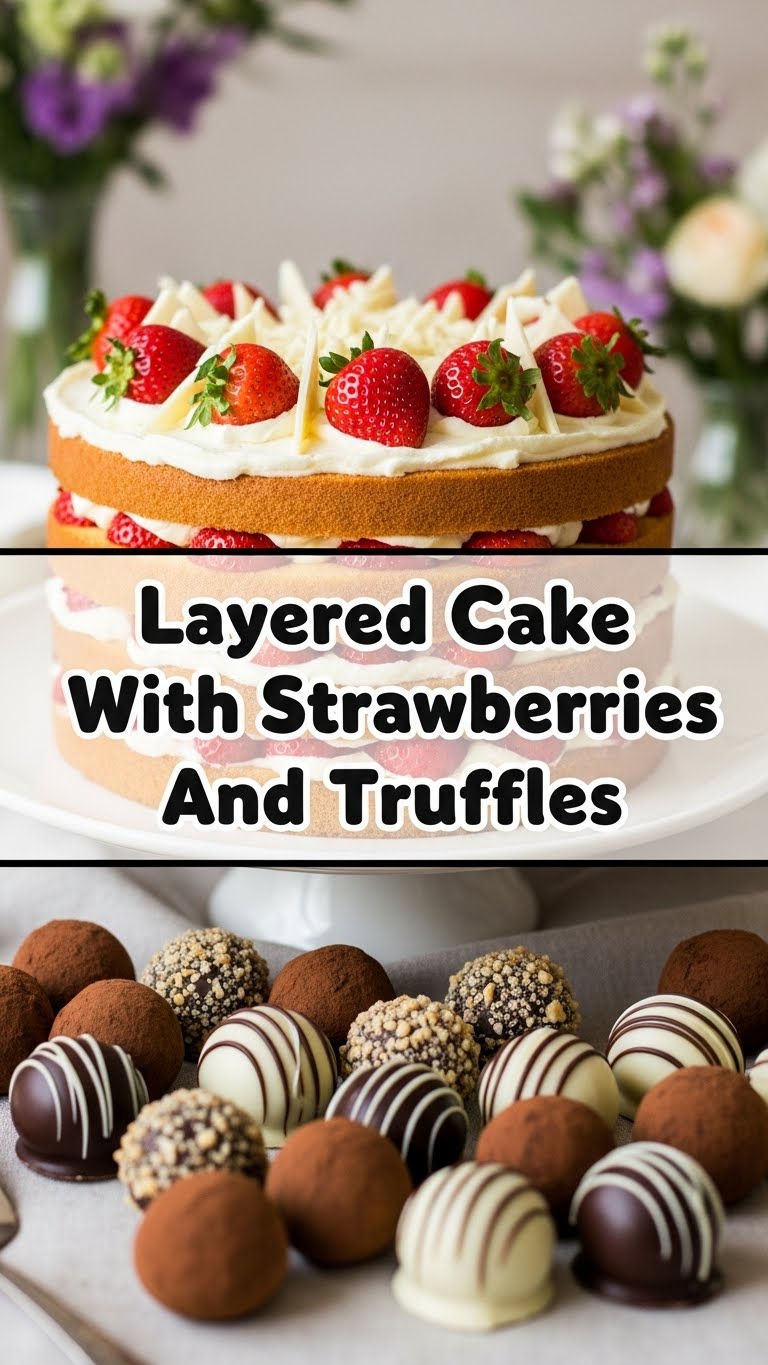
- 2 lbs Fresh Strawberries: Washed, hulled, and sliced. Enough to make it look healthy-ish, right?
- 2 cups Heavy Cream: The good stuff, full-fat. This is where the magic happens.
- 1/2 cup Powdered Sugar: For sweetening that cream. Add more if you have a serious sweet tooth (no judgment).
- 1 teaspoon Vanilla Extract: A splash of warmth and deliciousness.
- 10-12 Chocolate Truffles (store-bought): Your secret weapon for instant sophistication. Don’t worry, we won’t tell you bought them.
- Optional: A little extra chocolate sauce for drizzling. Because, why not? More chocolate is always a good idea, IMO.
Step-by-Step Instructions
- Bake the Cake: Preheat your oven and prepare your cake pan(s) according to your cake mix box. Bake the cake, then let it cool **completely** on a wire rack. This is crucial! Once cool, carefully slice the cake horizontally into 2 or 3 even layers.
- Whip the Cream Dream: In a large, super-cold bowl (pop it in the fridge for 10 mins first!), combine the heavy cream, powdered sugar, and vanilla extract. Beat with an electric mixer on high speed until **stiff peaks** form. Don’t walk away from this; it goes from perfect to over-whipped in a blink.
- Prep Your Truffles: Roughly chop about two-thirds of your chocolate truffles. Keep the remaining few whole or halved for decoration.
- Assemble Layer 1: Place one cake layer on your serving platter. Spread a generous layer of whipped cream over it. Arrange a good amount of sliced strawberries and sprinkle some chopped truffles evenly over the cream.
- Repeat the Yum: Gently place the next cake layer on top and repeat the cream, strawberry, and truffle process. If you have a third layer, go for it!
- The Grand Finale: Once all layers are stacked, generously cover the top and sides of the cake with the remaining whipped cream. Decorate the top with your remaining fresh strawberries and the whole/halved truffles. A little chocolate sauce drizzle never hurt anyone either!
- Chill Out: Pop that gorgeous creation into the fridge for at least 1-2 hours. This lets the layers settle and the flavors meld. **Patience, young grasshopper!**
Common Mistakes to Avoid
- Frosting a Warm Cake: Seriously, don’t do it. You’ll end up with a melted, sliding mess. **Always let your cake layers cool completely.** I mean, *completely*.
- Over-whipping the Cream: One minute it’s fluffy clouds, the next it’s grainy butter. Keep an eye on it! Stop as soon as those stiff peaks appear.
- Skipping the Chill Time: Your cake needs to firm up and let those flavors mingle. Skipping this step means a less stable and less delicious cake. Don’t rush perfection!
- Being Afraid of Imperfection: So what if your layers aren’t perfectly even? It’s homemade, and that’s part of its charm! Slap on more cream, and no one will notice (or care, because it tastes amazing).
Alternatives & Substitutions
Feeling creative? Or just ran out of something? No worries, we’ve got options!
- The Cake: If you’re feeling ambitious (or guilty about the mix), use your favorite homemade vanilla sponge cake recipe. Just make sure it’s sturdy enough for layering.
- The Berries: Not a strawberry fan? Or maybe it’s winter? Raspberries, blueberries, or a mixed berry medley would be equally divine. Just avoid anything too watery if using frozen; thaw and drain first.
- The Truffles: Can’t find truffles? Or want a different chocolate vibe? Use high-quality chocolate chips, shaved dark chocolate, or even crushed chocolate sandwich cookies for a fun twist. Your cake, your rules!
- The Cream: If whipping cream from scratch feels like too much work, store-bought whipped topping (like Cool Whip) can be a decent shortcut. But honestly, homemade whipped cream is **worth the extra minute**. FYI, it just tastes better.
FAQ (Frequently Asked Questions)
Let’s tackle some burning questions, shall we?
- Can I make the cake layers ahead of time? Absolutely! Bake them a day or two in advance, let them cool completely, then wrap them tightly in plastic wrap and store at room temperature.
- How long does this masterpiece last in the fridge? If it even makes it past the first day, it’ll be good for 2-3 days, covered. But seriously, who has that kind of self-control?
- My whipped cream isn’t getting stiff, help! Make sure your heavy cream, bowl, and whisk attachment are all **super cold**. Pop them in the freezer for 10-15 minutes before whipping. A little cream of tartar or cornstarch can also act as a stabilizer.
- Do I *have* to use fresh strawberries? For the best texture and flavor, yes. Frozen berries can sometimes make the cake a bit watery as they thaw, so stick to fresh if you can.
- What if I don’t like truffles? (Gasp!) Blasphemy! Kidding. If truffles aren’t your thing, swap them out for other chocolate goodness like chocolate shavings, mini chocolate chips, or even chopped chocolate bars.
- Is this really easy? It looks so fancy! Dude, it’s ridiculously easy. The “fancy” part is mostly an illusion created by delicious ingredients and pretty layering. You got this!
Final Thoughts
See? I told you it wasn’t rocket science! You’ve just whipped up a dessert that looks like it came straight from a fancy patisserie, but you know the truth: it was a delightful cheat. Now go forth and bask in the glory of your creation. Share it, don’t share it – that’s your call. Just enjoy every single, delicious bite. You’ve earned it!


