So you’re craving something utterly divine, a hug in cookie form, but you’re also deeply committed to maximum deliciousness with minimum fuss? You’ve landed in the right spot, my friend. Forget those puny, sad excuses for cookies. We’re talking **Jumbo Chewy Chocolate Chip Cookies** today – the kind that make you question every life decision that didn’t involve baking them sooner. Get ready to roll up your sleeves, but not too much, because this is ridiculously easy.
Why This Recipe is Awesome
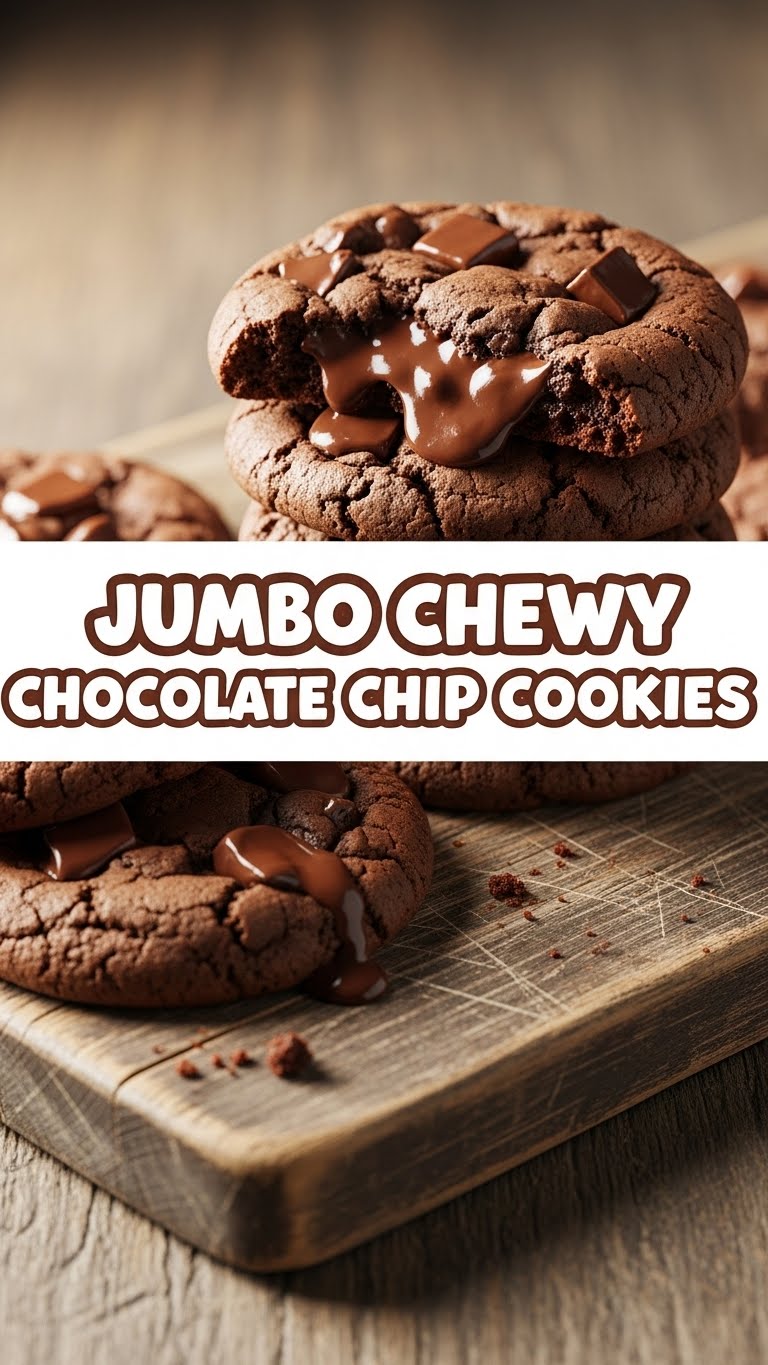
Let’s be real, who needs a complex recipe when you just want pure, unadulterated cookie bliss? This isn’t just a chocolate chip cookie recipe; it’s the recipe for when you want a cookie so big and chewy, it almost counts as a meal. Seriously, it’s practically idiot-proof. Even I, with my occasional ability to burn water, have mastered this. The result? A perfectly crisp edge, a gloriously gooey center, and so many chocolate chips you’ll wonder if you accidentally poured the entire bag in (spoiler: you probably did, and it’s perfect).
Ingredients You’ll Need
Gather your cookie comrades! You likely have most of these hiding in your pantry already. No fancy, obscure stuff here, just good old basics ready to be transformed into chewy magic.
- 1 cup (2 sticks) unsalted butter, softened. We’re talking room temperature, not melted. Patience, young padawan!
- ¾ cup granulated sugar. For that sweet crackle.
- 1 ½ cups packed light brown sugar. This is your chewiness secret weapon, don’t skimp!
- 2 large eggs. Happy eggs make happy cookies.
- 2 teaspoons pure vanilla extract. Use the good stuff, it makes a difference. Trust me.
- 2 ¼ cups all-purpose flour. No need for cake flour drama.
- 1 teaspoon baking soda. Helps them puff up just right.
- ½ teaspoon salt. Crucial for balancing all that sweetness. Don’t skip it, unless you like bland cookies (and who does?).
- 2 cups (about 12 oz) semi-sweet chocolate chips. Or milk chocolate, or dark, or a glorious mix! You do you.
- Flaky sea salt (optional, but highly recommended for sprinkling on top). Because fancy-schmancy cookies deserve a fancy finish.
Step-by-Step Instructions
Okay, let’s get down to business. Don’t blink, these jumbo beauties will be baking before you know it!
- Preheat your oven and prep: Get your oven blazing at **375°F (190°C)**. Line a couple of baking sheets with parchment paper or silicone mats. This is non-negotiable for easy cleanup and no-stick cookies.
- Cream the butter and sugars: In a large bowl, or your stand mixer, beat the softened butter with both sugars until the mixture is light and fluffy. This usually takes about 2-3 minutes. Scrape down the sides of the bowl to make sure everything gets mixed in.
- Add the wet ingredients: Beat in the eggs one at a time, mixing well after each addition. Then stir in the vanilla extract. It should look creamy and dreamy.
- Combine dry ingredients: In a separate bowl, whisk together the flour, baking soda, and salt. Make sure there are no lumps—nobody likes a flour bomb in their cookie.
- Mix wet and dry: Gradually add the dry ingredients to the wet ingredients, mixing on low speed until *just* combined. Do not overmix! A few streaks of flour are totally fine; overmixing leads to tough cookies, and we want chewy.
- Fold in the chocolate chips: Gently fold in your chosen chocolate chips. You can use a spatula or your hands here. Get them evenly distributed for maximum chocolatey goodness in every bite.
- Chill the dough (the secret weapon): This step is key for chewy cookies that don’t spread too much. Cover the bowl with plastic wrap and **chill the dough for at least 30 minutes, or up to 24 hours**. Seriously, don’t skip this.
- Scoop ’em jumbo: Using a large ice cream scoop (about 2-3 tablespoons per cookie), drop generous balls of dough onto your prepared baking sheets. Leave plenty of space between them; these babies are going to spread! If you’re using flaky sea salt, sprinkle a little on top of each dough ball now.
- Bake to perfection: Bake for **10-14 minutes**, or until the edges are golden brown but the centers still look slightly soft and gooey. This is crucial for that perfect chew! If you want them extra chewy, err on the side of slightly underbaked.
- Cool and devour: Let the cookies cool on the baking sheets for about 5-10 minutes before transferring them to a wire rack to cool completely. Or, if you’re like me, eat one warm right off the tray (tongue-burning warning!).
Common Mistakes to Avoid
We’ve all been there, staring at a tray of flat, sad, or cakey cookies. Don’t let it happen to you! Here are some rookie (and not-so-rookie) errors to dodge:
- Not chilling the dough: I know, I know, instant gratification. But chilling helps the flavors meld, prevents excessive spreading, and makes them wonderfully chewy. **Seriously, chill your dough.**
- Overmixing the flour: Once the flour goes in, mix only until just combined. Too much mixing develops the gluten, making your cookies tough instead of tender.
- Using cold eggs/butter: Room temperature ingredients combine better, creating a smoother, more emulsified dough. Cold ingredients mean lumps and an uneven bake.
- Overbaking: This is the biggest culprit for dry, hard cookies. Pull them out when the edges are set and golden, but the centers still look a bit soft. They’ll continue to bake on the hot sheet.
- Crowding the baking sheet: Give those jumbo cookies room to breathe and spread. If they’re too close, they’ll merge into one giant, misshapen cookie monster (which isn’t *always* a bad thing, but not what we’re going for).
Alternatives & Substitutions
Feeling adventurous? Or just working with what you’ve got? Here are some ways to switch things up:
- Chocolate Varieties: Mix and match! Use milk chocolate, dark chocolate, white chocolate, or even chocolate chunks for different textures. Personally, a combo of semi-sweet and dark chocolate is my jam.
- Add-ins: Go wild! Stir in a handful of chopped walnuts or pecans for a nutty crunch, or throw in some toffee bits, M&M’s, or even a sprinkle of mini marshmallows at the end of baking for extra gooiness.
- Brown Sugar Ratio: If you want them even chewier and richer, you can increase the brown sugar to 2 cups and decrease the white sugar to ½ cup. More brown sugar = more chew, FYI.
- Gluten-Free: Swap out the all-purpose flour for a 1:1 gluten-free baking blend. Results may vary slightly, but many work quite well!
- Butter Substitute: While butter is king here, if you’re in a pinch, you can technically use a good quality plant-based butter substitute. Just be aware the flavor profile might shift a bit. But hey, necessity is the mother of invention, right?
FAQ (Frequently Asked Questions)
Got questions? I’ve got (casual) answers!
- “Can I skip chilling the dough? I’m impatient!” Technically, yes, you *can*, but your cookies will spread more and be flatter. The chill time is really important for texture and flavor. Think of it as a brief, therapeutic spa day for your dough.
- “My cookies are flat! What went wrong?” Likely culprits: warm butter, not enough flour, overmixing, or not chilling the dough. Make sure your butter is softened, not melted, and always chill!
- “How do I store these jumbo beauties?” Keep them in an airtight container at room temperature for up to 3-4 days. If they last that long, you have more willpower than I do.
- “Can I freeze the dough?” Absolutely! Scoop the dough balls, place them on a baking sheet, and freeze until solid. Then transfer to a freezer-safe bag for up to 3 months. Bake from frozen, adding a few extra minutes to the baking time. Fresh-baked cookies on demand? Yes, please!
- “Why do my cookies taste cakey instead of chewy?” This often happens from too much flour or overbaking. Make sure you measure your flour correctly (spoon and level!) and pull those cookies out of the oven when they’re still slightly soft in the middle.
- “What if I don’t have parchment paper?” Aluminum foil works in a pinch, but grease it well! Silicone mats are also fantastic. But seriously, invest in some parchment paper; your baking life will be forever changed.
Final Thoughts
So there you have it, folks! The blueprint for creating cookie masterpieces that will make your kitchen smell incredible and your taste buds sing. These aren’t just cookies; they’re an experience. Go forth and conquer your cookie cravings. Share them (if you’re feeling generous), hoard them (no judgment here), and definitely enjoy every glorious, chewy bite. Now go impress someone—or yourself—with your new culinary superpowers. You’ve earned it!


