So, picture this: you’re lounging around, probably in your comfiest PJs, and a sudden, undeniable craving hits. It’s not just *any* craving; it’s a deep, primal urge for something sweet, creamy, and ridiculously happy. Something that screams “celebration” even if the only thing you’re celebrating is Tuesday. You want ice cream, but not just any ice cream—we’re talking **ice cream with a party of rainbow sprinkles**! And guess what? You don’t even need an ice cream machine or a culinary degree to make this magic happen. Seriously, if I can do it without burning the kitchen down, so can you. Let’s get scooping!
Why This Recipe is Awesome
Okay, let’s be real. There are approximately a million reasons why this recipe deserves a gold medal, a parade, and probably its own national holiday. First off, it’s **no-churn**. That’s right, no fancy, expensive gadgets required. Just a bowl, a whisk, and your fabulous self. Second, it’s ridiculously simple. Like, “can’t-mess-it-up-unless-you-try-really-hard” simple. It’s the kind of recipe you can whip up on a whim, impress your friends with (or just yourself, no judgment here), and then bask in the glory of your own genius. Plus, sprinkles! Need I say more? They just make everything better, IMO. This isn’t just dessert; it’s a dose of pure, unadulterated joy.
Ingredients You’ll Need
Gather your troops, folks! These are the few, but mighty, ingredients standing between you and dessert nirvana. No obscure, hard-to-pronounce stuff here, promise.
- Heavy Whipping Cream (2 cups): This is the superstar, the foundation of all your creamy dreams. Make sure it’s super cold for best whipping results!
- Sweetened Condensed Milk (1 can, 14 oz): The other hero. It’s sweet, it’s thick, and it’s what gives our ice cream that dreamy, smooth texture without all the churning fuss. Don’t confuse it with evaporated milk—rookie mistake!
- Vanilla Extract (1-2 teaspoons): A dash of pure magic. Use good quality stuff; it really makes a difference. Or, if you’re feeling fancy, a vanilla bean paste.
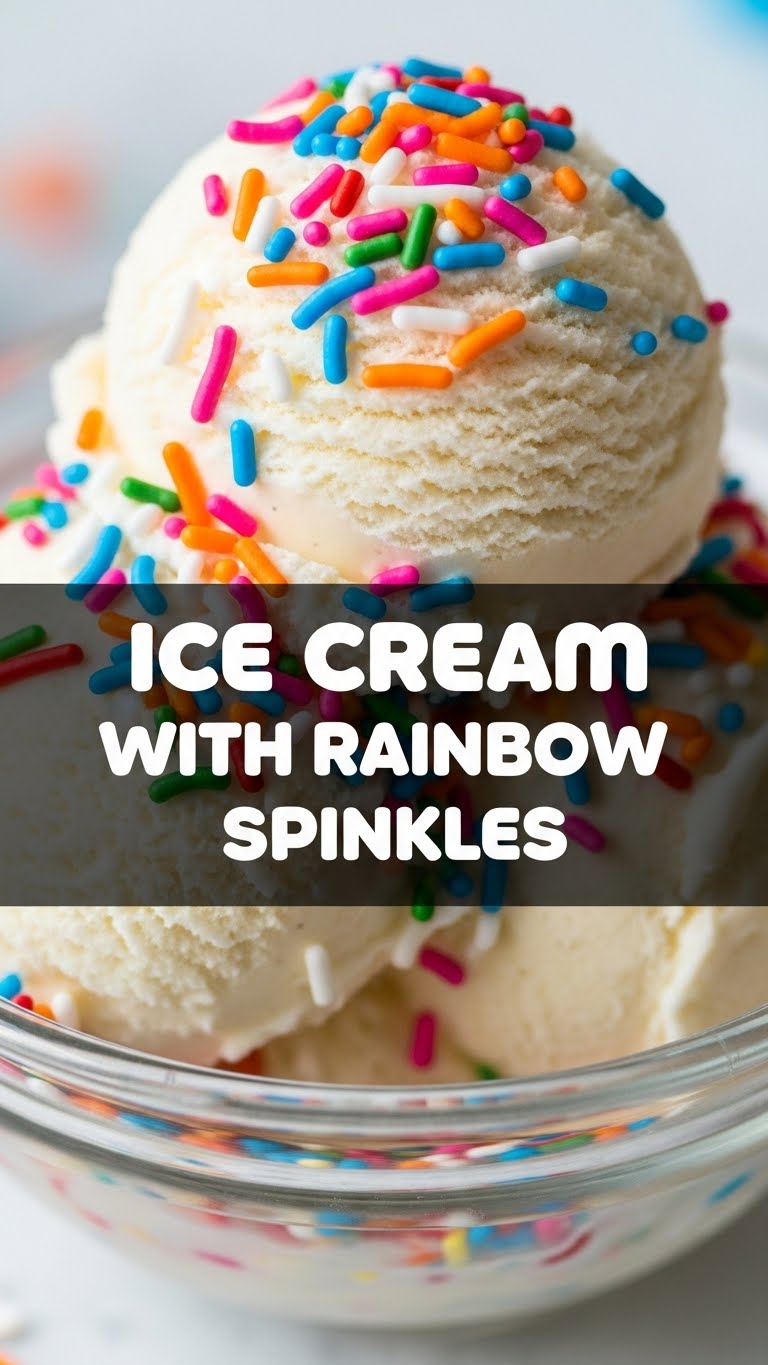
- Rainbow Sprinkles (1/2 cup, plus more for topping): The guest of honor! Go for the classic “jimmie” style sprinkles for maximum fun. Nonpareils can bleed color, which is fine if you’re into that abstract art vibe, but jimmies hold their shape better.
- Pinch of Salt (optional, but recommended): Just a tiny bit to balance the sweetness and make all the flavors pop. Trust me on this one.
Step-by-Step Instructions
Ready? Set? Go! This is where the magic happens, and it’s quicker than deciding what to watch on Netflix.
Chill Your Bowl: First things first, pop a large mixing bowl and your whisk attachment (if using an electric mixer) into the freezer for about 10-15 minutes. A cold bowl helps the cream whip up faster and fluffier. This is a **pro tip** for real.
Whip the Cream: Pour your super-cold heavy whipping cream into that chilled bowl. Beat it with an electric mixer (or a whisk and some serious arm muscle) on medium-high speed until stiff peaks form. You want it light and airy, like a cloud ready for a nap. Don’t overmix, though, or you’ll end up with butter, and while delicious, that’s not what we’re aiming for today!
Fold in the Goodness: In a separate bowl, combine the sweetened condensed milk, vanilla extract, and that tiny pinch of salt. Give it a good stir. Now, gently fold this mixture into your whipped cream. Do it in two additions, being careful not to deflate all that lovely air you just whipped in. **Gentle is key!**
Add the Sprinkles: Once everything is beautifully combined, it’s sprinkle time! Gently fold in about half a cup of your rainbow sprinkles. Be quick and gentle here to prevent too much color bleeding. We want distinct dots of joy, not a tie-dye masterpiece (unless that’s your jam, then go wild!).
Freeze It Up: Pour the mixture into a freezer-safe container. A loaf pan works perfectly, but any airtight container will do. Smooth the top, then add a generous extra sprinkle of… you guessed it, more rainbow sprinkles! Cover it tightly with plastic wrap or a lid. Freeze for at least 6 hours, or preferably overnight, until it’s firm enough to scoop.
Scoop and Enjoy: Once frozen, let it sit out for 5-10 minutes before scooping. This makes it easier to get those perfect, creamy scoops. Now, dig in and savor every single joyful bite!
Common Mistakes to Avoid
Even though this recipe is practically foolproof, there are a few potholes on the road to rainbow ice cream perfection. Learn from my past (not-so-glorious) moments!
- Warm Cream Syndrome: Trying to whip cream that isn’t absolutely chilled is like trying to convince a cat to take a bath – it’s a struggle, and you’re probably going to lose. Always use **cold cream and a cold bowl**.
- Overmixing the Whipped Cream: Yes, you want stiff peaks, but if you keep going, you’ll separate the fat and end up with lumpy cream (or even butter!). Stop as soon as those peaks hold their shape.
- Deflating the Whipped Cream: When folding in the condensed milk, be gentle! All that air you whipped into the cream is crucial for the light, airy texture of your no-churn ice cream. Don’t be a brute.
- Skimping on Freeze Time: Impatience is a virtue sometimes, but not here. If you pull it out too early, you’ll have a sad, slushy mess instead of firm, scoopable ice cream. **Patience, my friend.**
Alternatives & Substitutions
Feeling adventurous? Or maybe you’re missing an ingredient? No stress! This recipe is super flexible. Think of it as a canvas for your dessert dreams.
- Flavor Frenzy: Swap vanilla extract for almond, peppermint, or even a citrus zest! A little espresso powder stirred into the condensed milk can also create a mocha dream.
- Dairy-Free Delight: For a dairy-free version, use full-fat canned coconut cream (chill it first and scoop out the thick cream, leaving the liquid behind) and a dairy-free sweetened condensed milk alternative. The texture will be slightly different, but still delicious!
- Sprinkle Swap: Not a rainbow fan? Use chocolate sprinkles, edible glitter, or even mini chocolate chips. Or go for a monochromatic sprinkle theme for a more sophisticated vibe (if “sophisticated” and “sprinkles” can ever be in the same sentence).
- Mix-in Mania: Once the base is mixed, gently fold in crushed cookies (Oreos, anyone?), chopped candy bars, or fresh fruit (just be mindful that watery fruits might form ice crystals). Add these right before freezing.
FAQ (Frequently Asked Questions)
Got questions? I probably had them too when I first started! Let’s clear some things up.
- Do I really need heavy cream? Can I use half-and-half? Nope, you absolutely need heavy cream (or heavy whipping cream). Half-and-half or milk just won’t whip up to the consistency we need for that glorious, airy texture. So, don’t try it unless you enjoy disappointment!
- My ice cream is icy, what went wrong? Hmm, sounds like either your cream wasn’t whipped to stiff peaks, or you might have too much water content. Make sure you use **heavy cream**, measure carefully, and don’t let it melt and refreeze.
- How long does this no-churn ice cream last? In an airtight container in the freezer, it’ll happily last for up to 2 weeks. Beyond that, it might start to get a bit icy, but honestly, it’s so good, it probably won’t last that long anyway!
- Can I make this ahead for a party? Absolutely! It’s the perfect make-ahead dessert. Just whip it up, freeze it, and pull it out about 10 minutes before serving. Easy peasy lemon squeezy.
- What kind of sprinkles are best? IMHO, the classic “jimmie” type rainbow sprinkles are the champions here. They keep their shape and color beautifully. Nonpareils are cute but tend to bleed into the ice cream, turning it a slightly muddy color. Still tasty, just less vibrant.
Final Thoughts
See? That wasn’t so scary, was it? You just unleashed your inner dessert wizard and created something truly magnificent. This isn’t just ice cream; it’s a mood, a celebration, a testament to the fact that sometimes the simplest things bring the most joy. So, go on, grab a spoon, or a bigger spoon, and indulge! You’ve earned every single creamy, sprinkle-filled bite. Now go impress someone—or yourself—with your new culinary skills. You’ve earned it!


