Okay, so you’re craving something ridiculously tasty but the thought of spending hours in the kitchen makes you want to curl up and nap, huh? Same, friend, same. Especially when that craving hits for something cold, creamy, and just *good*. Well, buckle up, buttercup, because we’re about to make some magic happen with minimal effort and maximum deliciousness. Your inner lazy chef is going to LOVE this.
Why This Recipe is Awesome
This isn’t just a recipe; it’s a life hack disguised as a dessert. Seriously. It’s so idiot-proof, even my cat could probably whip it up if she had opposable thumbs and a freezer. We’re talking minimal ingredients, minimal effort, and maximum deliciousness. Plus, it uses Greek yogurt, so you can totally pretend it’s healthy. It’s basically a dessert and a health food rolled into one. Your future self (and your taste buds) will thank you. No fancy ice cream maker required, FYI!
Ingredients You’ll Need
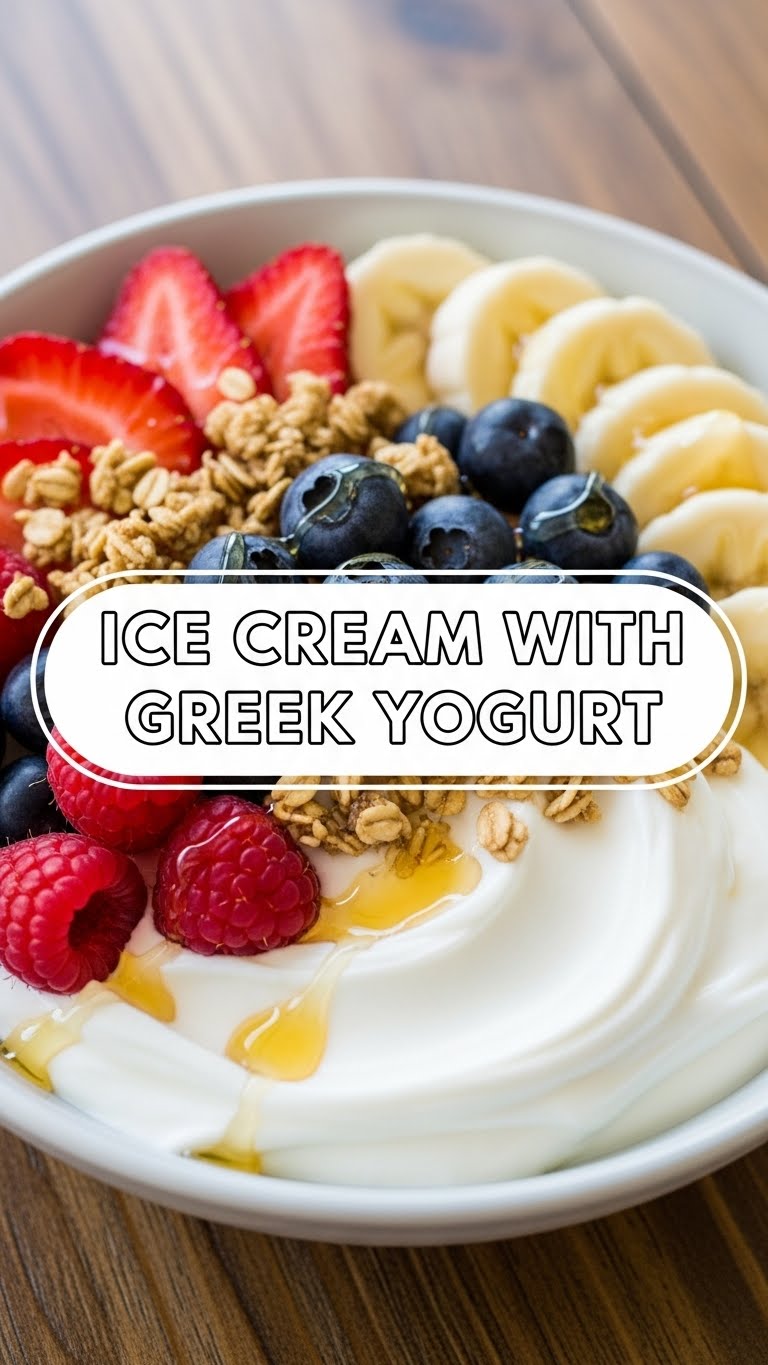
- Full-Fat Plain Greek Yogurt: Don’t even *think* about skimping on fat here. This is where the magic creaminess happens. Go for plain, unsweetened. We’ll add the sweetness later, trust me.
- Sweetener of Choice: Maple syrup, honey, agave, or even good old granulated sugar. Pick your poison. Or, you know, your nectar. Start with a 1/4 cup, but you do you.
- Vanilla Extract: A tiny splash makes *all* the difference. It’s like the secret handshake of delicious desserts. Don’t skip it!
- Optional Mix-ins/Toppings (where the real fun begins!): Fresh berries, mini chocolate chips, a drizzle of fudge, chopped nuts, granola – whatever your heart desires. This is YOUR ice cream, own it!
Step-by-Step Instructions
- Grab a Bowl (a big one!): In a large bowl, dump in your full-fat Greek yogurt. If you’re using a smaller bowl, bless your ambitious heart, but you might make a mess. You’ve been warned.
- Sweeten the Deal: Add your chosen sweetener to the yogurt. Start with about 1/4 cup and taste as you go. You want it sweet enough to feel like a treat, but not so sweet it makes your teeth hurt.
- Vanilla Vibes: Pour in a teaspoon of vanilla extract. Give it a good whisk until everything is super smooth and well combined. No lumpy bits allowed!
- Fold in the Fun (Optional): If you’ve got mix-ins that can handle a freeze (like chocolate chips or chopped nuts), gently fold them in now. Save delicate fruits like berries for topping later, unless you want a sorbet-like consistency (which, hey, also isn’t bad!).
- Freeze It Up: Pour your glorious yogurt mixture into a freezer-safe container. A loaf pan works great, or an airtight container. Cover it up tightly to prevent freezer burn (nobody wants icy bits!).
- Patience, Grasshopper: Pop it in the freezer for at least 4-6 hours, or until firm. For best results, give it an overnight chill.
- Scoop & Savor: When you’re ready to indulge, let it sit out for 5-10 minutes to soften slightly, then scoop, top with anything extra special (like those fresh berries!), and devour.
Common Mistakes to Avoid
- Skimping on Full-Fat Yogurt: Seriously, don’t do it. Low-fat or non-fat yogurt will give you icy, sad “ice cream.” We’re going for creamy, dreamy goodness here.
- Not Tasting As You Go: You are the master of your own sweetness destiny! Taste the yogurt mixture *before* freezing. Adjust sweetener as needed. Once it’s frozen, it’s a done deal.
- Forgetting to Cover It: Freezer burn is the enemy of deliciousness. Cover that container tightly, or you’ll end up with a crystallised mess. Rookie mistake!
- Impatience: Trying to scoop it too soon will result in a soupy mess. Let it freeze properly. Good things come to those who wait (especially good ice cream)!
Alternatives & Substitutions
- Sweeteners: Don’t have maple syrup? Honey, agave, or even granulated sugar (dissolved first) will work just fine. Just adjust to taste.
- Flavor Town: Want to jazz it up? Add a spoonful of cocoa powder for chocolate ice cream, a dash of almond extract, or even a tiny bit of citrus zest. The world is your oyster!
- Mix-ins: The possibilities are endless! Swirl in some peanut butter, add crushed cookies, or mix in some fruit preserves. Get creative!
- Dairy-Free? You *can* try this with a full-fat dairy-free yogurt (like coconut cream-based or cashew-based), but results may vary in terms of creaminess. Pro tip: Add a tiny bit of coconut milk or cream to dairy-free options for extra richness if needed.
FAQ (Frequently Asked Questions)
- Do I *really* need full-fat Greek yogurt? Yes, my friend, **yes**. Unless you’re aiming for a block of ice with yogurt flavor, full-fat is your creamy king.
- Can I use regular yogurt instead of Greek? You *can*, but it’ll be a lot runnier and likely more icy due to higher water content. Stick with Greek for that authentic creamy texture.
- How long does this last in the freezer? If it lasts longer than a week, I’d be genuinely surprised. But technically, in an airtight container, it’s good for about 2-3 weeks.
- My ice cream is too hard! What gives? Did you let it sit out for 5-10 minutes before scooping? Greek yogurt ice cream tends to freeze harder than traditional ice cream. A little thaw time is crucial!
- Can I make this without an ice cream maker? Um, hello? That’s the whole point! No fancy equipment needed. Just a bowl, a spoon, and a freezer.
- Can I add fruit *before* freezing? You can, but softer fruits like berries might make it a bit more like a sorbet and can get really icy. IMO, adding them fresh as a topping gives a better texture contrast.
Final Thoughts
See? I told you this was easy peasy lemon squeezy. You just made delicious, creamy ice cream with minimal fuss, and probably impressed yourself (and anyone else lucky enough to be around). Now go forth and conquer those cravings! You’ve earned every single scoop. Now, if you’ll excuse me, I hear my freezer calling… and it sounds suspiciously like ice cream.


