So, you’ve got a tub of ice cream staring at you, and plain cones just feel… meh? You want to unleash your inner dessert Picasso without, you know, actually painting? Honey, you’ve come to the right place. We’re talking next-level, kid-delighting, adult-approved ice cream cone magic here. Forget boring – we’re going for *epic*.
Why This Recipe is Awesome
Why bother with this “recipe”? Because life’s too short for sad cones, that’s why! This isn’t just about putting ice cream in a cone; it’s about transforming a simple treat into a full-blown culinary adventure for your tiny humans (or, let’s be real, for yourself after a long Tuesday). Plus, it’s virtually impossible to mess up. Seriously, even I, who once burnt water, can do this. It’s creativity on a sugar high, and minimal cleanup – a win-win, IMO.
Ingredients You’ll Need
- Ice Cream: Your favorite flavor (or a few, because choices are good). Don’t limit yourself!
- Ice Cream Cones: Waffle, sugar, cake – whatever your heart desires. Or, you know, what’s left in the back of the pantry.
- Sprinkles: The official glitter of the food world. All colors, all shapes. Go wild.
- Chocolate Chips (or Melts): For dipping and drizzling. Because everything’s better with chocolate. Duh.
- Candy: Gummy bears, mini M&Ms, sour worms, chocolate-covered pretzels, crushed Oreos – the more random, the better. Think of it as a candy buffet on a cone.
- Mini Marshmallows: Fluffy clouds of joy.
- Whipped Cream: Because, presentation. And extra yum.
- Syrups: Chocolate, caramel, strawberry. Drizzle till your heart’s content.
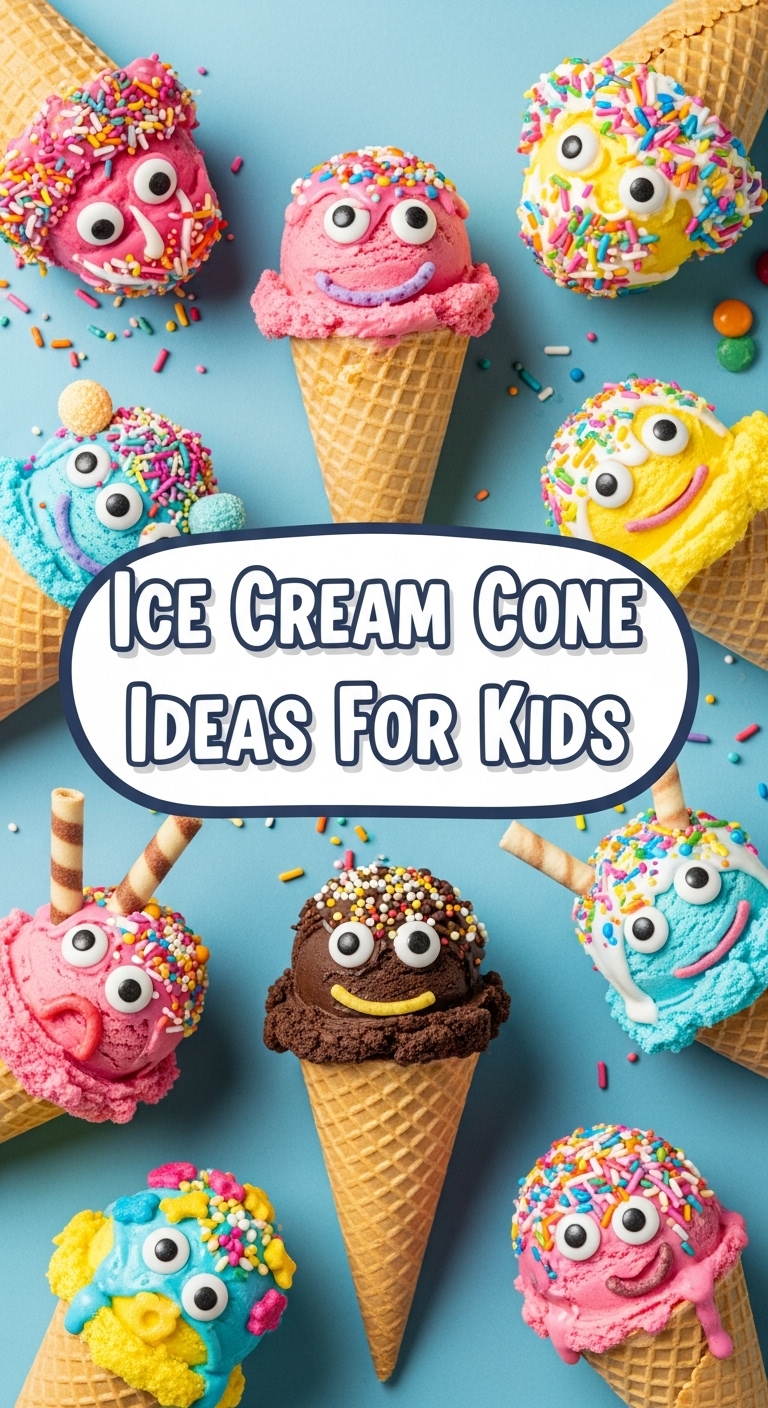
- Optional (but highly recommended for maximum cuteness): Small edible googly eyes for monster cones!
Step-by-Step Instructions
- Set Up Your “Creation Station”: Gather all your glorious ingredients. Arrange them in small bowls. This makes everything accessible and prevents sticky chaos later. Trust me on this one.
- Melt Some Chocolate (If You’re Feeling Fancy): Pop your chocolate chips or melts in a microwave-safe bowl. Heat in 30-second intervals, stirring in between, until smooth. This is your cone glue and drizzle magic!
- Dip & Roll the Cone Rim: This is where the real fun begins! Take an empty cone and dip its rim into the melted chocolate. Immediately roll the chocolate-dipped rim into a bowl of sprinkles, mini marshmallows, or crushed Oreos. Let it set for a minute or two – a quick trip to the fridge helps. This creates the “wow” factor before the ice cream even touches it.
- Scoop Your Ice Cream: Now for the main event! Scoop a generous amount of ice cream into your prepped cone. Don’t be shy. If it’s for kids, maybe start with one scoop to avoid an immediate meltdown (the ice cream, not the kid… usually).
- Decorate Like a Boss: This is where you unleash your inner artist. Press gummy bears onto the sides, stick mini M&Ms into the scoop, drizzle with syrup, top with whipped cream, and then, *more sprinkles*. Add those edible googly eyes if you’re making a monster cone. The goal is maximum visual impact and sugar overload.
- Serve and Devour: Hand over these masterpieces and watch the pure joy (and inevitable stickiness) ensue. Be ready with napkins!
Common Mistakes to Avoid
- Over-scooping too early: Your ice cream will start melting before you’ve even had a chance to get a single sprinkle on it. Scoop *after* you’ve prepped the cone rim. Timing is everything!
- Not having enough napkins: This is a sticky business. Seriously, have a roll of paper towels on standby. Rookie mistake to underestimate the mess.
- Putting the kids in charge of the melted chocolate: Unless you enjoy cleaning chocolate off every surface, maybe handle the dipping yourself. Or at least supervise like a hawk.
- Thinking “just one topping” is enough: You’re missing the point, friend. This is about excess! Embrace the glorious chaos.
- Forgetting to take a picture: These edible works of art deserve their moment in the spotlight before they’re devoured.
Alternatives & Substitutions
- No cones? No problem! Serve your ice cream masterpieces in small bowls and decorate the scoops instead. Still super fun!
- Dairy-free? Absolutely! Grab your favorite plant-based ice cream and all the same toppings. No one misses out on the fun.
- Chocolate adverse? (Who are you? Just kidding!) Use white chocolate melts or even some colorful candy melts for dipping.
- “Healthy” toppings? If you *must*, finely chopped nuts, dried fruit bits, or even fresh berries can join the party. But let’s be real, this isn’t exactly a health food column. 😉
- Different “themes”: Try a “mermaid” cone with blue/green sprinkles, edible pearls, and a gummy fish. Or a “galaxy” cone with dark blue ice cream and star sprinkles. Your imagination is the limit!
FAQ (Frequently Asked Questions)
- How do I prevent the cones from getting soggy? Great question! The key is to decorate the empty cone first and then add the ice cream immediately before serving. Don’t let empty, decorated cones sit around for ages.
- Can I prepare these ahead of time? Partially! You can dip and decorate the rims of the empty cones and let them set. Store them carefully in an airtight container in the fridge for a short while (a few hours). Don’t add ice cream until serving time.
- My melted chocolate is too thick! Help! No worries! Add a tiny, tiny bit of coconut oil (or a neutral oil like vegetable oil) and stir well. A few drops usually does the trick to thin it out.
- What if I don’t have fancy sprinkles? Who cares?! Regular sprinkles are awesome. Or crush some colorful cereal, hard candies, or even some dry fruit loops. Creativity over perfection, always!
- Is this just for kids? Pffft. Is the sky blue? Is pizza delicious? Absolutely not! This is for anyone who appreciates a little joy and isn’t afraid of a sugar rush. Treat yo’self!
- What’s the best way to clean up the sticky mess? Warm, soapy water, my friend. And a good sense of humor. Maybe wear an apron. Or just embrace the stickiness as a sign of a good time!
Final Thoughts
There you have it, folks! Your new favorite (and ridiculously easy) way to level up dessert time. Remember, the goal here is fun, not Michelin stars. So grab those cones, unleash your inner child (or just your actual child), and create some edible masterpieces. Now go impress someone – or yourself – with your glorious, over-the-top ice cream cone skills. You’ve earned that sugar high!


