So you’ve decided regular cupcakes are just too… normal? And ice cream cones are great, but sometimes you want a *bit* more structure and a whole lot less melt-drip disaster? Welcome, friend, to the best of both worlds! We’re diving headfirst (sprinkles first, obviously) into the ridiculously fun, surprisingly simple, and utterly delightful world of Ice Cream Cone Cupcakes. Get ready to impress everyone with minimal effort. You’re welcome.
Why This Recipe is Awesome
Because who needs a plate when your dessert comes in its own edible holder? This recipe is the ultimate party trick that looks fancy but requires zero actual wizardry. Seriously, your friends will think you’re a genius, and you can just nod mysteriously, clutching your cupcake-cone. Plus, less dishwashing since the “wrapper” is edible! **Bonus points for adulting.** It’s pretty much idiot-proof; even I didn’t mess it up, and my kitchen adventures often involve smoke alarms. It’s also wildly customizable, making it perfect for literally any mood or occasion. Win-win-win!
Ingredients You’ll Need
Alright, let’s get down to business. Here’s your shopping list for edible happiness:
- **1 box (approx. 15.25 oz) Cake Mix:** Any flavor that tickles your fancy! Chocolate, vanilla, funfetti – we’re not judging your shortcuts here. Embrace the box, it’s a lifesaver.
- **Ingredients listed on your cake mix box:** Usually eggs, vegetable oil, and water. Follow those instructions like they’re gospel.
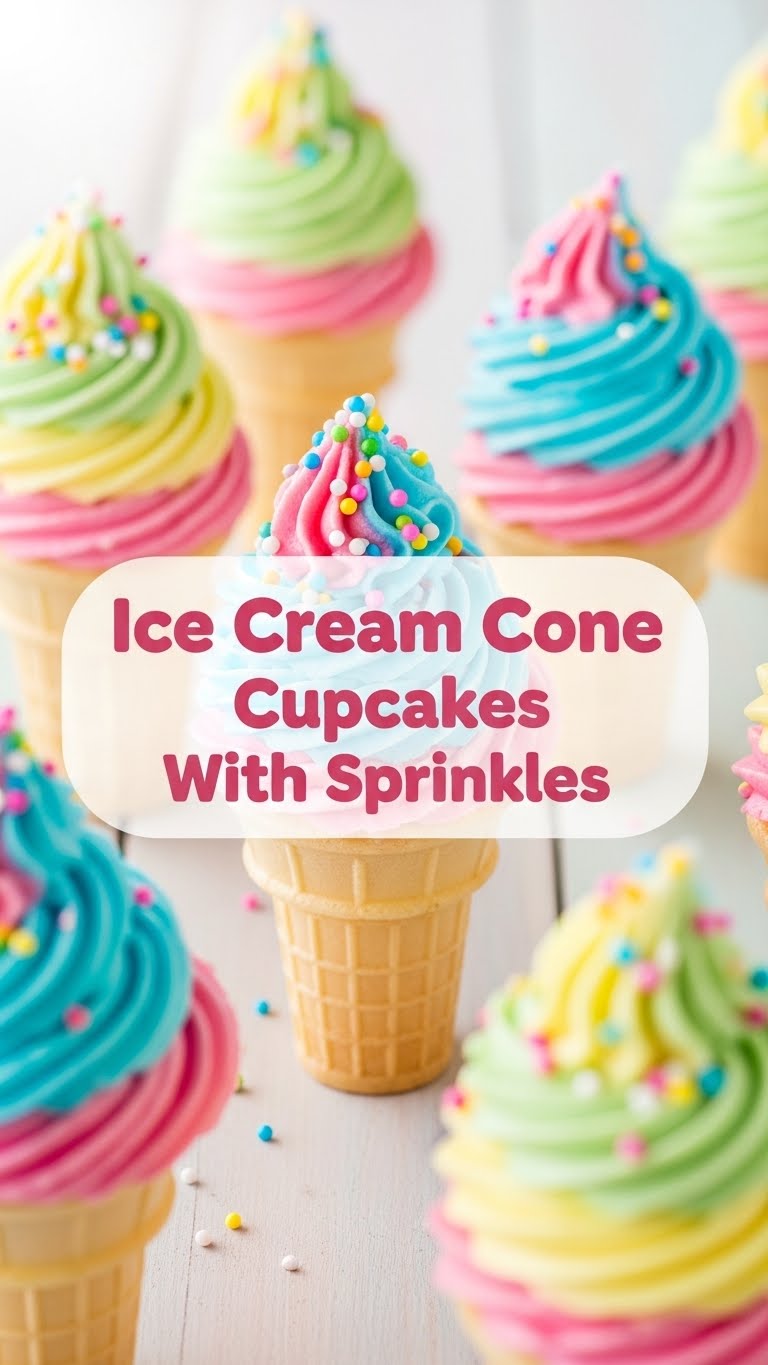
- **24 flat-bottomed ice cream cones:** This is crucial! **No wobbly pointy cones allowed.** Trust me, unless you enjoy a good balancing act, flat bottoms are your best friend here.
- **1-2 tubs (16 oz each) Canned Frosting:** Again, no judgment! Pick your favorite flavor. Vanilla, chocolate, cream cheese – go wild!
- **LOTS of Sprinkles:** This is non-negotiable. The more, the merrier. Make it rain color!
Step-by-Step Instructions
- **Preheat Party Central!** Get that oven preheated to 350°F (175°C). While it’s heating, grab a muffin tin (or two, if you’re making a big batch) and line each cup with a square of aluminum foil. This is your trusty cone holder system!
- **Mix It Up!** In a large bowl, combine your cake mix, eggs, oil, and water according to the package directions. Mix until just combined and smooth. **Don’t overmix!** Nobody likes a tough cupcake.
- **Cone Zone!** Carefully place your flat-bottomed cones into the foil-lined muffin tin cups. Now, using a spoon or an ice cream scoop, fill each cone about **2/3 full** with batter. **This is key!** Overfilling leads to volcanic eruptions of cake, which are tasty but messy.
- **Bake to Perfection!** Pop those beauties into your preheated oven. Bake for approximately 18-22 minutes, or until a wooden skewer or toothpick inserted into the center of a cupcake comes out clean.
- **Cool Down, Buttercup!** Carefully remove the muffin tin from the oven. Let the cones cool in the tin for about 5-10 minutes, then transfer them to a wire rack to cool completely. **Patience, my friend, is a virtue here, especially when frosting is involved.**
- **Frosting Fun!** Once your cone cupcakes are totally cool to the touch, it’s frosting time! Dollop or pipe that glorious canned frosting onto each cupcake.
- **Sprinkle Mania!** This is where the real magic happens. Drench them in sprinkles! Seriously, don’t be shy. Roll the frosted top in a bowl of sprinkles, or just generously shower them. **Obvs, the more sprinkles, the happier everyone will be.**
Common Mistakes to Avoid
- **Overfilling the Cones:** We’ve been over this, but it bears repeating. Too much batter = runaway cake. Aim for 2/3 full.
- **Using Pointy Cones:** Unless you’re into a game of “Will it tip over?” every time you set one down, stick to flat-bottomed cones. Save yourself the stress.
- **Frosting Hot Cupcakes:** You’ll just have sad, melted frosting goo sliding off. **Wait.** I repeat, **WAIT** for them to cool completely. Room temperature or slightly chilled is perfect.
- **Forgetting Sprinkles:** Is it even an ice cream cone cupcake without sprinkles? I think not. It’s a fundamental error and a missed opportunity for joy.
- **Thinking you don’t need to preheat the oven:** Rookie mistake, my friend. Give that oven time to get to temperature for even baking.
Alternatives & Substitutions
Feeling creative? Here are some ideas to jazz things up:
- **Cake Mix Flavor:** Literally any flavor works! Red velvet for a fancy vibe, lemon for a zesty kick, or even chocolate fudge for pure decadence. If you’re feeling *extra* ambitious and want to make cake from scratch, go for it! Just make sure your batter isn’t too runny.
- **Frosting:** Homemade buttercream? Ooh la la, fancy! Whipped cream (stabilized, so it doesn’t melt)? Lighter and fluffy! You could even do a simple glaze if you’re really aiming for minimal fuss.
- **Toppings (Beyond Sprinkles):** Chocolate chips, mini M&Ms, crushed Oreos, chopped nuts (literally, if you want nuts!), shredded coconut, or even a drizzle of caramel or hot fudge. The world is your oyster… or, well, your cupcake cone.
- **Cones:** Waffle cones offer an extra crunch and look super cool, though they can be a bit more fragile and harder to stand up. Just reinforce them with more foil in the muffin tin.
FAQ (Frequently Asked Questions)
Got questions? I probably do too, but here are some common ones that actually make sense:
Can I make these ahead of time? Absolutely! Bake the cupcakes, cool ’em, and then frost on the day you plan to serve. Store the unfrosted cones in an airtight container at room temp for up to 2-3 days. They’ll be fine.
My cones are tipping, help! Did you use pointy cones? Rookie mistake! For flat-bottoms, sometimes a little foil cradle in the muffin tin helps them stand upright, even during baking. If they’re tipping after baking, maybe your table is uneven? Just kidding, mostly.
Can I use homemade cake batter? Yes, you culinary superstar! Just ensure it’s not too runny, or it might soak into the cone too much. A slightly thicker batter works best.
What if I don’t have a muffin tin? You can try balancing them on a crumpled foil sheet on a baking pan. Form little nests for them. It’s a bit of a high-wire act, but totally doable. Proceed with caution!
My sprinkles fell off! What gives? Did you wait for the frosting to set a bit? Or maybe your sprinkles just have commitment issues. Try pressing them gently into the frosting, or put a very fresh layer of frosting right before applying them. A slightly tacky frosting holds them best.
Are these suitable for a kids’ party? Um, is the sky blue? Yes! They’re basically a party on a stick… or in a cone. Kids (and adults!) absolutely love ’em because they’re fun to eat and just generally delightful.
Can I freeze these? You can freeze the unfrosted cupcakes in their cones! Wrap them individually and store in an airtight container for up to a month. Thaw at room temperature before frosting.
Final Thoughts
And there you have it! Your ticket to dessert glory, minimal fuss required. These Ice Cream Cone Cupcakes are proof that you can have fun, delicious treats without spending all day in the kitchen. They’re a guaranteed crowd-pleaser, a mood-booster, and frankly, just plain cute. Now go impress someone—or yourself—with your new culinary skills. You’ve earned it! Or, just eat them all yourself, no judgment here. **Happy baking (and eating)!**


