So, you’ve scrolled through enough food porn to realize your freezer is tragically empty, and your sweet tooth is staging a full-blown rebellion? Been there, my friend. And guess what? We’re about to dive into making vegan ice cream that’s so ridiculously easy and delicious, you’ll wonder if it’s even legal. All thanks to some magical bean juice. Yep, aquafaba!
Why This Recipe is Awesome
Okay, let’s be real. Most ice cream recipes involve churning, specialized equipment, or a degree in advanced dairy-ology. Not this one, buttercup! This recipe is **no-churn**, meaning your fancy ice cream maker can stay in the back of the cupboard gathering dust. It’s also completely vegan, so your plant-based pals (or just your ethical conscience) will be super happy.
Plus, we’re using aquafaba – that liquid gold from a can of chickpeas – turning what some might call ‘waste’ into a culinary masterpiece. It’s practically a magic trick, and **it’s practically idiot-proof**, even *I* didn’t mess it up, and my kitchen skills peak at toast. BTW, it tastes amazing.
Ingredients You’ll Need
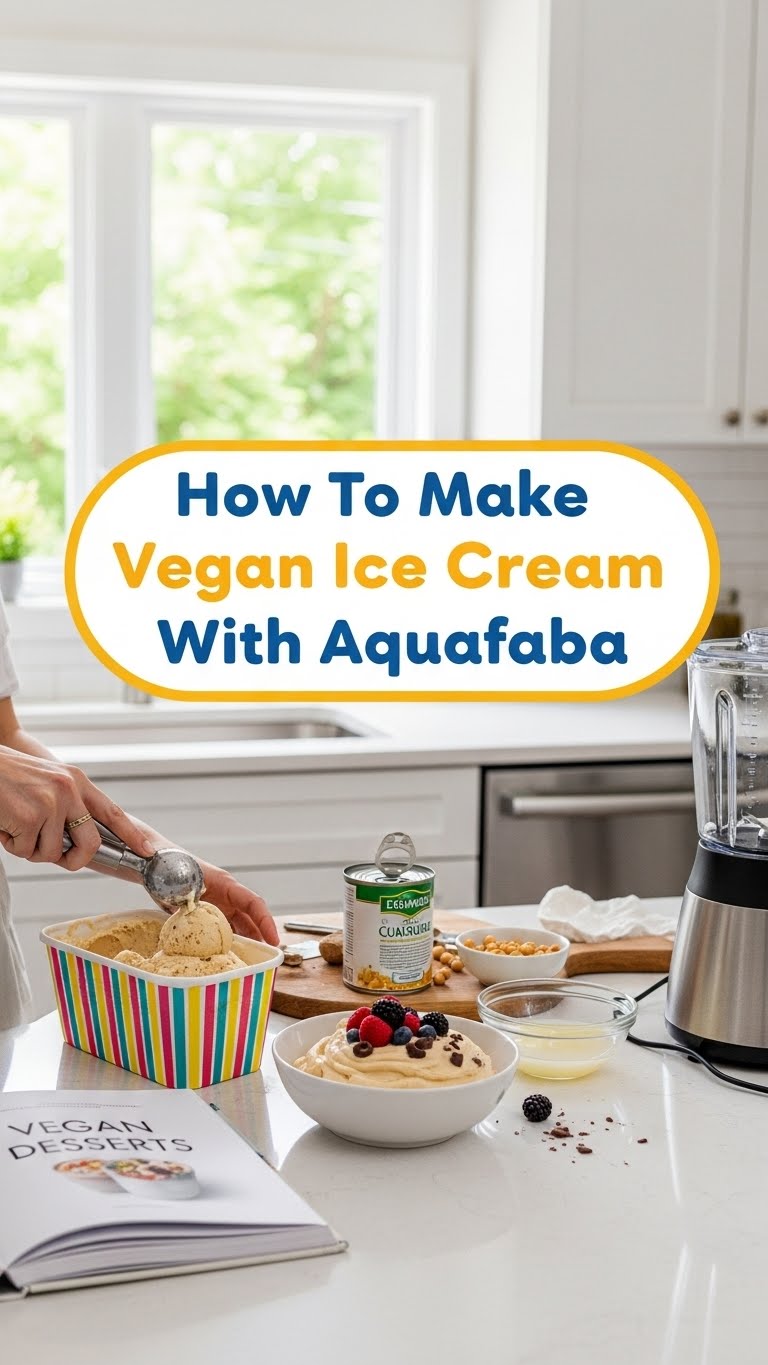
- Aquafaba: About ½ cup (120ml) from a can of chickpeas. This is the star of our show! Don’t worry, the chickpeas can be used for hummus later—no waste!
- Full-Fat Canned Coconut Milk: One can (about 13.5 oz / 400ml), chilled overnight in the fridge. This is crucial for creaminess, unless you like icy rocks. **Don’t shake it** before opening!
- Sweetener: ½ cup (120ml) maple syrup or agave nectar. Adjust to your sweet tooth’s demands, but don’t go too wild; we’re making ice cream, not a sugar cube.
- Vanilla Extract: 1-2 teaspoons. The secret weapon for making everything taste better. Or just because it smells nice.
- Optional Add-ins: Chocolate chips, fresh fruit, chopped nuts, sprinkles, a dollop of peanut butter—whatever your heart desires. This is where you get to be an artist (or just a kid).
Step-by-Step Instructions
- Prep Your Aquafaba: Carefully drain a can of chickpeas, reserving the liquid (that’s our aquafaba!). Make sure there are no chickpea bits floating around.
- Whip It Good: Pour the aquafaba into a super clean, grease-free mixing bowl. Using an electric mixer (or a whisk and a lot of arm strength), beat the aquafaba on high speed for about 5-10 minutes until it forms **stiff, glossy peaks**. It should look like meringue!
- Scoop the Creamy Goodness: Open your chilled can of coconut milk *without shaking it*. The solid, thick cream should be separated at the top. Gently scoop out just the thick cream into another bowl, leaving the watery liquid behind (you can save this for smoothies!).
- Combine the Wet Magic: Add the scooped coconut cream, maple syrup (or agave), and vanilla extract to a blender or food processor. Blend until completely smooth and creamy.
- Gently Fold Them In: Now, here’s the delicate part. Pour the blended coconut cream mixture into the bowl with your whipped aquafaba. Using a spatula, **gently fold** the mixtures together until just combined. You want to keep as much air in there as possible, so no aggressive stirring, okay?
- Time for Fun Add-ins: If you’re adding chocolate chips, nuts, or fruit, now’s the time! Gently fold them into the mixture.
- Freeze Your Masterpiece: Pour the mixture into a freezer-safe container. An airtight container works best to prevent freezer burn. Smooth the top with your spatula.
- Patience, Grasshopper: Pop it in the freezer for at least 6-8 hours, or preferably overnight, until it’s firm enough to scoop.
- Serve and Devour: Let it sit out for 5-10 minutes to soften slightly before scooping. Then, congratulate yourself and enjoy your homemade, creamy vegan ice cream!
Common Mistakes to Avoid
- Not Chilling Your Coconut Milk: A rookie mistake! If your coconut milk isn’t super cold, you won’t get that thick cream, and your ice cream will be sad and watery. **Chill it overnight!**
- Under-Whipping Aquafaba: You need those **stiff peaks**, my friend. If it’s still runny, your ice cream won’t be airy and light; it’ll be dense like a brick. Keep whipping!
- Over-Mixing: Once the aquafaba is in, **fold gently**. Don’t aggressively stir everything to death; you’ll deflate all that lovely air we just whipped in. Think gentle waves, not a tsunami.
- Using Light Coconut Milk: Just… don’t. We need the full-fat stuff for creaminess. Light coconut milk will lead to icy disappointment, trust me.
- Greasy Bowls: Even a tiny bit of oil or grease on your mixing bowl or whisk can prevent aquafaba from whipping up properly. **Ensure everything is sparkling clean!**
Alternatives & Substitutions
This recipe is super flexible, so feel free to play around!
- Sweetener Swap: Maple syrup is my go-to for that rich flavor, but feel free to use agave nectar or even a blend of stevia (be careful, that stuff’s potent!) or date syrup. Just taste as you go!
- Flavor Variations:
- For chocolate lovers: Add 2-3 tablespoons of cocoa powder to the coconut cream mixture before blending.
- Fruity kick: Blend in ½ cup of fruit puree (like berries or mango) with the coconut cream for a vibrant flavor.
- Coffee fiend? Add a tablespoon of instant coffee powder or espresso powder to the coconut mixture.
- No Aquafaba? Okay, this *is* an aquafaba recipe, but if you’re in a pinch, you *could* try a different thickener like a tiny bit of xanthan gum (like ¼ tsp) to help with texture. However, it won’t give you the same airy lift, IMO. It would essentially become a different recipe, but hey, you do you!
FAQ (Frequently Asked Questions)
Got questions? I’ve got (casual) answers!
- Why aquafaba? Is it really that magical? Yes! It whips up just like egg whites, giving our ice cream a lighter, airier texture without any animal products. It’s truly a game-changer for vegan desserts, aka bean juice magic!
- Can I use coconut milk from a carton? Absolutely not, my friend! Stick to the canned stuff, specifically the full-fat variety. The carton version is too watery and won’t give you the necessary creaminess for ice cream. Learn from my past mistakes!
- How long does this homemade ice cream last in the freezer? It’s best eaten within 1-2 weeks. After that, it might start getting a bit icy. But honestly, who are we kidding? It’s so good it won’t last that long.
- Do I need an ice cream maker for this recipe? Nope! That’s the beauty of this **no-churn** recipe! Your freezer is all the equipment you need. Save that counter space for more snacks.
- My aquafaba isn’t whipping! Help! Make sure your bowl and whisk are super clean and grease-free. Even a tiny bit of oil can prevent it from whipping up. Also, ensure your aquafaba is cold. Patience is key!
- Can I add alcohol to my ice cream? Fun fact: A little bit of liqueur (like 1-2 tablespoons) can actually help keep the ice cream softer and less icy! Just don’t overdo it, unless you want an alcoholic smoothie that won’t freeze properly.
Final Thoughts
See? Who said making delicious, creamy vegan ice cream had to be complicated? Not us! You’ve just transformed humble bean juice into a dreamy dessert, and that, my friend, is a superpower. Now go impress someone—or yourself—with your new culinary skills. You’ve earned every single delicious scoop! And maybe save a little for me?


