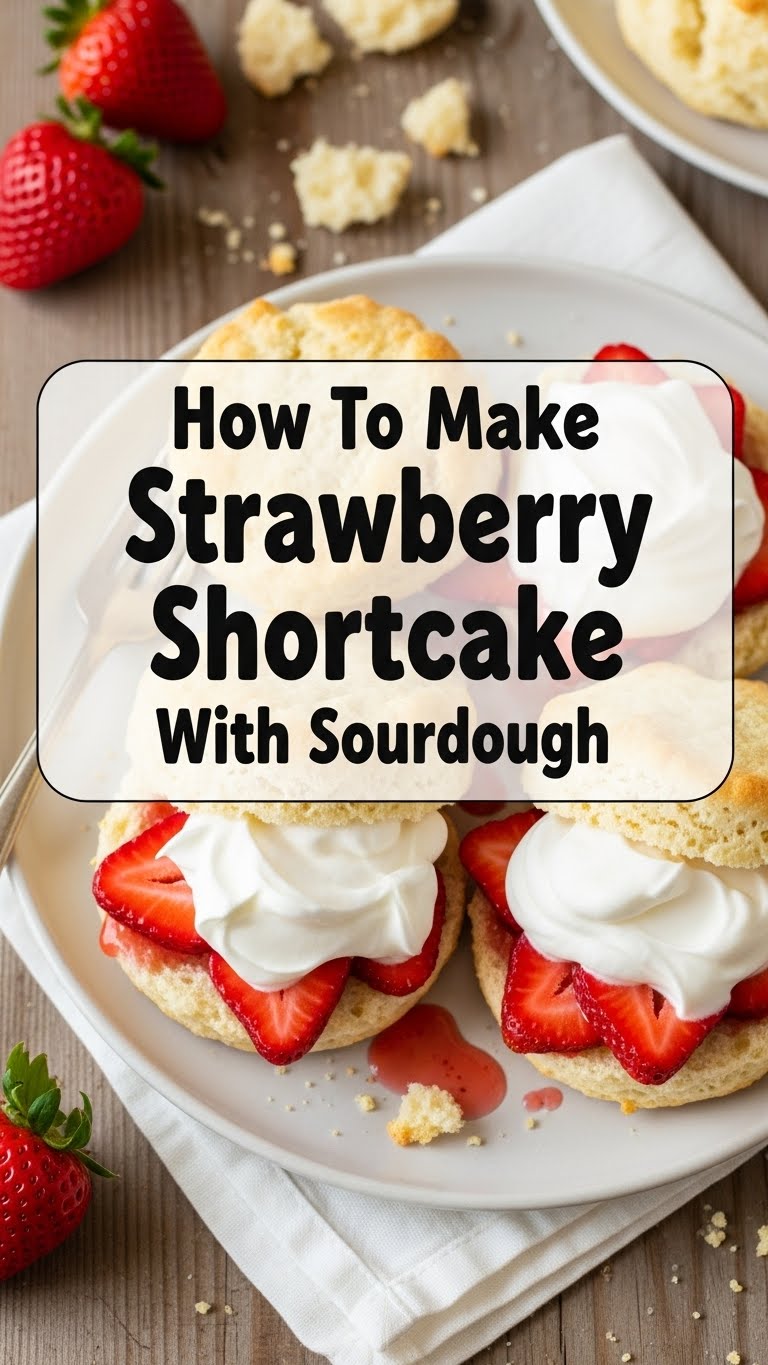
So, you’re staring at your sourdough discard, wondering if it’s got more potential than just pancakes or, dare I say, the compost bin, huh? And simultaneously, you’re craving something ridiculously delicious, comforting, and just a *little* bit fancy without actually trying too hard? My friend, you’ve come to the right place. We’re about to make Strawberry Shortcake, but we’re giving it a secret weapon: that tangy sourdough magic. Get ready to impress everyone (mostly yourself) with minimal effort and maximum deliciousness.
Why This Recipe is Awesome
Look, I’m not gonna lie, I was skeptical too. Sourdough in a shortcake? Sounds like something a hipster baker would charge way too much for. But hear me out: that sourdough discard (the sleepy stuff you usually don’t know what to do with) adds this incredible, subtle tang and a tenderness to the shortcakes that will make you rethink everything you thought you knew about baking. It’s like regular shortcake went on a fancy European vacation and came back with an irresistible je ne sais quoi. Plus, it’s pretty much **idiot-proof**. If I can do it without burning down the kitchen, you absolutely can.
Ingredients You’ll Need
Gather your troops, folks! Here’s what you need for this culinary adventure:
- **For the Shortcakes:**
- **2 cups All-Purpose Flour:** The trusty backbone of our shortcakes.
- **1/4 cup Granulated Sugar:** Just enough sweetness to play nice with the strawberries.
- **1 tablespoon Baking Powder:** Our leavening MVP, making those cakes rise like they’ve got somewhere important to be.
- **1/2 teaspoon Salt:** Don’t skip this! It makes everything taste better.
- **1/2 cup (1 stick) Unsalted Butter, cold and cubed:** Cold butter = flaky layers. It’s science!
- **1 cup Sourdough Discard:** The secret sauce! (Preferably unfed, straight from the fridge.)
- **1/4 cup Whole Milk (or buttermilk if you’re feeling fancy):** Just to bring it all together.
- **For the Strawberries:**
- **1 lb Fresh Strawberries, hulled and sliced:** The star of the show. Get the good ones!
- **2 tablespoons Granulated Sugar (or more, to taste):** Sweeten those berries up.
- **For the Whipped Cream:**
- **1 pint Heavy Whipping Cream, cold:** Get ready for peak fluffiness.
- **2-3 tablespoons Powdered Sugar:** To sweeten, of course.
- **1 teaspoon Vanilla Extract:** Adds that “oh-so-good” aroma.
Step-by-Step Instructions
- **Prep Like a Pro:** Preheat your oven to 400°F (200°C). Line a baking sheet with parchment paper. Trust me, it makes cleanup a breeze.
- **Dry Mix It Up:** In a large bowl, whisk together the flour, sugar, baking powder, and salt. Make sure it’s all nicely combined, no lumps allowed.
- **Butter Up (Literally):** Add your cold, cubed butter to the dry ingredients. Use a pastry blender, your fingertips, or even a food processor (pulse just a few times!) to cut the butter into the flour until it resembles coarse crumbs, with some pea-sized pieces remaining. **Don’t overmix!**
- **Wet Ingredients Join the Party:** In a separate small bowl, whisk together the sourdough discard and milk. Pour this wet mixture into the dry ingredients. Stir gently with a spoon or spatula until just combined. The dough will be a bit shaggy, and that’s exactly what we want.
- **Form and Cut:** Turn the dough out onto a lightly floured surface. Gently pat it into a disc about 1-inch thick. You can use a 2.5-inch round cutter (or the rim of a glass!) to cut out about 6-8 shortcakes. Reroll scraps gently, if necessary, but try to handle the dough as little as possible.
- **Bake to Perfection:** Place the shortcakes on your prepared baking sheet. Bake for 15-18 minutes, or until they’re golden brown and puffed up. Let them cool on a wire rack while you prepare the toppings.
- **Sweeten the Strawberries:** While the shortcakes are baking, gently toss the sliced strawberries with 2 tablespoons of sugar in a medium bowl. Let them sit and macerate for about 10-15 minutes; they’ll get juicy and even more delicious.
- **Whip It Real Good:** In a chilled bowl, beat the cold heavy cream with powdered sugar and vanilla extract until stiff peaks form. **Don’t overbeat, or you’ll have butter!**
- **Assemble and Devour:** Once the shortcakes are cool enough to handle, slice each one in half horizontally. Spoon a generous dollop of strawberries onto the bottom half, top with a cloud of whipped cream, and then crown with the other half of the shortcake. Repeat until you’ve run out of shortcakes (or self-control).
Common Mistakes to Avoid
- **Overworking the Dough:** This is the cardinal sin of shortcake! Too much handling makes them tough. Treat your dough gently, like a sleeping baby.
- **Warm Butter:** Seriously, don’t use soft butter. Cold butter creates those lovely pockets of steam that make your shortcakes flaky. **Cold, cold, cold!**
- **Not Preheating the Oven:** Rookie mistake! A hot oven ensures a quick rise and a beautiful golden crust. Give it time to get to temp.
- **Cutting Strawberries Too Early:** If you cut and sugar them too far in advance, they can get *really* soggy. Do it while the shortcakes are baking for perfect juiciness.
Alternatives & Substitutions
Feeling adventurous or missing an ingredient? No stress, my friend!
- **Other Fruits:** Not a strawberry fan? Or maybe it’s peach season? Go wild! Blueberries, raspberries, peaches, or a mixed berry medley would be divine. Just macerate them with a little sugar, same as the strawberries.
- **Dairy-Free:** You can swap the milk for a non-dairy alternative like almond or oat milk, and use a good quality plant-based butter (just make sure it’s cold!). For the cream, look for coconut cream (the thick stuff from a can, chilled overnight) and whip it up!
- **Whole Wheat Flour:** Want to add a bit of nuttiness? Replace up to half of the all-purpose flour with whole wheat. The texture will be a bit denser, but still delicious.
- **Sweetener Swap:** Honey or maple syrup can be used for the berries, but sugar dissolves and creates that lovely juice more effectively. For the whipped cream, feel free to adjust powdered sugar to your liking!
FAQ (Frequently Asked Questions)
Got questions? I’ve got answers (and maybe a little sass).
**Q: Can I use active sourdough starter instead of discard?**
A: Well, technically yes, but why? Discard is ideal here because it contributes flavor and tenderness without the extra leavening power (which we get from baking powder). Active starter might make them rise differently or taste a bit too sour, IMO. Stick to the sleepy stuff!
**Q: My shortcakes didn’t rise much. What gives?**
A: Did you check your baking powder? It might be old and lazy. Or maybe you overworked the dough? Remember, gentle hands make happy shortcakes.
**Q: Can I make the shortcakes ahead of time?**
A: Absolutely! Bake them, let them cool completely, and store them in an airtight container at room temperature for up to 2 days. Reheat briefly in the oven or microwave before serving for that “freshly baked” feel.
**Q: How long do leftovers last?**
A: If assembled, best eaten immediately to avoid soggy shortcakes. If you’re talking about unadorned shortcakes, see above. Whipped cream and berries are definitely “day of” stars.
**Q: What if I don’t have a round cutter?**
A: No biggie! Use a sharp knife to cut the dough into squares or triangles. Rustic shortcakes are totally a thing, and honestly, they’re often more charming.
**Q: Can I use frozen strawberries?**
A: You can, but they tend to release a lot more liquid and can be a bit mushier. If you do, thaw them completely, drain any excess liquid, and then proceed with sugaring. Fresh is always best for texture and flavor here.
**Q: Margarine instead of butter?**
A: You could, but… why? Butter gives the shortcakes incredible flavor and flakiness that margarine just can’t replicate. Treat yourself. You deserve real butter.
Final Thoughts
So there you have it! A ridiculously simple, incredibly delicious Strawberry Shortcake recipe with a secret sourdough twist that’ll make everyone wonder if you secretly went to culinary school. Go on, give it a whirl! Don’t be afraid to get a little flour on your nose. Now go impress someone—or yourself—with your new culinary skills. You’ve earned it!

