So you’re craving something tasty but too lazy to spend forever in the kitchen, huh? Same. But what if I told you we could whip up something ridiculously delicious, looks fancy, but is actually so easy even your cat could probably do it? (Don’t let them, though. Hygiene, people.) We’re talking about the ultimate dessert mashup: Ice Cream Sandwiches… made with actual cake. Mind blown yet?
Why This Recipe is Awesome
Okay, let’s be real. You’re busy. You have Netflix to watch, memes to scroll through, and maybe, *just maybe*, some adulting to do. This recipe respects your time. It’s idiot-proof (trust me, I’ve tested it). It uses store-bought shortcuts like a boss, meaning less baking, more eating. Plus, it just *looks* impressive. Guests will think you’re some kind of culinary wizard, and you’ll just smile knowingly, remembering you spent more time deciding what ice cream flavor to use than actually making it. It’s like a dessert cheat code, but legal and delicious.
Ingredients You’ll Need
- Box of Cake Mix (any flavor you love): Chocolate? Vanilla? Funfetti? Your choice, champ! Just make sure it’s, y’know, *cake* mix.
- Ingredients listed on your cake mix box: Usually eggs, oil, and water. Follow those instructions like gospel. We’re not reinventing the wheel here.
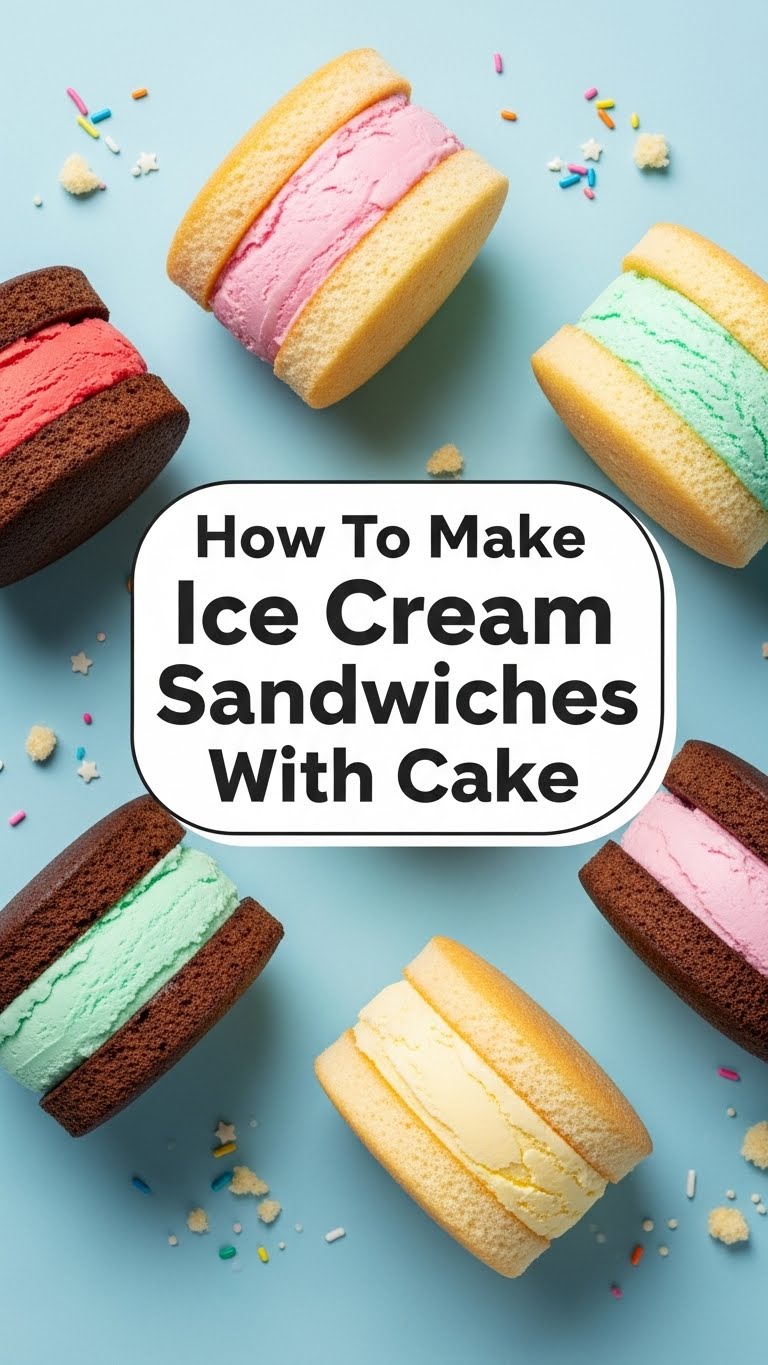
- Two containers (1.5-quart each) of your favorite ice cream: This is where the real fun begins. Pick two different flavors for a party in your mouth, or double down on one for pure bliss. Softened just enough to scoop, but not a melted puddle.
- Optional toppings (sprinkles, chocolate chips, crushed cookies, etc.): Because why be basic when you can be extra?
Step-by-Step Instructions
- Bake Your Cake: Prepare the cake mix according to package directions. Divide the batter evenly between two 9×13 inch baking pans lined with parchment paper. Bake until golden and a toothpick comes out clean. Let them cool completely. Do not skip the cooling! Seriously, impatience leads to sadness here.
- Prep for Sandwiching: Once cool, gently remove the cakes from their pans and place them on large cutting boards or baking sheets. Trim the edges to make them neat, if you’re feeling fancy. This just makes for prettier sandwiches.
- Spread the Love: Take one cooled cake layer. Evenly spread one container of slightly softened ice cream across the entire surface. Work relatively quickly here so the ice cream doesn’t melt too much.
- Layer Up: Carefully place the second cooled cake layer directly on top of the ice cream. Gently press down to create an even layer.
- Second Scoop (of a different flavor, maybe?): Now, spread the second container of softened ice cream evenly over the top of the second cake layer. Oh yeah, we’re going for a double decker!
- Chill Out: Cover the entire glorious assembly with plastic wrap and freeze for at least 4-6 hours, or even better, overnight. This is crucial for the sandwiches to hold their shape.
- Slice & Serve: Once completely frozen, remove from the freezer. Use a sharp, warm knife (run it under hot water and wipe dry) to slice the cake into individual ice cream sandwiches. If desired, roll the exposed ice cream edges in your chosen toppings. Serve immediately and bask in the glory!
Common Mistakes to Avoid
- Not cooling your cake completely: This is like trying to build a sandcastle during high tide. It just won’t work, and you’ll end up with a melted, cakey mess. Patience, young padawan!
- Using rock-hard ice cream: Trying to spread frozen concrete will tear your delicate cake. Let it soften for 5-10 minutes on the counter first.
- Using *too* soft ice cream: Conversely, if it’s practically soup, your layers will slide right off each other. It should be spreadable, not pourable.
- Not freezing long enough: You want solid, holdable sandwiches, not squishy, melty abominations. Overnight is best, trust me on this.
- Thinking you need to be a pastry chef: Nope! This recipe is about fun, not perfection. Embrace the delicious chaos if a corner isn’t perfectly straight.
Alternatives & Substitutions
- Cake Flavors: Seriously, go wild! Red velvet with cream cheese ice cream? Chocolate cake with mint chip? Lemon cake with raspberry sorbet? The world is your oyster… or, well, your cake.
- Ice Cream Flavors: This is where you can *really* customize. Think about complementary flavors. Strawberry ice cream with vanilla cake? Cookies ‘n’ cream with chocolate cake? You can even use sorbet for a lighter, fruitier vibe. IMO, mixing a classic vanilla with something a bit wilder, like a salted caramel or pistachio, is a winner.
- Homemade Cake/Brownies: Feeling ambitious? Absolutely use your favorite homemade cake recipe or even brownies for the layers. Just make sure they’re sturdy enough to hold the ice cream.
- Toppings: The sky’s the limit! Chopped nuts, sprinkles (the good kind, not the waxy ones), mini chocolate chips, crushed Oreos, toasted coconut… get creative!
FAQ (Frequently Asked Questions)
- “Can I use store-bought pre-made cake layers?” Heck yes! That’s an even bigger shortcut if you can find them. Just make sure they’re sturdy enough.
- “How do I prevent the cake from getting soggy?” The freezing process helps a lot! The cold essentially “sets” everything. Also, make sure your ice cream isn’t fully melted when you spread it.
- “Can I make these ahead of time?” Oh honey, you *should* make these ahead of time! They need a good long freeze. They’ll keep well in the freezer for about 1-2 weeks if wrapped tightly.
- “What if I don’t have two 9×13 pans?” You can bake one cake at a time and then slice it in half horizontally after it cools, or use two slightly smaller pans and adjust baking time. Just ensure you have two similarly sized layers.
- “Is there a dairy-free option?” Absolutely! Look for dairy-free cake mixes and your favorite non-dairy ice creams (almond milk, coconut milk, oat milk based).
- “My knife is sticking when I cut them. Help!” Warm it up under hot water, wipe it dry, and cut quickly. Re-warm it between cuts if needed. Don’t saw, press down firmly.
Final Thoughts
See? I told you it was easy! Now you’ve got yourself some seriously impressive, incredibly delicious ice cream sandwiches that will make everyone wonder if you secretly went to culinary school. Go on, pat yourself on the back. You’ve earned it. Now go impress someone—or yourself—with your new culinary skills. Maybe make a second batch for “testing purposes” later. You know, just to be sure. Enjoy, friend!


