Ever wanted to make your cake look like it just sashayed out of a fancy patisserie, but without, you know, the actual effort of being a pastry chef? Same. Enter chocolate ganache, my friend. It’s the little black dress of dessert toppings – always elegant, always impressive, and surprisingly easy to pull off. Consider this your cheat sheet to looking like a culinary wizard!
Why This Recipe is Awesome
Okay, so why is this recipe a total game-changer? First off, it’s ridiculously simple. Like, ‘can-do-it-with-one-eye-closed-while-binge-watching-your-favorite-show’ simple. Secondly, it elevates any dessert. A basic chocolate cake? Ganache makes it gourmet. A plain cupcake? Bam! Instant upgrade. Plus, it just *looks* fancy, making everyone think you’re some kind of kitchen genius. And who doesn’t want that?
Ingredients You’ll Need
- Good Quality Chocolate: Seriously, don’t skimp here. This is the star of the show! Think chocolate chips (semi-sweet or dark are my faves, around 8-10 ounces) or a nice bar chopped up. Your taste buds will thank you.
- Heavy Cream: The magic potion that makes it silky smooth. You’ll need about 1 cup. Don’t even *think* about using milk, IMO. Trust me on this one.
- Unsalted Butter (Optional, but recommended): A tiny knob (about 1 tablespoon) adds a glorious shine and extra richness. We’re going for decadence, right?
- A Pinch of Salt (Optional): Just a tiny bit (like 1/8 teaspoon) to make the chocolate flavor pop. It’s like a secret handshake for your taste buds.
Step-by-Step Instructions
- Chop the Chocolate: If you’re using a chocolate bar, chop it into small, uniform pieces. If chips, you’re already winning! Place your chocolate into a heat-proof bowl. Choose a bowl that can handle some serious warmth.
- Heat the Cream: Pour the heavy cream into a small saucepan. Heat it over medium heat until it just begins to simmer around the edges. You’ll see tiny bubbles forming. Do not let it boil vigorously! We’re not making soup here, just warming it up.
- Pour & Wait: Immediately pour the hot cream over the chopped chocolate in the bowl. This is the crucial moment! Resist the urge to stir right away. Just let it sit there, covered (you can use a plate or plastic wrap), for about 5 minutes. This allows the hot cream to melt the chocolate perfectly.
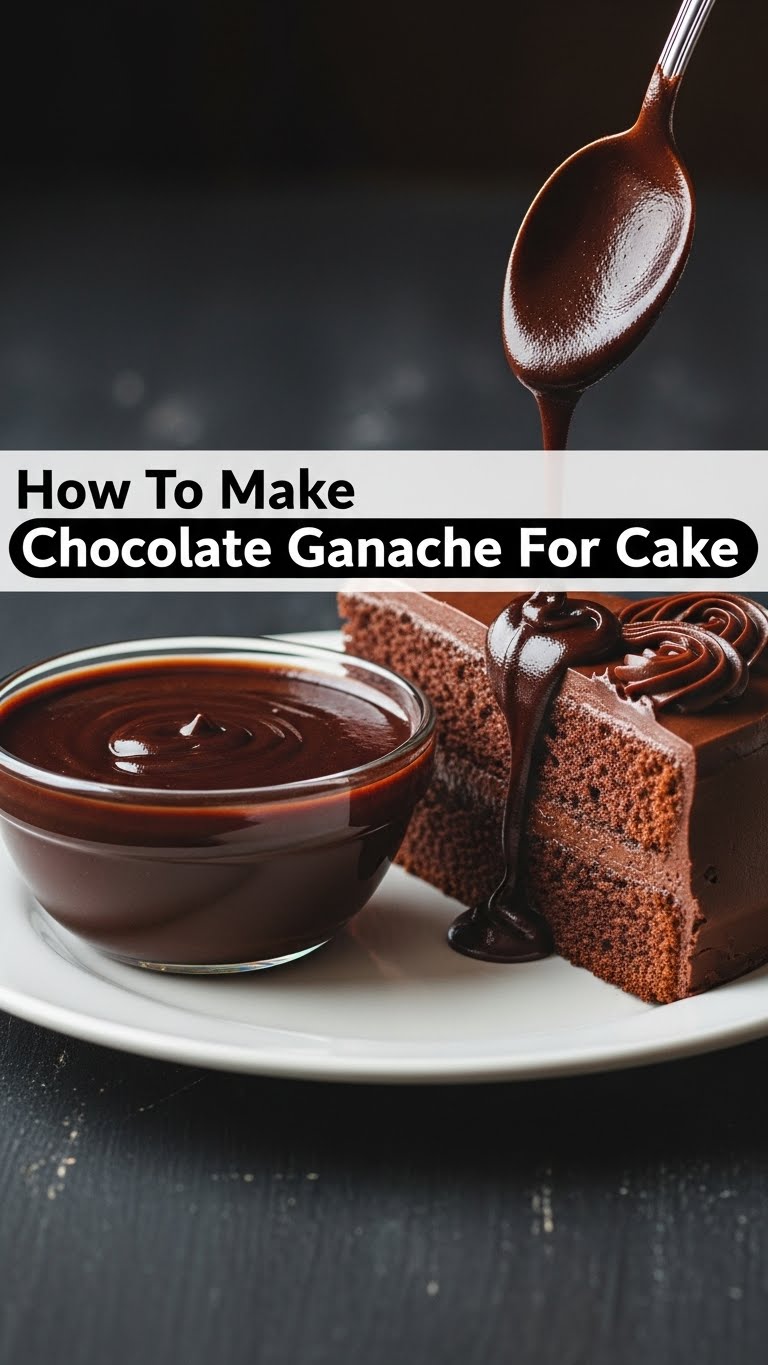
- Stir the Magic: After 5 minutes, uncover and start stirring gently from the center outwards with a whisk or spatula. It will look like a chocolate-cream mess at first, but keep stirring. Soon, it will transform into a glossy, smooth, irresistible river of chocolatey goodness.
- Add Butter (If Using): If you’re adding butter, stir it in now until fully melted and incorporated. See that shine? That’s the butter doing its thing, making your ganache extra luxurious.
- Cool Down: Let your ganache cool slightly at room temperature. It will thicken as it cools. For pouring over a cake, use it warm; for spreading, let it cool more until it’s the consistency of peanut butter. Divine!
Common Mistakes to Avoid
- Scorching the Cream: Don’t walk away from that saucepan! Burnt cream tastes awful, and your ganache will suffer. Keep an eye on it!
- Stirring Too Soon: Patience, young padawan! Giving the chocolate time to melt properly is key. Stirring too early can make it seize up or become grainy.
- Using Low-Quality Chocolate: I know, I know, I already said it. But it’s worth repeating! Garbage in, garbage out, my friend. Your ganache will only be as good as your chocolate.
- Over-Whisking: Once it’s smooth, stop! Excessive whisking can incorporate too much air, which isn’t ideal for a smooth, pourable ganache.
Alternatives & Substitutions
- White Chocolate Ganache: Craving something lighter? Use white chocolate! Just be aware that white chocolate can be a bit finicky and is more prone to seizing, so go *extra* gentle with the heat.
- Flavored Ganache: Want to get fancy? Infuse your cream with things like espresso powder, orange zest, a dash of liqueur (like Grand Marnier or Kahlúa), or even a few drops of peppermint extract (hello, holiday treats!). Add these to the cream while it’s heating.
- Vegan Version: Swap out the heavy cream for full-fat coconut cream (the thick stuff from the top of a can of coconut milk) and use dairy-free chocolate. Works like a charm!
FAQ (Frequently Asked Questions)
- My ganache looks grainy/separated! What happened? Uh oh. You probably stirred too soon or the chocolate got too hot too fast. Try adding a tablespoon of *lukewarm* water and whisking very gently. Sometimes it can be rescued!
- Can I use milk instead of heavy cream? Technically, you *could*, but you’d get a much thinner, less rich ganache that won’t set as well. Why compromise on deliciousness? Stick to heavy cream!
- How long does ganache last? If stored in an airtight container in the fridge, it’s generally good for about 1-2 weeks. Reheat gently in a double boiler or microwave (in short bursts) to bring it back to life.
- Can I make it thicker or thinner? Absolutely! For a thicker ganache (like for truffles or piping), use a higher ratio of chocolate to cream (e.g., 2:1 chocolate to cream). For a thinner ganache (for drizzling), use a 1:1 ratio or slightly less chocolate.
- Why is my ganache not shiny? This could be due to not adding butter, or your chocolate wasn’t good quality, or it cooled too quickly. A tiny bit of butter at the end really helps with that glorious sheen!
Final Thoughts
There you have it, folks! Your new secret weapon for turning any cake into a showstopper. Seriously, this ganache recipe is a game-changer. It’s easy, it’s elegant, and it screams ‘I know what I’m doing in the kitchen!’ even if you just learned it five minutes ago. Now go impress someone—or yourself—with your new culinary skills. You’ve earned it (and probably a slice of that cake!). Happy caking!


