So, your sweet tooth is doing a happy dance, but your motivation to actually *bake* something is still in bed, hitting snooze? Yep, been there, bought the T-shirt. Good news: we’re diving into the glorious, no-bake world of Banana Pudding with Vanilla Pudding, and it’s so easy, your cat could probably make it (if it had opposable thumbs, that is). Get ready for some serious comfort food vibes without breaking a sweat!
Why This Recipe is Awesome
Okay, let’s be real. This isn’t just a dessert; it’s a *life choice*. Why is it awesome? First, it’s no-bake, meaning your oven can chill out while you become a kitchen superstar. Second, it requires zero fancy equipment – if you’ve got a bowl and a spoon, you’re practically a pro chef. Third, it’s a nostalgic hug in a bowl, guaranteed to make everyone swoon. And finally, it’s pretty much idiot-proof; even I, the queen of kitchen mishaps, can nail this one every single time. Seriously, it’s that good and that easy.
Ingredients You’ll Need
- Vanilla Wafers: The OG cookie. Don’t even think about using anything else first time around.
- Ripe Bananas: The star of the show! Spotty, but not mushy is the sweet spot for maximum flavor and perfect texture.
- Instant Vanilla Pudding Mix: The quicker, the better. Grab two boxes for maximum creamy goodness (usually 3.4 oz each).
- Cold Milk: The colder, the better for that pudding to set up like a dream. Whole milk or 2% works best for creaminess.
- Whipped Topping: The fluffy cloud on top (like Cool Whip). Or whip up some heavy cream, if you’re feeling fancy.
- Optional: A splash of vanilla extract (because more vanilla is never a bad idea, IMO).
Step-by-Step Instructions
- Prep Your Bananas: Slice your bananas into nice, even rounds. Not too thin, not too thick, about 1/4-inch. Set them aside for now.
- Pudding Time: In a large bowl, whisk together the two instant vanilla pudding mixes and the cold milk. Whisk *vigorously* for about 2 minutes until it starts to thicken. Don’t be shy! If you’re using vanilla extract, stir it in now.
- Chill Out (Briefly): Pop that pudding in the fridge for about 5 minutes. This gives it a little extra time to firm up before layering. You want it nice and thick, not watery.
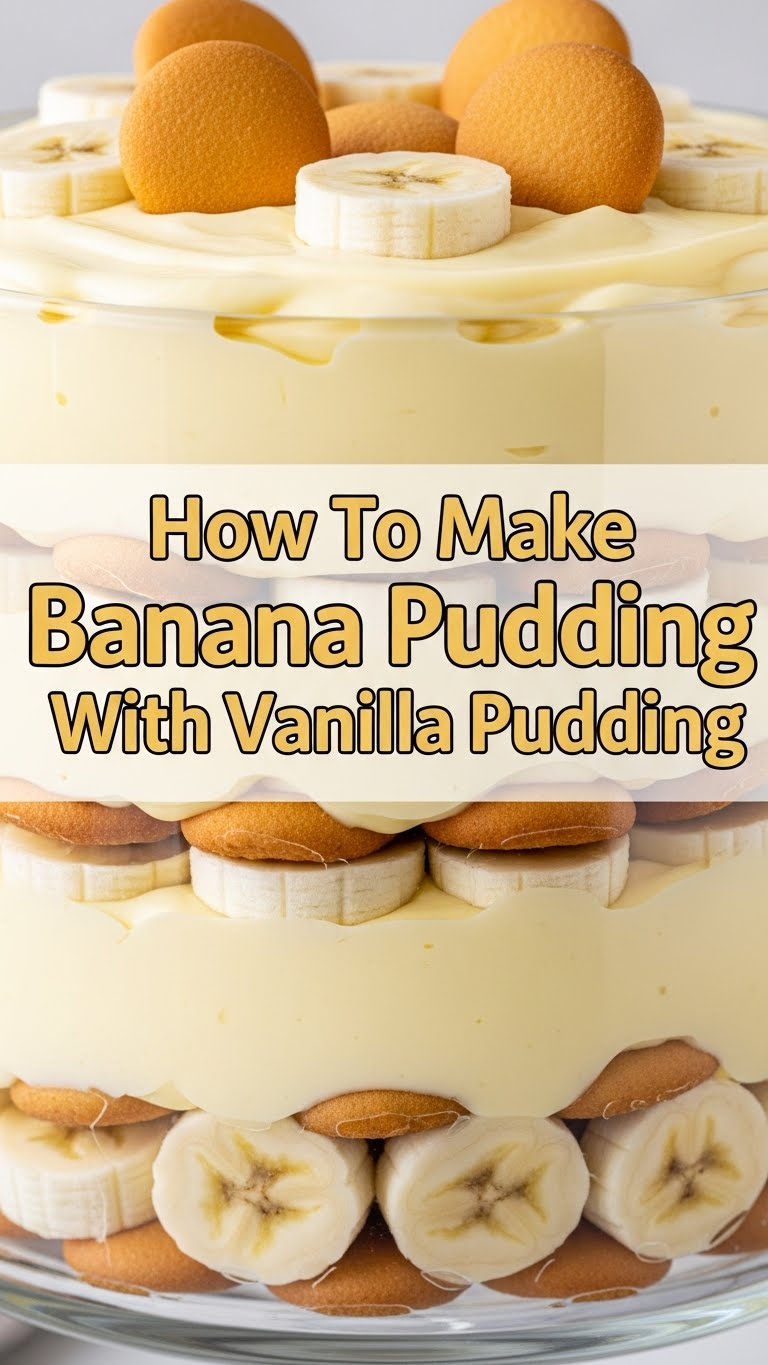
- Layer One: Wafers: Grab your serving dish (a 9×13-inch dish works perfectly). Lay a single layer of vanilla wafers on the bottom. Try to cover as much surface as possible, breaking some if needed to fill gaps.
- Layer Two: Bananas: Arrange about half of your sliced bananas over the wafers. Make it look pretty, or don’t. It’s all getting covered anyway!
- Layer Three: Pudding Power: Carefully spread about half of your thickened vanilla pudding over the bananas. Gently, my friend, gently. You don’t want to disturb those banana slices too much.
- Repeat the Magic: Do it all again! Add another layer of wafers, the remaining bananas, and then the rest of the pudding. You’re almost there!
- The Grand Finale: Spread your whipped topping evenly over the top layer of pudding. If you’re feeling extra, crush a few more vanilla wafers and sprinkle them on top for garnish.
- The Hard Part (Waiting!): Cover the dish tightly with plastic wrap and refrigerate for at least 4 hours, or ideally, overnight. This is crucial! It lets the wafers soften and all those delicious flavors meld together. Trust the process!
Common Mistakes to Avoid
- Using rock-hard green bananas: Big no-no! They’ll be starchy and won’t contribute that sweet banana flavor. We want ripe, but firm bananas with a few brown spots for the best taste and texture.
- Skimping on chill time: Impatience is your enemy here. If you dig in too soon, your pudding will be soupy and your wafers will be crunchy (and not in a good way). Seriously, chill it!
- Over-whisking the pudding: While you need to whisk vigorously initially, don’t go crazy for too long after it starts to thicken. Once it’s thick, stop. Over-whisking can sometimes make it lumpy or break its set.
- Leaving it uncovered in the fridge: Hello, dry, crusty pudding! Always cover your masterpiece with plastic wrap to keep it moist and delicious. Nobody likes a skin on their pudding!
Alternatives & Substitutions
- Cookie Swap: Not a vanilla wafer fan? (Gasp!) You could try shortbread cookies, graham crackers, or even Nilla Wafers (the brand name, FYI, sometimes people mix these up). For a richer twist, try Chessmen cookies!
- Pudding Flavor Fun: Vanilla is classic, but why not experiment? Butterscotch pudding or even a cheesecake-flavored instant pudding could be a game-changer. TBH, vanilla is king, but you do you!
- Topping It Off: Instead of store-bought whipped topping, whip up some fresh heavy cream with a little sugar and vanilla. It tastes amazing and adds an extra touch of homemade goodness.
- Make it boozy: A splash of rum or banana liqueur in the pudding mix (before it sets) could be a fun adult twist. Just sayin’.
FAQ (Frequently Asked Questions)
- “Can I use overripe, mushy bananas?” Well, technically yes, but why hurt your beautiful pudding with sad, squishy bananas? They’ll just make the texture weird and turn brown faster. Stick to ripe but still firm ones.
- “How long does banana pudding last?” Generally, about 3-4 days in the fridge. After that, the bananas start to get a bit… funky, and the wafers get super soft. Best enjoyed fresh!
- “Can I make this ahead of time for a party?” Absolutely! In fact, it’s *better* when made the day before. Just make sure to chill it overnight. It’s a fantastic make-ahead dessert!
- “My pudding isn’t thickening, help!” Did you use cold milk? Did you whisk long enough (at least 2 minutes)? Sometimes, instant pudding can be finicky. If it’s still too thin after a good whisking and a few minutes in the fridge, you might have to start over or add a *tiny* bit more pudding mix (be careful not to make it gluey!).
- “What if I don’t have a 9×13 dish?” No problem! Use any similar-sized dish, or even individual serving cups for a fancy touch. The layering might just be a bit different, but the deliciousness remains!
- “Do I *really* have to chill it for 4 hours?” Yes, my friend, yes you do! Trust the process. That’s how the magic happens, and those wafers turn into soft, cake-like layers, absorbing all that creamy goodness.
Final Thoughts
There you have it, superstar! You’ve just unlocked the secrets to a seriously delicious, ridiculously easy banana pudding. So go ahead, whip up a batch, impress your friends, family, or just yourself (because you deserve it!). Remember, cooking should be fun, and this recipe delivers on all fronts. Now go forth and conquer that sweet tooth. You’ve earned it!


