Look, if you’re reading this, I’m guessing you’ve got some apples lying around that are giving you that judgmental stare every time you open the fridge. Don’t let them win! Transform those smug little fruits into something magical with this maple-kissed apple crisp that screams “fall vibes” even if you’re making it in the middle of July. No judgment here!
Why This Recipe is Awesome
Let me count the ways this maple apple crisp will change your life (or at least your dessert game):
First, we’re using maple syrup instead of boring old sugar, which automatically makes you 37% more sophisticated. Second, the contrast between the warm, soft apples and that crunchy, buttery topping is basically the culinary equivalent of a cozy hug. And third, your kitchen will smell so good that your neighbors might “coincidentally” drop by. Fair warning: you may become the neighborhood dessert dealer after word gets out.
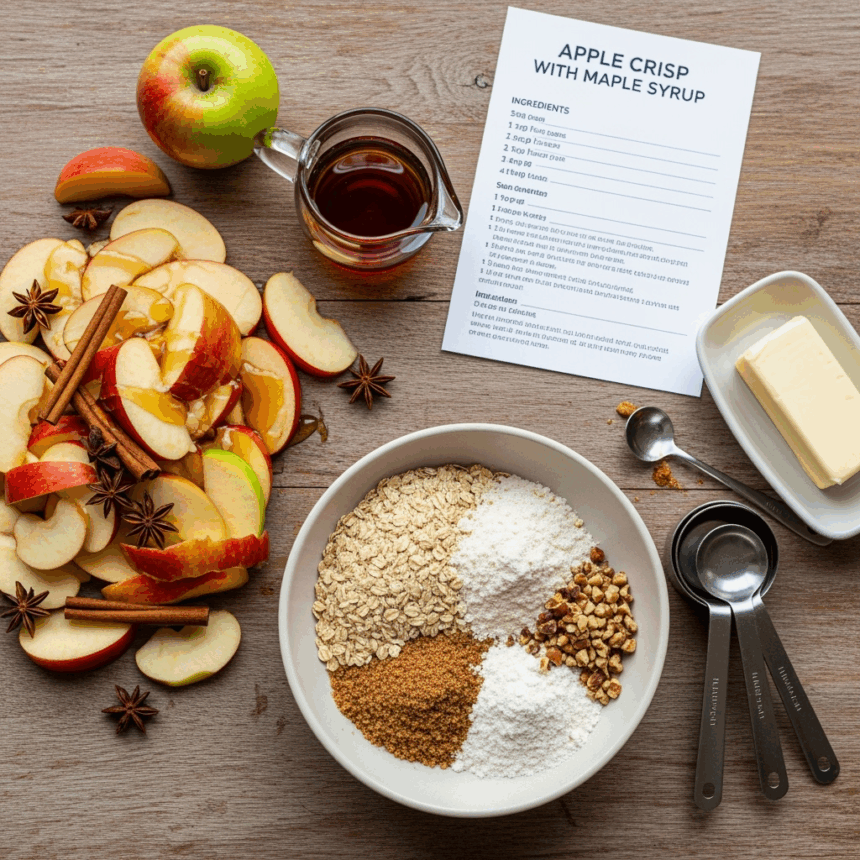
Ingredients You’ll Need
For the apple filling:
- 6-7 medium apples (Honeycrisp, Granny Smith, or whatever’s giving you the side-eye in your fruit bowl)
- ¼ cup pure maple syrup (the real stuff, not that pancake-flavored corn syrup nonsense)
- 1 tablespoon lemon juice (keeps the apples from turning that sad brown color)
- 2 tablespoons all-purpose flour (to thicken things up)
- 1 teaspoon cinnamon (because duh)
- ¼ teaspoon nutmeg (optional, but highly recommended for that “what’s that amazing flavor?” effect)
- Pinch of salt (trust me on this one)
For the crisp topping (the best part, let’s be honest):
- 1 cup old-fashioned oats (not the instant kind, you’re better than that)
- ¾ cup all-purpose flour
- ½ cup cold butter, cubed (cold is crucial, don’t get lazy here)
- ½ cup brown sugar (because we’re adding complexity, people)
- ¼ cup maple syrup (yep, more maple goodness)
- 1 teaspoon vanilla extract (the real stuff, please and thank you)
- ½ teaspoon cinnamon
- ¼ teaspoon salt
Step-by-Step Instructions
- Preheat your oven to 350°F (175°C). I know it’s tempting to skip this step, but don’t. Your future self will thank you for not having to wait around while the oven heats up.
- Prep your apples. Peel (if you want, I won’t tell if you leave some skin on), core, and slice them about ¼-inch thick. Not too thin or they’ll turn to mush, not too thick or you’ll be chewing until next Tuesday.
- Mix the filling. Toss those apple slices with maple syrup, lemon juice, flour, cinnamon, nutmeg, and salt in a large bowl until every slice is coated in that maple-spice goodness.
- Transfer to baking dish. Dump the apple mixture into a 9×9 inch baking dish or a 10-inch cast-iron skillet if you’re feeling fancy (or just don’t want to wash another dish).
- Make the topping. In another bowl, combine the oats, flour, brown sugar, cinnamon, and salt. Then add the cold butter cubes and use your fingers to work it in until you get a crumbly texture. Pour in the maple syrup and vanilla, and mix until everything is moistened and clumpy. Pro tip: if your hands get too sticky, run them under cold water for a sec.
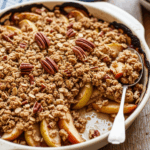
- Top it off. Sprinkle (or let’s be real, dump) the topping over the apples, covering them completely. No need to press it down—we want that rustic, craggy look.
- Bake until golden and bubbly. This takes about 45-50 minutes. You’ll know it’s done when the topping is golden brown and you can see the apple filling bubbling around the edges like delicious lava.
- Cool slightly. Let it rest for at least 15 minutes before serving. I know waiting is hard, but your taste buds will appreciate not being scorched by molten apple napalm.
Common Mistakes to Avoid
Even though this recipe is pretty forgiving, here are some ways you might accidentally sabotage yourself:
- Using warm or room-temperature butter in the topping. Cold butter = crispy, crumbly topping. Warm butter = sad, soggy topping. Don’t be a hero—just use it cold.
- Skipping the lemon juice. Unless you enjoy that lovely oxidized brown apple look (you don’t), don’t skip this.
- Using fake maple syrup. I’m not maple-syrup-shaming you, but Aunt Jemima and Mrs. Butterworth don’t belong in this recipe, mkay?
- Slicing apples inconsistently. Try to keep those slices relatively uniform so they cook evenly. No one wants to bite into an undercooked apple chunk.
- Serving immediately from the oven. Unless you enjoy the sensation of molten lava on your tongue, give it those 15 minutes to cool down and set up.
Alternatives & Substitutions
Life happens. Ingredients go missing. Here’s how to adapt:
- Apples: Any firm baking apple works. Honeycrisp, Granny Smith, Braeburn, or Jonagold are all solid choices. Mix and match for more complex flavor. Pears also work if you’re in an apple crisis.
- Flour: Gluten-free? Use a 1:1 gluten-free flour blend. You can also sub in almond flour in the topping (though it will be less crisp).
- Butter: Vegans, use coconut oil or a plant-based butter. Just make sure it’s solid and cold.
- Maple Syrup: In a pinch, honey works (though the flavor profile changes). You can also use brown sugar mixed with a tiny bit of water, but then we’d have to change the name of the recipe, and that’s just paperwork I don’t need.
- Add-ins: Feeling fancy? Throw in some chopped nuts, dried cranberries, or even a splash of bourbon. I won’t tell anyone.
FAQ (Frequently Asked Questions)
Can I make this ahead of time?
Absolutely! Assemble the whole thing, cover it, and refrigerate for up to 24 hours before baking. Just add about 10 minutes to the baking time if you’re cooking it straight from the fridge. Your future self will high-five you for the prep work.
Will this reheat well the next day?
If you think there will be leftovers, that’s adorable. But yes, reheat in a 300°F oven for about 15 minutes to crisp up the topping again. Microwaving works in a pinch, but say goodbye to the “crisp” part of apple crisp.
Do I really need to peel the apples?
Nope! If you’re feeling rebellious (or lazy, no judgment), leave the peels on. They add fiber, color, and a slight texture difference. Just make sure to wash them well first, unless you enjoy a hint of pesticide with your dessert.
Can I use quick oats instead of old-fashioned?
In theory, yes. In practice, the texture won’t be as good. Quick oats tend to get mushier. If quick oats are all you’ve got, reduce the amount to about ¾ cup and carry on with your life.
Is this dessert or breakfast?
Yes. The beauty of apple crisp is its versatility. Warm with ice cream? Dessert. Cold with yogurt? Breakfast. Room temperature eaten directly from the pan while standing in front of an open refrigerator at 2 AM? That’s between you and your therapist.
Can I freeze this?
You can freeze it either before or after baking. If before, don’t thaw before baking—just add about 20 minutes to the bake time. If after, thaw in the fridge overnight and reheat in the oven for that crispy top. It’ll keep in the freezer for about 3 months, which is approximately 2 months and 29 days longer than it will actually last before someone eats it.
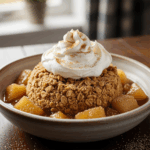
Final Thoughts
There you have it—a maple apple crisp that’s basically impossible to mess up unless you try really hard (and even then, it’ll probably still taste good). The beauty of this dessert is in its rustic charm, so don’t stress if it doesn’t look Instagram-perfect. It’s supposed to look homemade because, well, you made it at home.
The real magic happens when that warm, fragrant dessert meets a scoop of vanilla ice cream and creates that hot-cold perfection that makes taste buds do a happy dance. Or enjoy it for breakfast with a dollop of Greek yogurt and pretend you’re being healthy.
Now go forth and bake! Your house is about to smell amazing, and you’re about to become everyone’s favorite person. Just remember who gave you this recipe when you’re famous for your apple crisp. I accept payment in the form of… apple crisp.
