Oh my gosh, you have apples sitting on your counter looking all sad and forgotten, don’t you? Well, let me rescue those poor abandoned fruits with the most soul-warming, embarrassingly simple apple crisp recipe that’ll make your kitchen smell like you’ve got your life together (even if your sock drawer tells a different story).
Why This Recipe is Awesome
Look, I could tell you this apple crisp is “delightful” or “scrumptious” like every other food blog, but let’s be real—this recipe is awesome because:
1. It’s basically impossible to mess up. Seriously, if you can operate a knife without requiring medical attention, you’re qualified.
2. The brown sugar creates this caramel-like situation that makes everything taste like fall had a love child with dessert heaven.
3. It takes like 15 minutes of actual work. The rest is just you pretending to be busy while the oven does everything.
4. People will think you’re some kind of domestic wizard when they taste it. Don’t correct them.
Ingredients You’ll Need
For the apple filling:
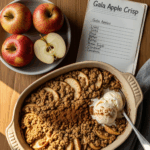
- 6-7 medium apples (Granny Smith, Honeycrisp, or whatever looks least sketchy at the store)
- ¾ cup brown sugar (packed, because we’re not playing around here)
- 2 tablespoons flour (to thicken things up—like Spanx but for your filling)
- 1 teaspoon cinnamon (more if you’re going through something emotionally)
- ¼ teaspoon nutmeg (optional, but why deprive yourself?)
- 2 tablespoons lemon juice (prevents browning and adds zing)
- Pinch of salt (to balance the sweetness—just like your personality)
For the crisp topping (the best part, let’s be honest):
- 1 cup old-fashioned oats (not instant—have some standards)
- 1 cup all-purpose flour (the workhorse of your pantry)
- 1 cup brown sugar (yes, more—it’s not called apple sensible)
- ½ teaspoon cinnamon (because we’re not monsters)
- ½ cup cold butter, cubed (the real stuff, please and thank you)
- Pinch of salt (trust me on this)
Step-by-Step Instructions
1. Preheat your oven to 350°F (175°C). I know this sounds obvious, but we’ve all been the person who’s halfway through a recipe before remembering this crucial step. No judgment.
2. Prep your apples. Peel, core, and slice them into ¼-inch pieces. Not too thin (they’ll disintegrate) and not too thick (hello, raw apple chunks). Think Goldilocks—juuuust right.
3. Make the filling. Toss your apple slices with brown sugar, flour, cinnamon, nutmeg, lemon juice, and salt in a large bowl. Make sure everything’s coated like you’re painting a masterpiece. Transfer this mixture to a 9×13 inch baking dish.
4. Create the crisp topping. In another bowl, mix the oats, flour, brown sugar, cinnamon, and salt. Add the cold butter cubes and use your fingers to smush everything together until it resembles coarse crumbs. This is your moment to relieve stress—really get in there!
5. Top it like you mean it. Sprinkle (or honestly, dump) the crisp mixture evenly over your apples. Don’t be shy—we want full coverage here.
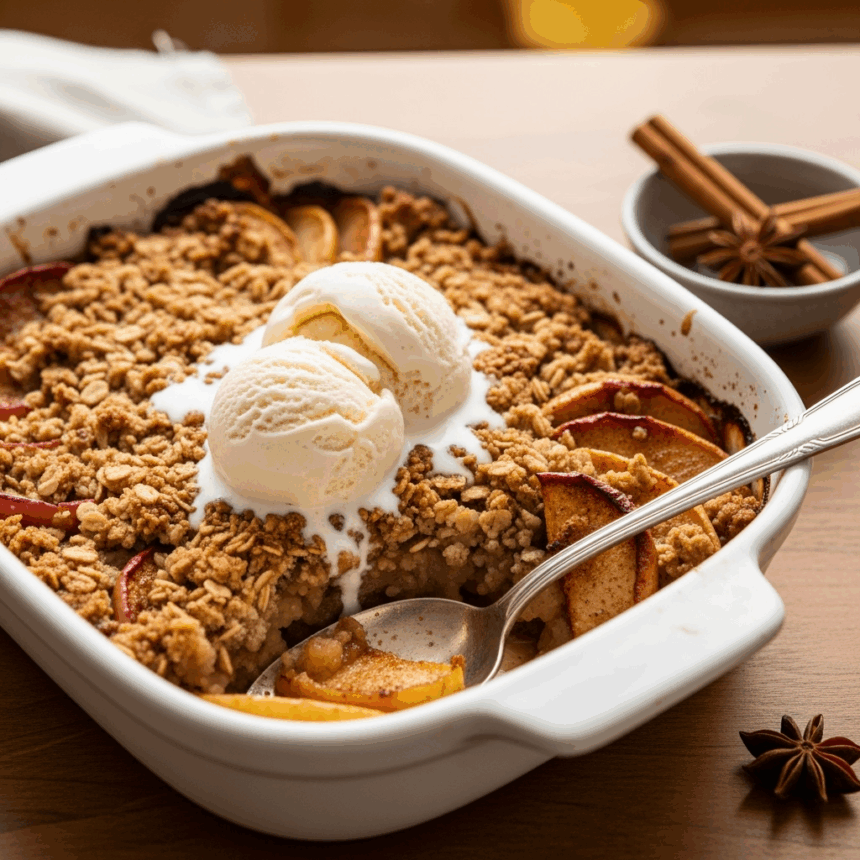
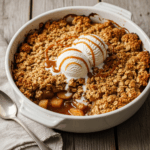
6. Bake until golden and bubbly, about 45-50 minutes. You’ll know it’s done when the top is beautifully browned and the apple filling is bubbling at the edges like a witch’s cauldron.
7. Let it cool for at least 10-15 minutes before serving—I know it’s torture, but your mouth skin will thank you for not immediately scorching it with molten apple lava.
Common Mistakes to Avoid
• Skimping on the brown sugar. This isn’t the time for your health journey. That’s tomorrow’s problem.
• Slicing apples inconsistently. Unless you enjoy some pieces turning to mush while others remain crunchy enough to break a tooth.
• Using warm butter in the topping. Cold butter = crumbly topping. Warm butter = sad, flat topping. Don’t make your topping sad.
• Forgetting the salt. It’s like forgetting to wear deodorant—no one mentions it, but everyone notices.
• Getting impatient and not letting it cool. Hot sugar is basically napalm. Your taste buds deserve better.
Alternatives & Substitutions
Apples: Not all heroes wear capes, and not all apple crisps need Granny Smiths. Honeycrisp, Braeburn, or Pink Lady apples work great too. Mixing varieties? Now you’re playing in the big leagues.
Gluten-free? Swap regular flour for almond flour or a gluten-free blend. Your topping might be slightly less “crisp” but still delicious. Your gluten-free friends will stop giving you that look.
Vegan concerns? Use coconut oil instead of butter. The slight coconut flavor actually works amazingly well with the apples. FYI, it’s weirdly good.
Spice it up: Add a dash of cardamom, ginger, or allspice if you’re feeling adventurous. Or add a splash of bourbon to the filling if you’re having *that* kind of day.
No brown sugar? White sugar with a tablespoon of molasses works in a pinch. Or just use white sugar and acknowledge that your life choices have led you to this slightly less delicious outcome.
FAQ (Frequently Asked Questions)
Can I make this ahead of time?
Absolutely! You can assemble it a day ahead and refrigerate it unbaked. Just add an extra 5-10 minutes to the baking time. Your future self will high-five you.
Do I really need to peel the apples?
Do you need to brush your teeth? Technically no, but the results are better when you do. The peels can get a bit tough and disrupt the dreamy texture we’re aiming for.
My topping isn’t crisp enough. What went wrong?
You probably didn’t use enough butter (said no one ever) or your oven temperature is off. Next time, try baking it on a higher rack.
Is this healthier than apple pie?
It has oats, so technically yes. Will your doctor approve? Probably not. But what do they know about joy?
How do I store leftovers?
Cover and refrigerate for up to 4 days. But let’s be honest—leftovers? In this economy?
Can I freeze this?
Yes! Freeze it unbaked for up to 3 months. Thaw overnight in the fridge before baking. It’s like sending a gift to your future self.
Final Thoughts
Let’s be real—this apple crisp isn’t just dessert; it’s an experience. It’s what happens when basic ingredients come together for something greater than themselves (unlike most group projects you’ve been part of).
Serve it warm with a scoop of vanilla ice cream if you really want to live your best life. Or eat it cold for breakfast—I’m not here to judge, I’m here to enable.
Now go forth and create this ridiculously simple yet impressive dessert. Your house will smell amazing, your taste buds will do a little dance, and for a brief, shining moment, you’ll feel like you’ve actually got this adulting thing figured out.
