So, you’ve just pulled a glorious, warm, chocolatey slab of deliciousness out of the oven. Your kitchen smells like a dream, your tummy is rumbling, and the cake is… well, it’s a cake. A plain, unadorned, albeit delicious, cake. Now what? Just slice it up and call it a day? My friend, we are not quitters. We are not minimalists when it comes to chocolate cake. We are here to make that beauty *shine*! Think of it as giving your cake a little glow-up before its big debut.
Why This Decorating Guide is Awesome
Because let’s be real, you want that cake to look as good as it tastes, right? This isn’t about becoming a pastry chef overnight (unless you want to, then go for it, champ!). This is about making your chocolate cake look like it just sashayed out of a fancy bakery, but with minimal fuss and maximum fun. It’s **idiot-proof**, I promise, even *I* managed to make my cakes look presentable after following these steps. Plus, who doesn’t love a little artistic expression that ends in chocolate?
Ingredients (and Tools) You’ll Need
Alright, gather your troops! These aren’t just ingredients; they’re your cake’s glam squad.
- Your Awesome Chocolate Cake: The star of the show, obviously. Make sure it’s completely cooled down, or you’re gonna have a melty, crumbly disaster. You’ve been warned.
- Frosting (Chocolate or Otherwise): About 3-4 cups. Store-bought is perfectly acceptable – no judgment here! Or whip up your favorite homemade buttercream or ganache. The gooier, the better, IMO.
- Offset Spatula (or Butter Knife): Your trusty paint brush. An offset spatula is a game-changer for smooth frosting, but a regular butter knife works in a pinch for that rustic “I meant to do that” look.
- Piping Bag & Tips (Optional, but Fun): For those fancy swirls and borders. If you don’t have one, a Ziploc bag with the corner snipped off is a legit hack.
- Sprinkles, glorious Sprinkles!: The fun stuff! Rainbow, chocolate, metallic, jimmies, nonpareils… pick your poison!
- Chocolate Shavings or Chips: For that elegant, sophisticated vibe. Or just mini chocolate chips for a cuter look.
- Fresh Berries (Strawberries, Raspberries, Cherries): For a pop of color and a fresh, tangy contrast. Also, makes it look healthy, right? (Totally kidding.)
- Edible Flowers (Optional): If you’re feeling extra fancy and want to channel your inner garden fairy.
- Cake Turntable (Optional): Not essential, but it makes frosting SO much easier. Think of it as a lazy susan for your cake.
Step-by-Step Instructions
Time to get your hands a little dirty (and chocolatey!).
- Cool Down, Buttercup: Seriously, this is step one for a reason. **Your cake MUST be completely cool.** Like, room temperature, no warmth whatsoever. Trying to frost a warm cake is like trying to ice skate uphill – messy and frustrating. Pop it in the fridge for 30 minutes if you’re impatient.
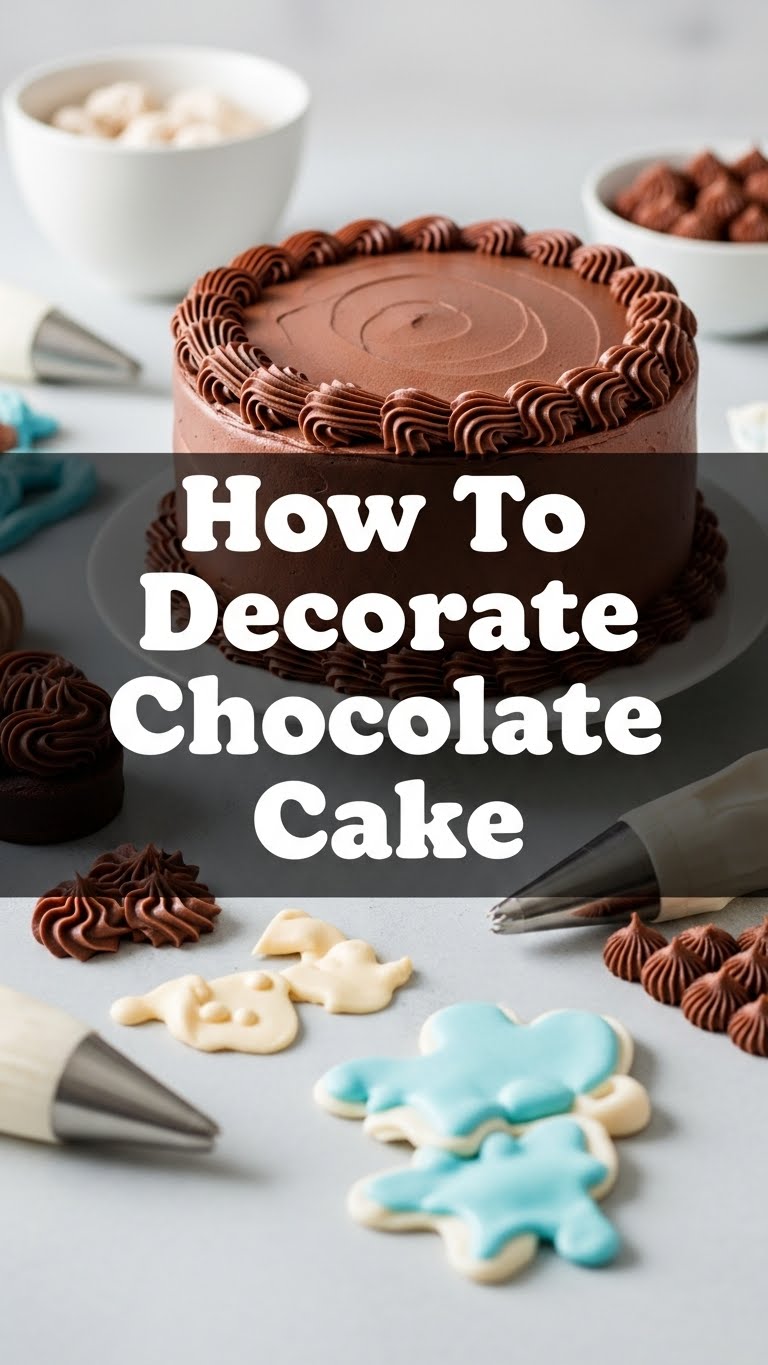
- The Mighty Crumb Coat: This is your secret weapon against rogue crumbs! Apply a very thin layer of frosting all over the cake – top and sides. It doesn’t need to be pretty, just enough to trap all those little loose crumbs. **This step is non-negotiable for a clean finish.** Chill the cake in the fridge for 15-20 minutes to set this layer.
- The Main Event: Frosting Time! Now for the real deal. Take a generous dollop of frosting and spread it on top of your cake, working outwards. Then, tackle the sides. Use your offset spatula (or knife) to smooth it out as best you can. Don’t stress too much about perfection; character is good! If you have a cake turntable, use it to spin the cake while holding your spatula steady for smoother sides.
- Sprinkle It On, Baby! This is where the party starts! Grab your favorite sprinkles. You can gently press them onto the sides of the cake, or just shower them haphazardly over the top for a fun, spontaneous look. No rules here, just joy!
- Chocolatey Elegance: If you’re using chocolate shavings, gently pile them in the center of the cake, or create a border around the edge. For chocolate chips, scatter them strategically or artfully. A little goes a long way for that touch of sophistication.
- Berry Good Looks: Arrange your fresh berries on top of the cake. You can make a pretty pattern, scatter them randomly, or create a lush pile in the middle. The vibrant colors of the fruit really pop against the chocolate.
- Optional Piping Panache: Feeling a bit extra? Load some frosting into your piping bag (with your chosen tip) and pipe some decorative borders, rosettes, or even a little message on top. Practice on a plate first if you’re nervous!
Common Mistakes to Avoid
Learn from my blunders, dear friend, and save yourself some cake-decorating heartache.
- Decorating a Warm Cake: I cannot stress this enough. Unless you’re going for a “melted avalanche” aesthetic, **cool your cake completely!**
- Skipping the Crumb Coat: This isn’t an optional step, it’s a necessary one. You’ll thank me when your final frosting layer is perfectly crumb-free.
- Over-Thinking It: It’s cake, not a Rembrandt. Don’t aim for unattainable perfection on your first (or fifth) try. Relax, have fun, and embrace the charming imperfections.
- Using Too Little Frosting: Skimping on frosting just makes it harder to spread evenly. Be generous! You can always scrape off excess.
- Pressing Too Hard with Your Spatula: Gentle hands, my friend. Too much pressure can dig into the cake and pull up crumbs, defeating the purpose of your crumb coat.
Alternatives & Substitutions
Feeling creative? Here are some ways to switch things up!
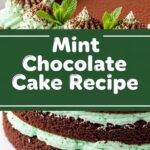
- Frosting Flavors: Not a fan of chocolate frosting on chocolate cake? Go for vanilla buttercream, cream cheese frosting, peanut butter frosting, or even a vibrant mint green for fun!
- Candy Mountain: Instead of traditional sprinkles, crush up your favorite candy bars (Kit Kat, Snickers, Oreos) and pile them on top. Or use mini marshmallows, gummy bears, or chocolate-covered pretzels.
- Nutty Professor: Toasted chopped nuts (pecans, walnuts, almonds) add a lovely crunch and earthy flavor. Press them onto the sides or sprinkle over the top.
- Ganache Drip: For a super professional look, make a chocolate ganache (heavy cream + chocolate) and let it drip artfully down the sides of your cake before decorating the top. Super chic!
- DIY Decorations: Melt some white chocolate, add food coloring, and drizzle patterns on parchment paper. Let it set, then break into shards for unique toppers.
FAQ (Frequently Asked Questions)
Got questions? I’ve got answers (mostly humorous ones).
Do I need fancy tools for this? Nope! While an offset spatula and a turntable are nice-to-haves, you can absolutely get by with a regular butter knife, a spoon, and a little patience. Your hands are surprisingly good tools, too!
My frosting is too stiff/runny, help! Ah, the eternal frosting dilemma! If it’s too stiff, add a tiny bit of milk or cream (half a teaspoon at a time) and mix well. Too runny? Pop it in the fridge for 15-20 minutes to firm up, or add a tablespoon of powdered sugar if it’s buttercream.
How long will my decorated cake last? Good question! If you’ve used fresh fruit, it’s best eaten within 1-2 days as the fruit can start to degrade. Without fruit, a well-frosted cake can hang out at room temp for 3-4 days (covered) or in the fridge for up to a week. IMO, it rarely lasts that long anyway!
Can I prepare decorations ahead of time? Absolutely! You can get your fruit washed, chocolate shaved, and sprinkles ready to go. The less you have to scramble when the cake is ready for its close-up, the better.
What if I totally mess up? Embrace it! Seriously, sometimes the “happy accidents” turn out to be the most charming. If it’s truly a disaster, scrape off the frosting, re-crumb coat, and try again. Or just call it “rustic” and eat it with a spoon. No one will judge a delicious cake.
Is store-bought frosting really okay? YES! Don’t let anyone tell you otherwise. We’re here for fun and ease, not to win a Michelin star. Use whatever makes you happy and gets the job done.
How do I get super smooth sides? Pro tip: after applying your final frosting layer, dip your offset spatula or bench scraper in hot water, wipe it dry, then use it to smooth the sides of your cake. The heat helps melt a tiny bit of the frosting for a super sleek finish. Fancy, right?
Final Thoughts
And there you have it, folks! You’ve just transformed a humble chocolate cake into a showstopper. Whether it’s for a special occasion, a random Tuesday, or just because you needed some chocolate therapy, you did it! Pat yourself on the back, grab a slice, and bask in the glory of your creation. You’re basically a cake artist now. Go impress someone—or yourself—with your new culinary (and artistic!) skills. You’ve earned it!

