So, you’ve got that craving, right? That deep, soul-satisfying desire for something cold, creamy, and ridiculously good, but the thought of battling supermarket crowds or deciphering a ten-page recipe makes you want to just… lie down. Same, friend, same. But fear not, because today we’re diving into the glorious world of homemade vanilla ice cream with cherries, and trust me, it’s easier than deciding what to watch on Netflix.
Why This Recipe is Awesome
Okay, let’s be real. This isn’t just *any* ice cream recipe. This is the **’I totally made this myself, don’t you dare buy store-bought again’** recipe. It’s practically idiot-proof (and trust me, I’ve put that to the test). You get that rich, velvety vanilla goodness, plus the juicy pop of fresh cherries, all without turning your kitchen into a science experiment. Plus, it’s a total flex – everyone thinks homemade ice cream is super hard. We’ll let them think that, *wink*.
It’s fresh, it’s flavorful, and it tastes a million times better than anything you’ll scoop out of a carton. **FYI**, the simple ingredients really shine here, making it a pure, unadulterated delight.
Ingredients You’ll Need
Gather your troops! Here’s what you’ll need to make this magic happen:
- **Heavy Cream (2 cups):** The MVP. Don’t skimp, this is where the magic happens. Full fat or bust!
- **Whole Milk (1 cup):** Its trusty sidekick. Keeps things creamy but not *too* heavy.
- **Granulated Sugar (3/4 cup):** Sweetness architect. We’re not making health food here, people.
- **Pure Vanilla Extract (1-2 tablespoons):** The soul of vanilla ice cream. Go for the good stuff, none of that imitation nonsense. Your taste buds will thank you.
- **Pinch of Salt (1/4 teaspoon):** Optional, but actually **super important** for balancing flavors. Trust me on this one.
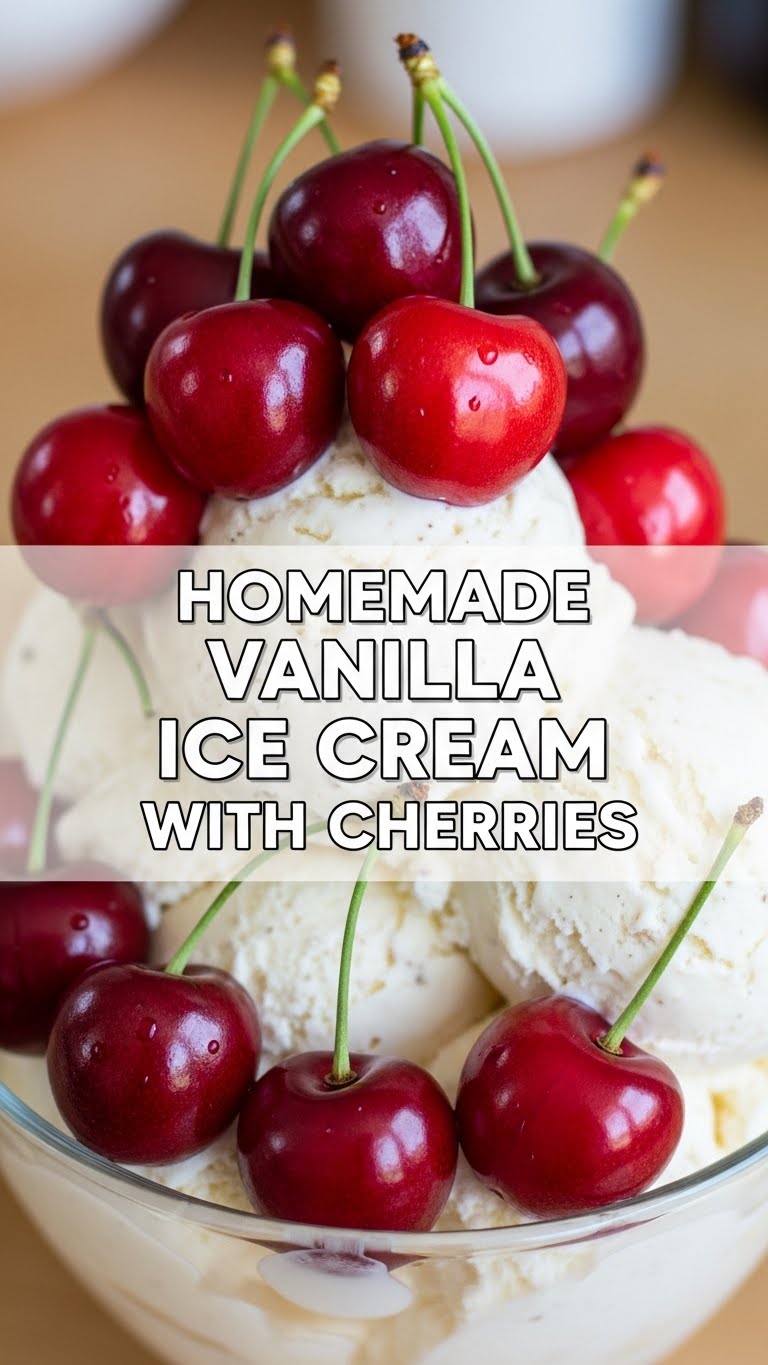
- **Fresh Cherries (1.5 cups, pitted):** The juicy stars! Pitted, obviously, unless you enjoy a dental adventure.
- **Lemon Juice (1 teaspoon, optional):** Just a tiny splash for the cherries to make them sing. Like a tiny, tangy choir.
Step-by-Step Instructions
Let’s get down to business! Follow these super simple steps:
- **Prep Your Cherries:** First things first, pit those cherries. If you have a pitter, great. If not, a chopstick or a sturdy straw works wonders. Halve them if they’re huge. Toss them in a bowl with a tiny splash of lemon juice (if using) and a spoonful of sugar (about 1 tbsp) to macerate a bit. Set them aside and let them do their juicy thing.
- **Whip Up the Base:** In a large bowl, whisk together the heavy cream, whole milk, granulated sugar, vanilla extract, and that tiny pinch of salt. Whisk until the sugar is completely dissolved – you don’t want grainy ice cream, do you? Give it a good taste test – does it need more vanilla? (Probably not, but you do you!)
- **Chill Out:** Cover the bowl and pop it in the fridge for at least 2 hours, or even better, overnight. **A super cold base churns better!** This is not a suggestion, it’s a command. Seriously, don’t skip this.
- **Churn Time!** Get your ice cream maker bowl out of the freezer (it should be frozen solid, like a block of ice from the Arctic). Pour the chilled mixture into your ice cream maker and churn according to its instructions. This usually takes 20-30 minutes, until it’s the consistency of soft-serve. It’s mesmerizing to watch!
- **Cherry Swirl:** When the ice cream is almost done churning, or when it’s just reaching that perfect soft-serve stage, gently fold in your prepared cherries. Don’t overmix – we want lovely swirls of cherry, not a uniform pink mush (unless that’s your vibe, then go for it!).
- **Harden Up:** Transfer the ice cream to an airtight container. Press a piece of parchment paper or plastic wrap directly onto the surface to prevent annoying ice crystals from forming. Freeze for at least 4 hours, or until firm. Patience, grasshopper! This is the hardest part, IMO.
Common Mistakes to Avoid
We’ve all been there. Learn from my kitchen mishaps:
- **Not Chilling Your Base Enough:** Seriously, people! This isn’t a suggestion, it’s the golden rule. Warm base = icy ice cream. And nobody wants that. It’s a rookie mistake with painful consequences (for your taste buds).
- **Overfilling Your Ice Cream Maker:** It expands, friend. Leave some room for expansion, or you’ll have an icy explosion on your hands. Plus, it won’t churn properly if it’s too full.
- **Using Imitation Vanilla:** Okay, look, I get it, sometimes budgets are tight. But for vanilla ice cream, the real deal makes *all* the difference. Don’t be a hero and compromise on the vanilla. Your dessert deserves better.
- **Forgetting to Pit the Cherries:** Unless you’re trying to play Russian roulette with your molars, this is a non-negotiable step. Just pit them! Your dentist (and your teeth) will thank you.
Alternatives & Substitutions
Feeling adventurous or missing an ingredient? Here are some ideas:
- **No Cherries? No Problem!** Swirl in fresh raspberries, blueberries, or even chopped strawberries. Or, dare I say, a generous dollop of chocolate fudge sauce. Your life, your ice cream.
- **Dairy-Free Dream?** You can try this with full-fat canned coconut milk (not the carton stuff!) and a dairy-free milk alternative. The texture will be slightly different, and a subtle coconut flavor might peek through, but it can still be delicious.
- **Vanilla Bean Paste vs. Extract:** If you’re feeling fancy (and have some extra cash), use vanilla bean paste instead of extract. Those little black flecks just scream “I’m gourmet!” and the flavor is even more intense.
- **Sweetener Swap:** Honey or maple syrup can technically work instead of granulated sugar, but they will affect the texture and flavor of the ice cream. Stick to sugar for a classic taste if you want that perfect creamy texture.
FAQ (Frequently Asked Questions)
- **My ice cream turned out icy, what happened?!** Did you chill your base enough? Did you perhaps overfill your machine? And for the love of all that is creamy, did you make sure your churn bowl was *super* frozen? Usually, it’s one of those culprits.
- **Can I make this without an ice cream maker?** Well, technically yes, but it involves a lot of stirring and freezing in layers to break up ice crystals. It’s more of a “granita” or a very patient “no-churn” effort than a true, smooth ice cream. If you don’t have one, consider borrowing or investing! They’re worth it.
- **How long does homemade ice cream last?** In an airtight container, about 1-2 weeks before ice crystals really start to take over and diminish the quality. But honestly, who are we kidding? It won’t last that long.
- **What kind of cherries should I use?** Fresh, sweet cherries (like Bing or Rainier) are absolutely amazing and highly recommended for that vibrant burst of flavor. If it’s not cherry season, frozen cherries (thawed and drained well) can work in a pinch, but fresh is always superior.
- **Can I add alcohol to the ice cream?** Ooh, now you’re talking! A tablespoon or two of cherry liqueur (like Kirsch) or even a good quality bourbon can add a lovely depth of flavor and also helps keep the ice cream softer (alcohol doesn’t freeze solid). Don’t overdo it, though, or it won’t set!
Final Thoughts
So there you have it, folks! Your new favorite party trick, stress reliever, or just a damn good reason to eat ice cream straight from the tub. Making homemade ice cream feels super fancy, but it’s really just a delightful little kitchen dance. Now go impress someone—or just yourself, because you deserve it—with your new culinary superpowers. You’ve earned every single scoop!


