So, you’re scrolling through Instagram, seeing all these fancy desserts, and thinking, “Ugh, I wish I could make something like that without turning my kitchen into a disaster zone or spending a fortune on ingredients.” Been there, friend, been there. But what if I told you there’s a dessert so elegant, so ridiculously simple, it’s practically *chef-proof*? Enter: Panna Cotta. And not just any panna cotta, but a silky, dreamy version with fresh strawberries that’ll make you feel like a culinary god/goddess without breaking a sweat. Ready to fake it ’til you make it (and actually make it really well)? Let’s dive in!
Why This Recipe is Awesome
Seriously, where do I even begin? First off, it’s like four ingredients. FOUR! If you can boil water, you can make panna cotta. It’s essentially fancy flavored jello for adults who appreciate smooth textures and minimal effort. Secondly, it looks ridiculously impressive. You serve this up, and people will think you secretly went to culinary school. Third, the texture is out of this world – that perfect wobble, that melt-in-your-mouth creaminess. It’s light, refreshing, and the strawberries add just the right amount of tang. Plus, it’s mostly chill time, meaning you can whip it up, stick it in the fridge, and forget about it until dessert o’clock. **It’s idiot-proof, even I didn’t mess it up.** Truly a winner for lazy gourmands.
Ingredients You’ll Need
Alright, gather your troops! Most of these are probably chilling in your pantry already. No obscure ingredients, promise. Well, maybe gelatin, but that’s like, the only “special” one.
- **For the Panna Cotta:**
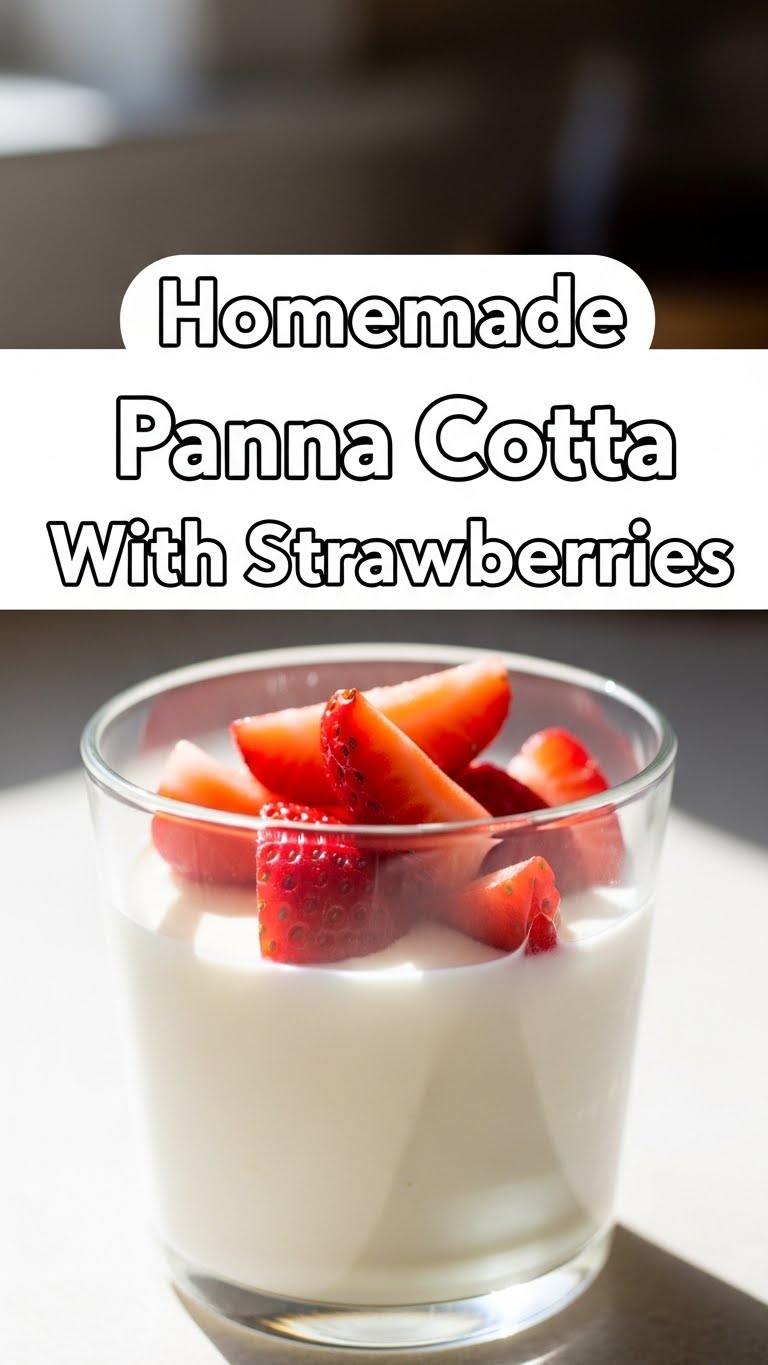
- **2 cups (480ml) Heavy Cream:** Go full fat or go home. This is where the magic happens, people.
- **1/2 cup (100g) Granulated Sugar:** Just enough sweetness to balance the cream. Don’t be shy, but don’t overdo it either.
- **1 teaspoon Vanilla Extract (or 1/2 vanilla bean, scraped):** This is your flavor MVP. Real vanilla bean takes it to “I’m fancy now” levels.
- **1 packet (about 2 1/4 teaspoons) Unflavored Gelatin Powder:** The unsung hero that gives us that glorious wobble. Find it in the baking aisle, usually next to the Jell-O.
- **2 tablespoons Cold Water:** To bloom our gelatin. Don’t skip this, it’s important!
- **For the Strawberry Topping:**
- **1 cup Fresh Strawberries:** Halved, sliced, diced, whatever makes your heart sing. The riper, the better!
- **(Optional) 1-2 tablespoons Granulated Sugar:** Only if your strawberries are a bit tart or you have a super sweet tooth.
- **(Optional) A tiny squeeze of Lemon Juice:** Brightens everything up. Like sunshine for your berries!
Step-by-Step Instructions
Deep breaths, you got this. It’s easier than assembling IKEA furniture, I swear.
- **Bloom the Gelatin:** Grab a small bowl and sprinkle the gelatin powder over the 2 tablespoons of cold water. Give it a quick stir. It’ll get lumpy and thick like sad jelly. This is good! Let it sit for 5-10 minutes. This process is called blooming, and it’s essential for a smooth panna cotta.
- **Heat the Cream:** In a medium saucepan, combine the heavy cream and sugar. Heat it over medium heat, stirring occasionally, until the sugar is dissolved and the mixture is just about to simmer. You’ll see tiny bubbles around the edges, but **don’t let it boil!** Boiling cream is a no-go.
- **Melt the Gelatin:** Remove the cream from the heat. Add the bloomed gelatin mixture to the hot cream. Stir continuously until the gelatin is completely dissolved. There shouldn’t be any gritty bits. If you’re using vanilla extract, stir it in now. If you used a vanilla bean, scrape out the seeds and add them to the cream, then fish out the pod when you’re done.
- **Pour and Chill:** Carefully pour the mixture into your serving dishes or ramekins. If you want to unmold them later, lightly oil the dishes first. I usually just serve them in pretty glasses because I’m lazy like that. Place the dishes in the fridge and chill for at least 4 hours, or ideally, overnight. **The longer, the firmer.**
- **Prep the Strawberries:** While your panna cotta is chilling (or just before serving), prepare your strawberry topping. Wash and hull your strawberries, then slice or dice them. If you want, mix them with a tablespoon or two of sugar and a tiny squeeze of lemon juice. Let them sit for a few minutes to release their juices.
- **Serve it Up!** Once your panna cotta is perfectly set and jiggly, spoon your fresh strawberry topping over each one. If you’re feeling extra fancy, garnish with a mint leaf. Enjoy your impressive, effortless dessert!
Common Mistakes to Avoid
Look, we all make mistakes. It’s part of the journey. But why not learn from mine, eh? Consider this your cheat sheet to panna cotta perfection:
- **Not Blooming the Gelatin:** Trying to just dump gelatin powder directly into hot cream? Rookie mistake. It’ll clump, refuse to dissolve properly, and you’ll end up with a grainy, sad dessert. **Always bloom your gelatin first.**
- **Boiling the Cream:** Remember that simmer warning? If you let the cream boil vigorously, it can scald, alter the flavor, and sometimes even affect how the gelatin sets. Keep it gentle, just to a simmer.
- **Not Dissolving Gelatin Fully:** After adding the bloomed gelatin, stir like your life depends on it. If there are still undissolved bits, you’ll end up with strange, rubbery pockets in your otherwise smooth panna cotta. No one wants that.
- **Not Chilling Long Enough:** Patience, young padawan! Pulling it out of the fridge after two hours is asking for a soupy mess. **Give it at least 4 hours, preferably overnight, for that perfect wobble.**
- **Over-gelatinizing (or Under-gelatinizing):** Too much gelatin and it’s rubber. Too little and it’s liquid. Stick to the recipe’s measurements, especially your first time.
Alternatives & Substitutions
Feeling adventurous? Or maybe you just ran out of something key (happens to the best of us). Here are some easy swaps:
- **Fruit Topping:** Strawberries are classic, but seriously, anything goes! **Raspberries, blueberries, mango puree, passion fruit, a simple berry compote…** get creative! A drizzle of chocolate sauce or caramel would also be divine, IMO.
- **Flavor Profile:** Swap out vanilla for other extracts like almond, peppermint (hello, holiday panna cotta!), or even a hint of espresso powder for a coffee kick. You could infuse the cream with citrus zest (lemon, orange) or spices like cinnamon sticks before heating, just strain them out before adding gelatin.
- **Sweetener:** You can totally reduce the sugar if your berries are super sweet, or increase it a touch if you like things sweeter. Honey or maple syrup could work for a different flavor, but be mindful of the liquid content.
- **Dairy-Free?** It’s possible! You can use full-fat coconut milk (the kind in a can, not the carton) instead of heavy cream for a tropical twist. Just be aware it will have a distinct coconut flavor.
FAQ (Frequently Asked Questions)
Got questions? Good, I’ve got answers! (Mostly.)
- **Can I make this ahead of time?** Um, yes! That’s half the beauty of it. Make it a day or two in advance and keep it covered in the fridge. Just add the fresh strawberries right before serving for maximum prettiness.
- **Help, my panna cotta is too rubbery! What went wrong?** Probably too much gelatin, friend. Or maybe you boiled the cream which can sometimes affect the gelatin’s setting power. Less is more when it comes to gelatin for that perfect jiggle.
- **What if I don’t have ramekins?** No biggie! Use small cups, wine glasses, cute little jars, shot glasses for mini versions… anything that can hold liquid and fit in your fridge works.
- **How do I get it out of the mold?** If you lightly oiled your ramekins (a very light spray of neutral oil works best) before pouring, you can dip the bottom of the mold quickly into warm water (just a few seconds!) then invert onto a plate. The edges should loosen. If not oiled, good luck, but don’t stress if it sticks—just eat it from the container!
- **Can I use fresh fruit other than strawberries?** Absolutely! **This is where you get to play!** Raspberries, blueberries, mango, peaches, kiwi… whatever seasonal fruit makes you happy.
- **My panna cotta is grainy, what’s up with that?** This usually means your sugar didn’t dissolve completely or your gelatin didn’t dissolve completely. Stir, stir, stir, folks!
- **Is panna cotta really Italian?** Yep! “Panna cotta” literally means “cooked cream” in Italian. So now you know some fancy lingo, too. You’re basically fluent!
Final Thoughts
See? Told ya it was easy! You just whipped up a dessert that tastes like a dream, looks like a million bucks, and required minimal actual “cooking” skills. You’re basically a culinary wizard now, enchanting everyone with your creamy, jiggly goodness. So go ahead, pat yourself on the back, snap a picture for the ‘gram (because if it’s not on social, did it even happen?), and devour that glorious panna cotta. **Now go impress someone—or yourself—with your new culinary skills. You’ve earned it!** And remember, cooking should be fun. Don’t take it too seriously. Unless you’re dealing with gelatin, then maybe just a *little* bit seriously. 😉 Happy eating!


