“`html
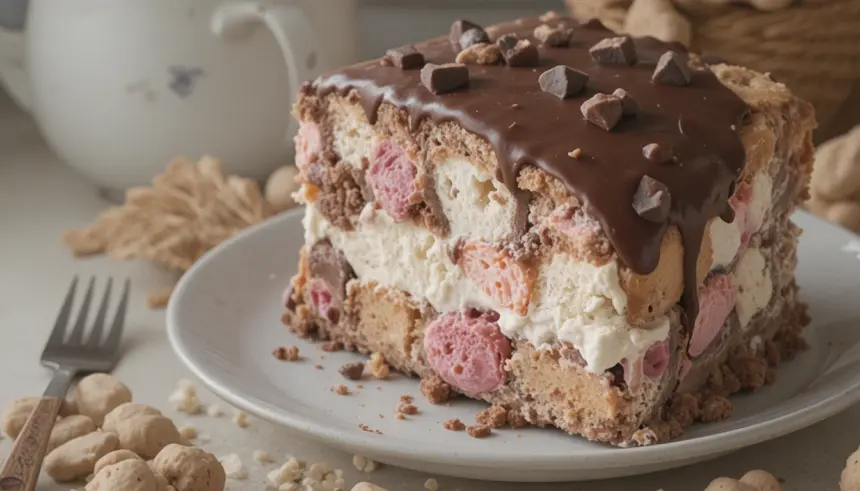
So, you’re staring into the abyss of your freezer, contemplating a life of sad, freezer-burned ice cream. Or maybe you’ve got a birthday coming up and the thought of a store-bought cake makes you weep tears of pure, unadulterated boredom. Fear not, my friend! We’re about to embark on a glorious, slightly messy, and utterly delicious adventure into the world of homemade ice cream cake. And trust me, this one’s a winner.
Why This Recipe is Awesome
Honestly, why is it awesome? Because it’s ridiculously easy, tastes like a million bucks (but costs way less), and makes you look like a culinary rockstar without, you know, actually having to be one. We’re talking layers of frozen delight, fudgy chocolate ganache that oozes like a dream, and an excuse to eat ice cream for, well, breakfast if you wanted. Plus, it’s totally customizable. Feel like adding sprinkles? Go for it. Want to swap out the ice cream flavors? Who am I to judge your frozen fantasies? It’s basically a hug in cake form.
Ingredients You’ll Need
- Ice Cream: About 1.5 quarts total. Two different flavors are usually best for that “wow” factor. Think vanilla and chocolate, or mint chip and strawberry. Your call, captain!
- Cookies or Brownies: About 2 cups worth. Crushed Oreos are classic, but crumbled brownie bits or even graham crackers work like a charm.
- Butter: 1/2 cup (1 stick), melted. For binding our cookie/brownie base.
- Chocolate Chips: 1 cup semi-sweet or dark chocolate chips. The good stuff, please!
- Heavy Cream: 1/2 cup. This is what makes the ganache go from “meh” to “OMG.”
- Optional Extras: Sprinkles, chopped nuts, chocolate syrup, whipped cream. Basically, anything that makes your heart sing (and your taste buds dance).
Step-by-Step Instructions
- Prep Your Pan: Grab a 9-inch springform pan. Line the bottom with parchment paper. This is crucial for easy removal, my friend. Don’t skip this, or we’ll be having a whole different conversation.
- Cookie Base Magic: Crush your cookies or brownies into fine crumbs. Mix them with the melted butter until they look like wet sand. Press this mixture firmly into the bottom of your prepared pan. **Pro Tip:** Use the flat bottom of a glass to get a nice, even layer. Pop this in the freezer for at least 30 minutes to firm up.
- Ice Cream Time! Take your first ice cream flavor out of the freezer and let it soften *just* enough to be spreadable. Don’t let it melt into a puddle of regret! Spread it evenly over your cookie base. Back into the freezer it goes for another 30-60 minutes until firm.
- Second Ice Cream Layer: Repeat step 3 with your second ice cream flavor. Spread it evenly over the first layer. Freeze until rock solid – at least 2-3 hours, or overnight if you’re feeling responsible.
- Ganache Glory: When you’re ready to assemble (or just can’t wait any longer), place your chocolate chips in a heatproof bowl. Heat the heavy cream in a small saucepan until it’s just simmering (don’t boil it!). Pour the hot cream over the chocolate chips. Let it sit for 5 minutes, then whisk until it’s smooth and gloriously glossy. Let it cool slightly.
- Assembly & Decorate: Remove your ice cream cake from the freezer. Carefully pour the slightly cooled ganache over the top, letting it drip down the sides. Add any other fun toppings you desire. Return to the freezer for at least another 30 minutes to set the ganache.
Common Mistakes to Avoid
- Melting Mayhem: Letting your ice cream get too soft is the ultimate sin. You want spreadable, not soup.
- Flimsy Base: Not pressing the cookie base down firmly enough. It’ll crumble like your New Year’s resolutions.
- Impatient Ganache: Pouring the ganache when it’s too hot. It’ll melt your ice cream into a sad, swirly mess.
- Freezer Burn Follies: Not wrapping the cake well if you plan to freeze it for more than a day. Plastic wrap and foil are your best friends here!
Alternatives & Substitutions
Don’t have springform pan? A regular cake pan lined with plastic wrap can work, but it’s a bit more of a wrestling match to get it out. No chocolate chips? Use chopped chocolate bars – just make sure they’re good quality! If you’re feeling fancy, you can even layer in some caramel sauce or hot fudge between the ice cream layers. My personal fave? A thin layer of peanut butter spread over the first ice cream layer before adding the second. Chef’s kiss!
FAQ (Frequently Asked Questions)
Can I make this ahead of time? Absolutely! In fact, it’s best made at least a day in advance to let everything firm up properly.
What if I only have one flavor of ice cream? Still totally doable! It just won’t have that epic flavor contrast, but it’ll still be delicious.
My ganache is too thick! What do I do? Gently warm it up for a few seconds in the microwave or over a double boiler. Add a tiny splash of cream if needed.
My ganache is too thin! Help! Oops! Pop it in the fridge for a bit, stirring occasionally, until it thickens up. Patience, grasshopper!
How long does it last? In the freezer, tightly wrapped, it should be good for about 2-3 weeks. But let’s be real, it won’t last that long.
Can I use store-bought cookie crumbs? Sure, but honestly, crushing your own cookies is way more fun and tastes better. Plus, you get to lick the food processor!
Is this healthy? Uh, no. And that’s exactly why we love it. 😉
Final Thoughts
There you have it – your ticket to ice cream cake nirvana! It’s a little bit of effort, a whole lot of deliciousness, and guaranteed to earn you some serious brownie points (pun intended). Now go forth, gather your ingredients, and unleash your inner ice cream cake artist. You’ve got this! And remember, if it’s not perfect, it’s still probably amazing. Happy baking (and eating)!
“`
