Let’s be honest—when chocolate chip cravings hit, they hit hard. And sure, you could drag yourself to the store for some mediocre bakery cake, OR you could spend the next 45 minutes creating something that’ll make your taste buds do a happy dance. Your call, friend. (Though since you’re reading this, I think I know which way you’re leaning.)
Why This Recipe is Awesome
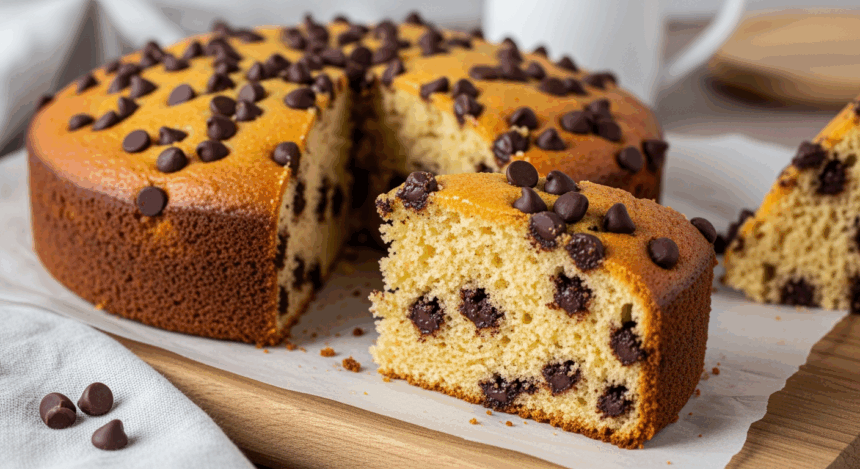
First off, this isn’t some fancy-schmancy cake that requires professional baking skills or equipment you’ll use exactly once before it collects dust for eternity. This is a no-nonsense, reliable chocolate chip cake that somehow manages to be both impressively delicious and embarrassingly simple.
The beauty here is in the perfect balance—it’s moist but not soggy, sweet but not cavity-inducing, and impressive enough for company while easy enough for a random Tuesday night when you’re feeling sorry for yourself. Plus, the chocolate chips create these pockets of melty goodness that are basically therapy in food form.
Ingredients You’ll Need
- 2 cups all-purpose flour (the regular stuff, nothing fancy)
- 1 cup granulated sugar (because adulting is hard and we deserve sweetness)
- 1/2 cup unsalted butter, softened (not melted—there’s a difference, trust me)
- 2 large eggs (room temperature makes a difference, but I won’t judge if you forget)
- 1 cup milk (whatever’s in your fridge works)
- 2 teaspoons vanilla extract (the real kind if possible—the fake stuff tastes like sadness)
- 2 teaspoons baking powder (the magical stuff that makes things rise)
- 1/2 teaspoon salt (to make the sweet things taste sweeter—science!)
- 1 1/2 cups chocolate chips (semi-sweet, milk, dark—follow your heart)
- Optional: 1/4 cup sour cream (for extra moistness, because dry cake is a crime)
Step-by-Step Instructions
- Prep your battle station. Preheat oven to 350°F (175°C) and grease a 9×13 inch baking pan. Or use a round 9-inch if you’re feeling fancy and want a layer cake situation.
- Mix the dry ingredients. In a medium bowl, whisk together flour, baking powder, and salt. Set aside and try not to snack on the chocolate chips while you work. (We both know you will anyway.)
- Cream like you mean it. In a large bowl, beat the butter and sugar together until light and fluffy—about 3 minutes with an electric mixer. This is not the time to be lazy. This step creates tiny air pockets that make your cake fluffy, so put your back into it!
- Get eggy with it. Add eggs one at a time, beating well after each. Then pour in the vanilla. Your mixture might look a little curdled—that’s totally normal, not a disaster.
- Bring it all together. Gradually add the flour mixture to the butter mixture, alternating with milk. Start and end with the flour (flour, milk, flour, milk, flour). Mix just until combined—overmixing is the enemy of tender cake.
- Add the stars of the show. Fold in those chocolate chips! If you’re feeling wild, save a small handful to sprinkle on top before baking.
- Bake to perfection. Pour the batter into your prepared pan and bake for 30-35 minutes, or until a toothpick inserted in the center comes out with a few moist crumbs (not wet batter).
- The hardest part. Let the cake cool for at least 20 minutes before cutting. I know it’s torture, but cutting into hot cake is asking for a crumbly mess.
Common Mistakes to Avoid
Let’s be real, even a “simple” recipe has its pitfalls. Here’s how not to mess up your chocolate chip masterpiece:
- Opening the oven door too early. Your cake will sink faster than my motivation on Monday mornings. Keep that door shut for at least 25 minutes.
- Using cold ingredients. Cold butter and eggs don’t play well with others. Let them come to room temp first, or prepare for a lumpy batter situation.
- Measuring flour like it’s a suggestion. Don’t just dip your measuring cup into the flour bag and call it a day. Fluff, spoon, level—your cake’s texture depends on it.
- Mixing until your arm falls off. Once you add flour, mix just enough to combine. Overmixing develops gluten, which turns your cake from tender to tough.
- Ignoring the toothpick test. “It looks done” isn’t reliable. Use a toothpick—if it comes out with wet batter, keep baking. If it’s completely clean, you’ve gone too far (slightly moist crumbs are the goal).
Alternatives & Substitutions
Because sometimes the pantry situation isn’t ideal, or you’re feeling adventurous:
- No all-purpose flour? Cake flour works but makes a more delicate crumb. Add 2 extra tablespoons per cup to compensate.
- Dairy-free needs? Substitute plant-based milk and butter. Almond milk works particularly well, and Earth Balance buttery sticks are decent for baking.
- Watching sugar? You can reduce to 3/4 cup without major catastrophe. Using part brown sugar (like 1/2 cup white, 1/2 cup brown) adds moisture and a caramel undertone.
- Chocolate chip alternatives: Butterscotch chips, peanut butter chips, chopped nuts, or even candy pieces work. Mix and match for your own signature cake—I’m partial to half dark chocolate, half peanut butter chips because I’m a genius, obviously.
- Flavor boosters: Add 1 teaspoon of espresso powder to intensify the chocolate flavor without making it taste like coffee. Or add orange zest for a chocolate-orange combo that’s seriously underrated, IMO.
FAQ (Frequently Asked Questions)
Can I make this cake ahead of time?
Absolutely! It actually tastes even better the next day. Just store it covered at room temperature for up to 3 days. If you live somewhere humid, maybe stick it in the fridge instead of turning it into a science experiment.
My chocolate chips all sank to the bottom. What gives?
Ah, the classic chocolate chip dive. Try tossing your chips in a tablespoon of the flour mixture before folding them in. The light coating helps them defy gravity a bit better.
Can I freeze this cake?
You sure can! Wrap it well in plastic wrap, then foil, and freeze for up to 3 months. Thaw overnight in the refrigerator before bringing to room temperature to serve. Future You will thank Present You for this emergency dessert planning.
Do I really need to bring ingredients to room temperature?
Look, will your cake explode if you use cold eggs? No. Will it be as good as it could be? Also no. Room temp ingredients blend better and create a more uniform texture. But if you’re in a rush, at least warm the eggs in a bowl of warm water for 5 minutes.
Can I turn this into cupcakes?
Definitely! Fill lined muffin cups about 2/3 full and bake at the same temperature for 18-22 minutes. You’ll get approximately 24 cupcakes from this recipe. Perfect for when you don’t want to share a full slice with anyone.
Is there a way to make this cake fancier for a special occasion?
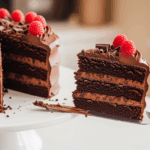
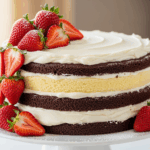
Easy! Bake in two 9-inch round pans instead (25-30 minutes), then stack with chocolate frosting between layers and on top. Or drizzle a simple glaze over the cooled cake (1 cup powdered sugar + 2 tablespoons milk + splash of vanilla). Instant upgrade with minimal effort—my favorite kind of fancy.
Final Thoughts
There you have it—a chocolate chip cake that’s practically foolproof and guaranteed to make you look like you know what you’re doing in the kitchen. It’s the perfect balance between “I put in effort” and “I didn’t want to spend all day doing this.”
Whether you’re stress-baking at midnight or trying to impress someone with your culinary prowess, this cake delivers. And remember, even if it doesn’t turn out Instagram-perfect (whose does, honestly?), it’ll still taste amazing. Because it’s cake. With chocolate chips. The bar for failure is remarkably high here.
Now go preheat that oven and create some magic. Your future self—the one with chocolate on their face—will thank you.
