So, you’re craving something ridiculously cute and delicious, but the thought of spending an entire day in the kitchen makes your soul shrivel? Girl, same. We’re about to make the most adorable Hello Kitty chocolate cake without the usual kitchen meltdown. You ready?
Why This Recipe is Awesome
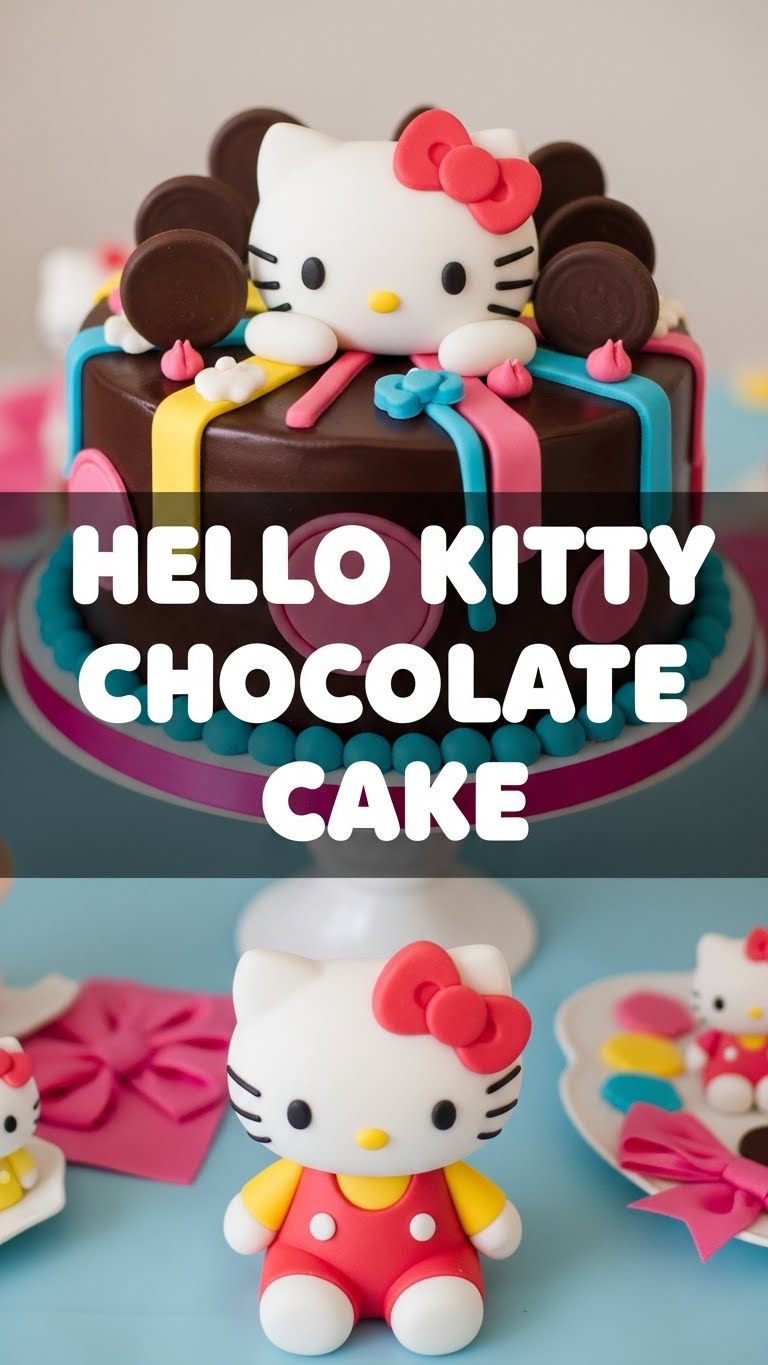
Okay, first things first: this isn’t just *any* chocolate cake. This is a Hello Kitty chocolate cake. That immediately bumps its awesomeness factor by, like, a thousand. But beyond the undeniable cuteness, here’s why this recipe will be your new bestie:
- It’s surprisingly simple. Seriously, if you can follow basic instructions and not set off the smoke detector, you’re golden.
- It’s a chocolate cake. Who doesn’t love chocolate cake? Exactly.
- The Hello Kitty design? It looks impressive but is actually idiot-proof. Even I didn’t mess it up, and my artistic skills peak at stick figures.
- It’s a guaranteed crowd-pleaser. Whether you’re making it for a birthday, a treat-yourself moment, or just to show off (no judgment!), this cake delivers smiles.
Ingredients You’ll Need
Gather your troops! Here’s what you’ll need to transform into a baking wizard. Don’t worry, nothing too fancy here.
For the Seriously Good Chocolate Cake:
- 1 ½ cups all-purpose flour: The backbone of your cake. Don’t try to substitute with almond flour unless you’re feeling adventurous (and possibly disappointed).
- 1 ½ cups granulated sugar: For that perfect sweetness. It’s a cake, not a health salad, okay?
- ¾ cup unsweetened cocoa powder: The darker, the richer! Don’t skimp here, your taste buds will thank you.
- 1 ½ teaspoons baking soda: Your lift-off secret.
- ¾ teaspoon baking powder: More lift, because we want a fluffy cake, not a dense brick.
- 1 teaspoon salt: Just a pinch to enhance all those glorious chocolatey flavors.
- 2 large eggs: Room temperature, please! They mix better.
- ¾ cup milk: Any kind works, but whole milk gives it that extra lusciousness.
- ⅓ cup vegetable oil: Or canola, or melted coconut oil. Keeps it moist for days.
- 1 teaspoon vanilla extract: Pure vanilla, for the love of all that is good.
- ¾ cup hot water or hot brewed coffee: Coffee seriously deepens the chocolate flavor. Trust me on this one.
For the Dreamy Chocolate Buttercream Frosting:
- 1 cup unsalted butter: Softened! Like, leave-it-on-the-counter-for-an-hour soft.
- 3-4 cups powdered sugar: Sifted, unless you like lumpy frosting (you don’t).
- ½ cup unsweetened cocoa powder: Again, good quality, please!
- ¼ cup milk or heavy cream: Add more if needed, a tablespoon at a time.
- 1 teaspoon vanilla extract: The frosting needs love too!
For the Adorable Hello Kitty Magic:
- 1 cup white chocolate chips or white melting wafers: For her cute little face and ears.
- Pink gel food coloring: Gel is key for vibrant colors without thinning out the chocolate.
- Black edible food marker: For her eyes and whiskers. Don’t even *think* about trying to pipe those with frosting unless you’re a surgeon.
- 1 yellow M&M or sprinkle: For her iconic little nose.
Step-by-Step Instructions
Alright, apron on, good vibes only! Let’s get this done.
- Preheat & Prep: Preheat your oven to 350°F (175°C). Grease and flour two 8-inch round cake pans. Or line with parchment paper circles if you’re feeling fancy.
- Mix the Dry Stuff: In a large bowl, whisk together the flour, sugar, cocoa powder, baking soda, baking powder, and salt. Make sure there are no lumpy bits.
- Combine the Wet Stuff: In another medium bowl, whisk the eggs, milk, oil, and vanilla extract until well combined.
- Wet Meets Dry: Pour the wet ingredients into the dry ingredients. Mix on low speed with an electric mixer (or by hand) until just combined. Don’t overmix, or your cake will be tough!
- Add the Hot Liquid: Carefully pour in the hot water or coffee. Mix on low speed until the batter is smooth. It will be thin, but that’s okay!
- Bake It Up: Divide the batter evenly between your two prepared pans. Bake for 30-35 minutes, or until a wooden skewer inserted into the center comes out clean.
- Cool Down: Let the cakes cool in the pans for about 10-15 minutes, then invert them onto a wire rack to cool completely. This is a crucial step! Do not frost a warm cake! It will melt into a sad puddle.
- Whip the Buttercream: While the cakes cool, make your frosting. Beat the softened butter in a large bowl until creamy. Gradually add the sifted powdered sugar and cocoa powder, alternating with splashes of milk/cream and vanilla. Beat until light and fluffy. If it’s too thick, add more milk a teaspoon at a time. Too thin? More powdered sugar.
- Stack ‘Em Up: Once your cakes are totally cool, place one layer on your serving plate. Spread a generous layer of chocolate buttercream on top. Place the second cake layer on top.
- Crumb Coat Magic: Apply a thin layer of frosting all over the cake. This is your “crumb coat” and it traps any loose crumbs. Pop it in the fridge for 15-20 minutes to set. This is a game-changer for a smooth finish.
- Final Frosting: Once the crumb coat is firm, apply the rest of the buttercream, smoothing it out with an offset spatula.
- Hello Kitty Time!
- Melt White Chocolate: Melt your white chocolate chips/wafers. You can do this in the microwave (30-second bursts, stirring each time) or over a double boiler.
- Ears: Spoon some melted white chocolate into a small piping bag (or a Ziploc bag with the corner snipped). On parchment paper, pipe two small triangles for her ears. Let them set in the fridge.
- Bow: Take a small amount of the remaining white chocolate and mix in a drop or two of pink gel food coloring until you get that perfect Hello Kitty pink. Pipe a little bow shape on parchment paper. Let it set.
- Assembly: Once the chocolate pieces are firm, carefully peel them off the parchment paper. Gently press the ears onto the top edge of the cake. Place the pink bow slightly to the side of one ear.
- Face Details: Use your black edible marker to draw two small oval eyes and three little whiskers on each side of her face. Finally, gently press the yellow M&M/sprinkle in place for her nose.
- Admire & Devour: Step back and behold your masterpiece! You made a Hello Kitty cake! Now, eat it before anyone else gets to it.
Common Mistakes to Avoid
We’ve all been there, friend. Learn from my past blunders!
- Overmixing the Batter: When mixing flour, stop as soon as it’s combined. Overmixing develops the gluten, making your cake tough and chewy instead of light and fluffy.
- Not Cooling Cakes Completely: I cannot stress this enough. If you frost a warm cake, that frosting will melt, slide, and make a hot mess. Patience, grasshopper.
- Skipping the Crumb Coat: This isn’t just an extra step, it’s a *necessary* step for a smooth, crumb-free outer layer of frosting. Don’t skip it!
- Eyeballing Hello Kitty Details: Unless you’re a secretly famous artist, trying to freehand Hello Kitty’s eyes and whiskers with frosting will likely result in a “Hello Kitty after a wild night out” look. Use the edible marker. It’s a lifesaver.
- Using Liquid Food Coloring for Chocolate: Water-based liquid food coloring will seize your melted chocolate, making it clumpy and unusable. Always use gel food coloring when coloring chocolate!
Alternatives & Substitutions
Feeling a little rebellious? Here are some simple swaps to keep things interesting:
- Dairy-Free? Swap regular milk for your favorite plant-based milk (almond, soy, oat). Use dairy-free butter sticks for the frosting and dairy-free chocolate chips.
- Less Sweet Frosting: You can reduce the powdered sugar in the frosting by about half a cup if you prefer it less sweet, but make sure to adjust the liquid accordingly.
- Different Frosting Flavor: Not a fan of chocolate frosting (gasp!)? Use vanilla buttercream, cream cheese frosting, or even a raspberry buttercream for a fun contrast.
- Hello Kitty’s Bow Color: Feel free to make her bow any color you like! A blue bow would be super cute too.
- No Round Pans? You can bake this in a 9×13 inch pan and cut out a circle (use a plate as a guide!), or even make Hello Kitty cupcakes. Just adjust baking times.
FAQ (Frequently Asked Questions)
Got questions? I’ve got (casual) answers!
- “Can I use margarine instead of butter in the frosting?”
Well, technically yes, but why hurt your soul (and your taste buds) like that? For the best flavor and texture, good ol’ butter is your BFF. Margarine often has more water, which can affect the frosting consistency.
- “My cake sank in the middle! What happened?”
Uh oh! This usually means you either opened the oven door too early (don’t peek!), or your baking powder/soda is old and tired. Make sure your leavening agents are fresh!
- “How do I get my frosting super smooth?”
The crumb coat is your secret weapon! Also, using a warm offset spatula (dip it in hot water, wipe it dry) helps. And honestly, practice makes perfect. Don’t stress too much – it’s homemade, not from a fancy bakery!
- “Can I make the cake batter ahead of time?”
I wouldn’t recommend it. The leavening agents start reacting once wet ingredients are added, so for the best rise and texture, bake the batter immediately after mixing.
- “How long does this cake last?”
This cake is best enjoyed within 3-4 days at room temperature (covered, of course!). You can also pop it in the fridge for up to a week, just bring it to room temp before serving for the best flavor.
- “Do I *really* need hot water or coffee? Can’t I just use cold?”
Yes, you really do! The hot liquid helps to “bloom” the cocoa powder, releasing its full flavor and creating a more intensely chocolatey cake. Cold water just doesn’t do it justice. IMO, go for the hot coffee!
Final Thoughts
You did it! You’ve just conjured a masterpiece that’s equal parts delicious and adorable. Take a pic, eat a slice (or three, I won’t tell), and bask in the glory of your culinary triumph. You totally rocked it!
Now go impress someone—or just yourself—with your new, undeniably charming Hello Kitty chocolate cake skills. You’ve earned every single bite!


