So, you’re craving something luscious, creamy, and ridiculously delicious, but your inner health guru is giving you the side-eye? Welcome to the club, friend! We’ve all been there, staring longingly at a picture of tiramisu, then sighing dramatically because, well, calories. But what if I told you there’s a way to have your tiramisu and eat it too, without the guilt trip? Buckle up, buttercup, because we’re about to make some **Healthy Tiramisu**!
Why This Recipe is Awesome
Let’s be real, most tiramisu recipes involve enough heavy cream and sugar to power a small village. Not this one! This recipe is your secret weapon for satisfying that sweet tooth without feeling like you need a nap (or a treadmill) immediately after. It’s lighter, it’s fresher, and dare I say, almost as addictive as the original. Plus, it’s pretty much **idiot-proof**. Seriously, if I can do it without setting off a single smoke alarm, you can too.
Think about it: fewer ingredients, less fuss, and you don’t even need to bake anything. It’s a no-bake wonder that comes together faster than you can say “espresso martini.” (Though, no judgment if you want to add a splash to the grown-up version later!) It’s also surprisingly quick to assemble, leaving you more time for important things, like watching Netflix or, you know, eating the tiramisu.
Ingredients You’ll Need
Get ready for a grocery list that won’t make your wallet (or your waistline) weep. Here’s what you’ll need for this healthy-ish magic:
- Strong Brewed Coffee or Espresso (cooled): About 1.5 cups. Your morning pick-me-up, but for dessert duty. **Make sure it’s cold, or you’ll have soggy ladyfingers, and nobody wants that.**
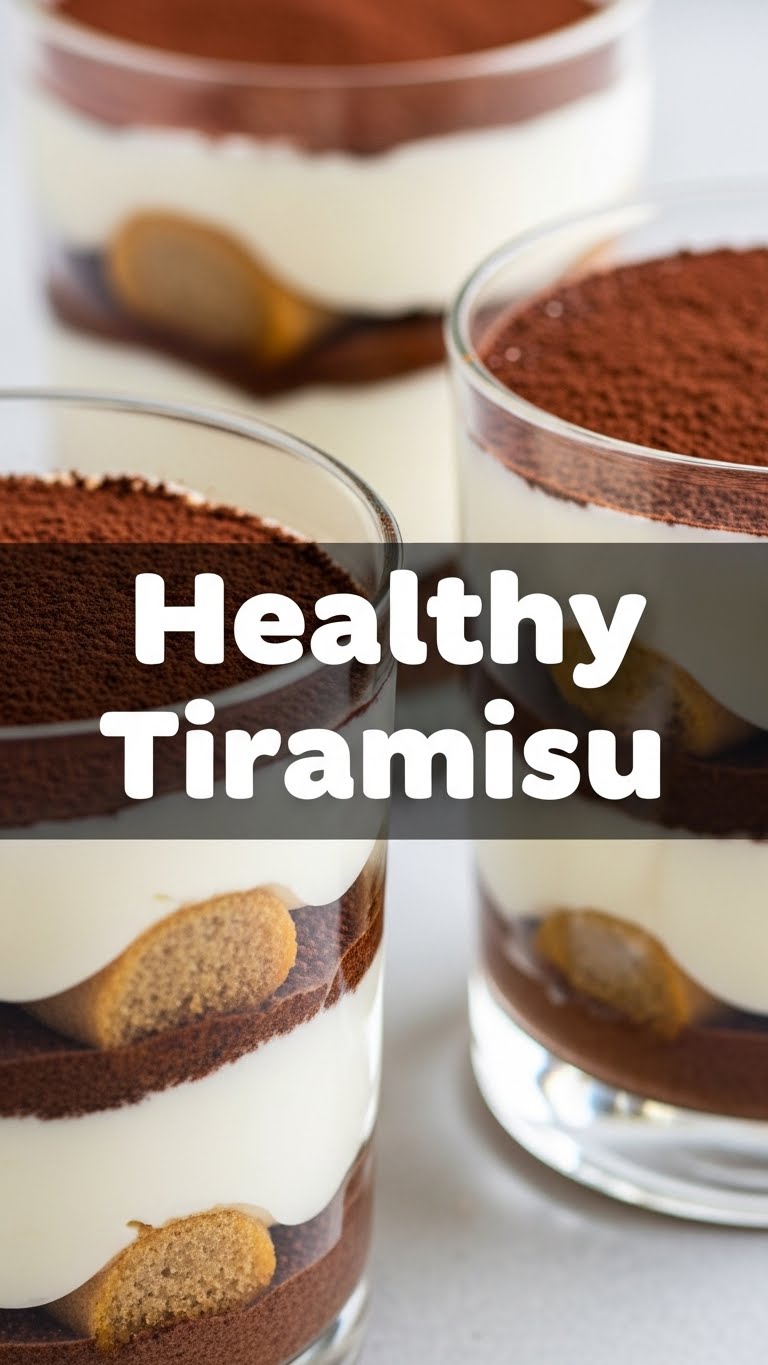
- Light Cream Cheese or Ricotta Cheese: 16 oz (about 2 cups). This is our healthy mascarpone swap. Go for the light stuff to keep things breezy.
- Plain Greek Yogurt (0% or 2% fat): 1 cup. Adds that tangy, creamy goodness without the heaviness. Plus, protein! High five for health!
- Maple Syrup or Honey: 1/2 cup (or to taste). The good kind of sweet. Adjust as per your sweet tooth’s demands.
- Vanilla Extract: 1 teaspoon. Because vanilla makes everything better, it’s a scientific fact.
- Ladyfingers (savoiardi biscuits): 1 pack (around 24-30 biscuits). Look for a whole wheat version if you’re feeling extra virtuous!
- Unsweetened Cocoa Powder: For dusting. The grand finale, the cocoa powder cape.
Step-by-Step Instructions
Alright, let’s get this dessert party started! These steps are so easy, you could probably do them blindfolded (though I don’t recommend it, for hygiene reasons).
- Brew and Chill: First things first, brew your strong coffee or espresso. Set it aside and let it **cool completely**. Seriously, don’t rush this. Cold coffee is key to non-soggy layers.
- Whip Up the Creamy Dream: In a large bowl, combine the light cream cheese (or ricotta), Greek yogurt, maple syrup (or honey), and vanilla extract. Use an electric mixer or a sturdy whisk to beat it until it’s smooth, fluffy, and looks utterly irresistible. You want zero lumps, so keep going until it’s super creamy.
- Prep Your Dipping Station: Pour the cooled coffee into a shallow dish or bowl.
- The Dip & Layer Game: Grab your ladyfingers. One by one, quickly dip each side of a ladyfinger into the coffee for just **1-2 seconds**. We’re talking a quick dunk, not a full swim. You want them moistened, not drenched. Arrange a single layer of these coffee-kissed biscuits at the bottom of an 8×8 inch (or similar sized) baking dish.
- Creamy Cloud Layer: Spread half of your glorious cream mixture evenly over the first layer of ladyfingers.
- Repeat the Magic: Repeat step 4 with another layer of dipped ladyfingers, and then top it with the remaining cream mixture.
- Chill Out, Max: Now comes the hardest part: **patience**. Cover the dish with plastic wrap and refrigerate for at least 4-6 hours, but **ideally overnight**. This chilling time lets the flavors meld and the tiramisu set perfectly. Don’t skip this, it’s crucial!
- Dust and Devour: Just before serving, grab your unsweetened cocoa powder and a fine-mesh sieve. Lightly dust the top of your tiramisu with cocoa powder. Slice, serve, and accept all the compliments!
Common Mistakes to Avoid
Look, we all make mistakes. It’s part of the human (and cooking) experience. But I’m here to help you dodge the most common tiramisu blunders, so you can strut out of the kitchen like a pro.
- Warm Coffee: Dipping ladyfingers in warm coffee is a one-way ticket to mush-ville. **Always use cold coffee.** Rookie mistake, don’t be that person.
- Over-Dipping Ladyfingers: These biscuits are sponges, not submarines. A quick dip (1-2 seconds per side) is all you need. Drown them, and you’ll end up with a sad, soggy mess instead of delicate layers.
- Impatience is Not a Virtue Here: Thinking you can serve this after just an hour in the fridge? Oh, honey, no. The magic happens during the chill time. **Give it at least 4-6 hours, but overnight is primo.** Otherwise, you’ll have runny, un-set tiramisu.
- Using Low-Quality Coffee: The coffee is a star flavor, not a background extra. Use good quality, strong brewed coffee or espresso. It makes a difference, IMO.
- Not Enough Dust: That cocoa powder isn’t just for show. It adds a crucial bittersweet counterpoint. Don’t be shy with the final dusting!
Alternatives & Substitutions
Got dietary restrictions? Missing an ingredient? No problem! This recipe is pretty forgiving. Here are some ideas to make it your own:
- Ladyfinger Swap: Can’t find ladyfingers or want something even healthier? Try whole wheat graham crackers, digestive biscuits, or even slices of whole grain pound cake. You might need to adjust the dipping time slightly.
- Creamy Base Alternatives: If cream cheese isn’t your jam, try using all ricotta, or a mix of ricotta and skyr (a thick Icelandic yogurt). For a truly dairy-free version (though this recipe isn’t strictly vegan), you could experiment with cashew cream or whipped coconut cream, but you’d need to adjust quantities and probably add a thickener.
- Sweetener Options: Agave nectar, date syrup, or even a sugar substitute like erythritol or stevia can work in place of maple syrup or honey. Just taste as you go!
- Flavor Boosters: Add a little orange zest to your cream for a brighter flavor, or a pinch of cinnamon for warmth. A tiny splash of almond extract can also be lovely.
- Coffee-Free Version: Not a coffee fan? You *could* dip the ladyfingers in strong black tea (like Earl Grey), or even a bit of cooled almond milk with a drop of vanilla. Just be aware, it won’t technically be “tiramisu” (which means “pick me up” in Italian, referring to the coffee!).
FAQ (Frequently Asked Questions)
Got questions swirling in your head? I’ve got answers! (Mostly.)
- Can I make this ahead of time? Absolutely, and in fact, you *should*! This tiramisu gets better with age (up to a point, like fine wine or a good cheese). Make it the night before for peak deliciousness.
- How long does this healthy tiramisu last in the fridge? If it makes it past day one, I’d say about 3-4 days in an airtight container. But let’s be honest, it rarely lasts that long.
- Is it *really* healthy, or are you just saying that? Okay, “healthy” is relative, right? It’s definitely *healthier* than traditional tiramisu, thanks to the lighter cream base and controlled sweetness. It’s about balance, and this baby delivers.
- Can I add alcohol to it? You want to get a little boozy, huh? While we’re going for “healthy” here, a tablespoon or two of rum, Kahlua, or Amaretto can be added to the coffee for dipping, or even mixed into the cream. Just don’t tell your inner health guru I suggested it!
- What if I don’t have an 8×8 inch dish? No stress! A loaf pan, a 9×5 inch rectangular dish, or even individual ramekins work great. Just adjust your layers accordingly. Get creative!
- Can I freeze tiramisu? You *can*, but the texture might change a little upon thawing, especially with the lighter cream base. The ladyfingers can get a bit mushier. For best results, enjoy it fresh from the fridge.
Final Thoughts
There you have it! A healthy-ish tiramisu that doesn’t compromise on flavor or that luxurious, creamy texture. You’ve officially debunked the myth that delicious desserts have to be loaded with guilt. So, go ahead, treat yourself, share with friends (if you’re feeling generous), and bask in the glory of your culinary prowess. You’ve just made a dessert that’s both smart and scrumptious. Now go impress someone—or yourself—with your new culinary skills. You’ve earned it!


