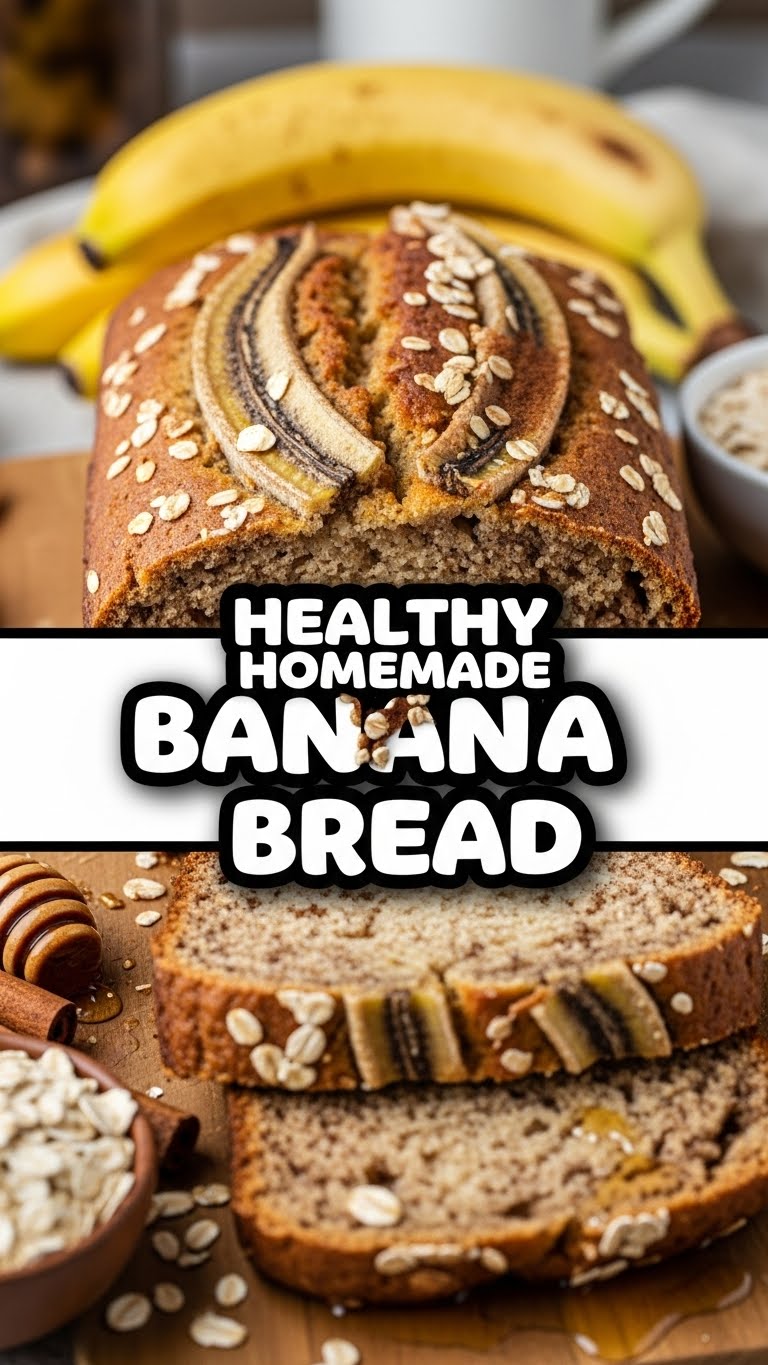
So you’re staring at those spotty, neglected bananas on your counter, aren’t you? Wondering if they’re still fruit or have started a new life form? Fear not, my friend! This isn’t a science experiment; it’s a golden opportunity. We’re about to transform those unassuming brown-speckled beauties into the most delectable, cozy, *healthy-ish* banana bread you’ve ever devoured. And guess what? It’s so ridiculously easy, you’ll wonder why you ever bought it from a cafe. Let’s get baking!
Why This Recipe is Awesome
Okay, let’s be real. We all want to bake something amazing without, like, *actually* working hard. This recipe? It’s your culinary soulmate. First off, it’s designed for those slightly-past-their-prime bananas, which means less food waste and more deliciousness. Win-win! Second, it’s got that perfect balance of sweet, moist, and utterly comforting, without being a total sugar bomb. We’re talking about a banana bread that you can *almost* convince yourself is a breakfast food. Plus, it’s **idiot-proof**. Seriously, if I can do it without setting off the smoke alarm, you’re golden. No fancy equipment, no complex techniques – just pure, unadulterated banana bread joy.
Ingredients You’ll Need
Gather your troops! Here’s what you’ll need for this banana bread magic. Don’t worry, nothing too exotic or hard to find here.
- 3-4 Ripe Bananas: The spottier, the better! Think leopard print, not sunshine yellow. These are the stars of the show, bringing all the natural sweetness.
- 1 Large Egg: Your binding agent, making everything stick together like best friends.
- 1/4 cup Melted Coconut Oil (or unsalted butter): Gives it that lovely moist texture. Coconut oil adds a subtle hint of tropical goodness, but butter works wonders too.
- 1/2 cup Granulated Sugar (or a mix of white and brown sugar for depth): We’re being *healthy-ish*, so not a ton, but enough to make your taste buds sing.
- 1 1/2 cups All-Purpose Flour: The foundation of our bread. No need for fancy stuff unless you’re feeling bougie.
- 1 teaspoon Baking Soda: The leavening hero that gives our bread lift and lightness.
- 1/2 teaspoon Salt: Don’t skip this! It balances the sweetness and enhances all the flavors.
- 1 teaspoon Vanilla Extract: Because vanilla makes everything better, **IMO**. It’s non-negotiable for that warm, comforting aroma.
- Optional Add-ins: 1/2 cup chocolate chips (dark chocolate for extra health points, *wink*), chopped walnuts, or pecans for crunch.
Step-by-Step Instructions
Alright, apron on (or not, we don’t judge). Let’s get this bread in the oven!
- Preheat & Prep: Preheat your oven to a cozy 350°F (175°C). Grab a standard loaf pan (about 9×5 inches) and give it a good spray with cooking spray or grease it with butter. We don’t want sticking!
- Mash Those Bananas: In a medium bowl, peel your spotty bananas and mash them with a fork until they’re mostly smooth but still have a few lovely lumps. Those lumps add character!
- Wet Ingredients Unite!: To your mashed bananas, add the egg, melted coconut oil (or butter), sugar, and vanilla extract. Whisk them all together until just combined. Don’t overmix; we’re making bread, not a science experiment.
- Dry Ingredients Do a Dance: In a separate, larger bowl, whisk together the flour, baking soda, and salt. Make sure they’re well distributed.
- Combine Forces: Pour the wet banana mixture into the dry ingredients. Stir gently with a spoon or spatula **just until combined**. A few streaks of flour are totally fine; overmixing develops gluten and can make your bread tough. Lumps are your friends here!
- Add Your Goodies: If you’re using chocolate chips, nuts, or any other fun add-ins, fold them in now. Spread the batter evenly into your prepared loaf pan.
- Bake It Up: Pop the pan into your preheated oven. Bake for 50-65 minutes, or until a toothpick inserted into the center comes out clean or with a few moist crumbs. The top should be beautifully golden brown.
- Cool Down: Once baked, take the loaf pan out and let it cool on a wire rack for about 10 minutes. Then, carefully remove the bread from the pan and let it cool completely on the rack. **Patience is key here**, my friend, otherwise it might crumble.
Common Mistakes to Avoid
Even though this recipe is practically foolproof, there are a few banana bread blunders to steer clear of. Learn from my mistakes, and you’ll be a baking legend!
- Using Under-Ripe Bananas: Seriously, yellow bananas are a no-go. They lack the sweetness and moisture needed. **Brown spots are where the magic happens!**
- Overmixing the Batter: This is a cardinal sin in baking. Stir until just combined, no more. An overmixed batter leads to a dense, chewy bread, and nobody wants that.
- Opening the Oven Door Too Much: Stop peeking! Every time you open the oven, the temperature drops, which can mess with your bread’s rise and cooking time. Trust the process!
- Not Cooling Enough: Trying to slice hot banana bread is a recipe for disaster (literally). It’ll be crumbly and mushy. **Let it cool completely for perfect slices.** I know, it’s hard to wait.
Alternatives & Substitutions
Feeling adventurous? Or just missing an ingredient? No worries, here are some easy swaps and additions to customize your banana bread experience:
- Flour Power: Want to make it even healthier? Swap out half (or all!) of the all-purpose flour for whole wheat flour. It’ll give it a nuttier flavor and denser texture. Gluten-free? Use a 1:1 gluten-free baking blend.
- Sweetener Swaps: Instead of granulated sugar, you can use maple syrup or honey. Just remember liquid sweeteners might slightly alter the texture, so you might need a tiny bit less liquid elsewhere, **FYI**. Brown sugar adds a lovely caramel note.
- Fat Choices: No coconut oil? No problem! Melted unsalted butter, vegetable oil, or even applesauce (for a super low-fat version) can stand in for the coconut oil.
- Add-In Extravaganza: Get creative! Aside from chocolate chips and nuts, try shredded coconut, dried cranberries, a sprinkle of cinnamon, or even a dash of nutmeg for extra warmth.
FAQ (Frequently Asked Questions)
Got questions? I’ve got (casual) answers!
- My bananas aren’t ripe enough! What do I do?
Oh, the agony! You can ripen them quickly by baking them on a baking sheet at 300°F (150°C) for 15-30 minutes until the peels are black and shiny. Let them cool before mashing. Crisis averted!
- Can I use margarine instead of butter/oil?
Well, technically yes, but why hurt your soul like that? Butter or coconut oil will give you much better flavor and texture. Margarine is a last resort, my friend.
- Can I make muffins instead of a loaf?
Absolutely! This batter works perfectly for muffins. Just divide it among a 12-cup muffin tin (liners recommended) and bake for 20-25 minutes, or until a toothpick comes out clean. Shorter bake time, instant gratification!
- How do I store banana bread?
Once completely cool, wrap it tightly in plastic wrap or foil, or store it in an airtight container at room temperature for up to 3-4 days. For longer storage, freeze slices for up to 3 months!
- Is this banana bread *actually* healthy?
It’s certainly *healthier* than many versions! Less sugar, good fats (if using coconut oil), and the natural goodness of bananas. It’s a treat you can feel good about enjoying, especially compared to a store-bought cake. It’s all about balance, right?
Final Thoughts
And there you have it, my friend! Your very own, absolutely delicious, and surprisingly easy homemade banana bread. Go on, slice yourself a thick piece, grab a cuppa, and bask in the glory of your culinary prowess. You’ve turned those forgotten bananas into something truly special. Now go impress someone—or just yourself—with your new baking skills. You’ve earned it!

