So, you’re eyeing that greasy takeaway menu again, aren’t you? And then feeling guilty even before you order? Been there, done that, bought the T-shirt. But what if I told you we could have the crispy, juicy magic of fried chicken without the deep-fried guilt trip? Stick with me, buttercup, because we’re about to make some “healthy” fried chicken that actually tastes good. Yes, I said “healthy” and “fried chicken” in the same sentence. Mind blown yet?
Why This Recipe is Awesome
Okay, let’s be real. “Healthy fried chicken” sounds like an oxymoron whispered in a dark alley. But this recipe? It’s the secret handshake to getting that craveable crispiness without swimming in a vat of oil. It’s awesome because:
- It’s practically **idiot-proof**. Seriously, I made it, and I once set off a smoke alarm making toast.
- Less oil means less guilt. You can totally have seconds (or thirds, no judgment here!).
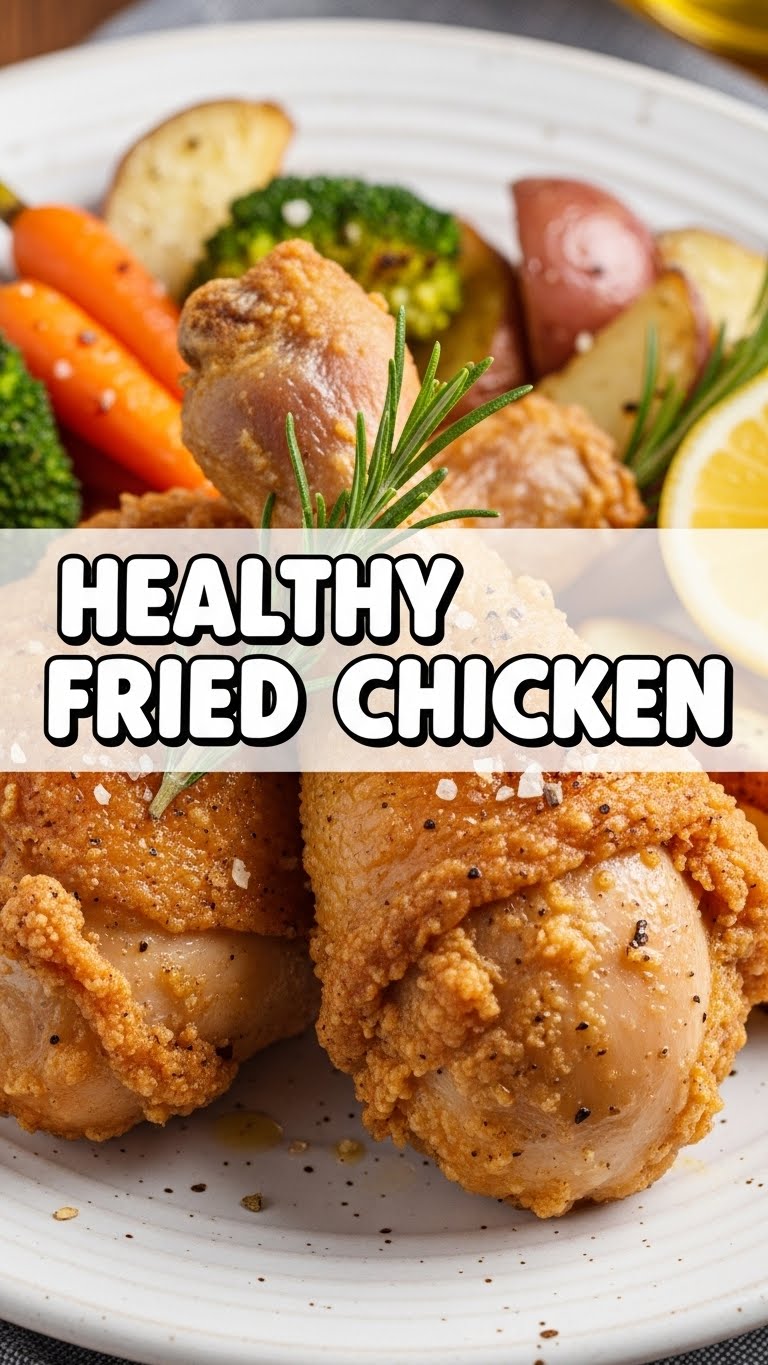
- The flavor is legitimately fantastic. We’re talking juicy on the inside, golden and crunchy on the outside.
- It’s a fantastic way to impress your friends or just yourself. Who knew you had these culinary superpowers?
- Your kitchen won’t smell like a fast-food joint for three days. Huge win, **IMO**.
Ingredients You’ll Need
Gather ’round, my fellow food adventurer! Here’s what you’ll need to kickstart this delicious journey. Don’t worry, it’s nothing too exotic – probably stuff you already have lurking in your pantry.
- 1.5 lbs Boneless, Skinless Chicken Thighs: Thighs are superior for juiciness, fight me. But breasts work if you’re a creature of habit.
- 1 cup Buttermilk (or DIY alternative): This is our secret weapon for tender, flavorful chicken. Don’t skip it!
- 1 cup Whole Wheat Flour: Or regular all-purpose, if you’re living on the edge and not pretending to be healthy.
- 1/2 cup Panko Breadcrumbs: For that extra, glorious crunch. Standard breadcrumbs are fine too, but panko is king.
- 1 tbsp Smoked Paprika: For a little smoky depth and gorgeous color.
- 1 tsp Garlic Powder: Because everything is better with garlic. Duh.
- 1 tsp Onion Powder: Garlic’s trusty sidekick.
- 1/2 tsp Cayenne Pepper (optional): If you like a little kick in your cluck. Adjust to your heat tolerance.
- 1 tsp Dried Thyme: Adds a lovely herby note.
- Salt and Freshly Ground Black Pepper: To taste, always. Don’t be shy!
- 2-3 tbsp Olive Oil or Avocado Oil: Just enough for a crispy coating, not a deep swim.
Step-by-Step Instructions
Alright, apron on, game face ready! Let’s get cooking. These steps are super easy, I promise.
Prep the Chicken: Pat your chicken thighs super dry with paper towels. I mean, *really* dry. Moisture is the enemy of crispiness, my friend. Cut them into roughly 2-inch pieces. This helps them cook faster and more evenly.
Buttermilk Bath: Place the chicken pieces in a bowl, pour the buttermilk over them, and make sure every piece is coated. Cover and refrigerate for at least 30 minutes, or up to 4 hours. The longer, the better for tenderness and flavor. This is a non-negotiable step!
Whisk the Dry Stuff: In a separate shallow dish, whisk together the whole wheat flour, panko breadcrumbs, smoked paprika, garlic powder, onion powder, cayenne pepper (if using), dried thyme, 1 teaspoon salt, and 1/2 teaspoon black pepper. Make sure it’s all nicely combined.
Coat the Chicken: Take the chicken out of the buttermilk (no need to rinse, just let excess drip off). Dredge each piece thoroughly in the flour mixture, pressing to make sure it’s completely coated. You want a good, thick crust. Place the coated chicken on a clean plate or wire rack.
Heat ‘er Up: Grab a large non-stick skillet and add 2-3 tablespoons of oil. Heat it over medium-high heat until shimmering. You want it hot enough to sizzle immediately when the chicken hits it, but not smoking.
Get Frying (the healthy way!): Carefully place the chicken pieces in the hot skillet, making sure not to overcrowd the pan. You might need to do this in batches. Cook for 4-6 minutes per side, until golden brown and crispy. **Resist the urge to move them around too much! Let that crust form.**
Finish in the Oven (optional, but recommended): To ensure the chicken is cooked through without burning the crust, transfer the seared chicken to a baking sheet and bake in a preheated oven at 375°F (190°C) for another 8-10 minutes, or until an internal temperature of 165°F (74°C) is reached. This is especially good for thicker pieces.
Serve and Devour: Let the chicken rest for a couple of minutes before serving. This keeps it juicy. Garnish with a sprinkle of fresh parsley if you’re feeling fancy, and serve with your favorite healthy sides. Enjoy your guilt-free indulgence!
Common Mistakes to Avoid
Look, we all make mistakes. It’s part of the journey. But some are easily avoidable, especially when I’m here to gently guide (read: mock) you away from them.
- Not Drying Your Chicken: I said it once, I’ll say it a thousand times: **pat your chicken dry!** Soggy chicken is sad chicken.
- Overcrowding the Pan: This isn’t a sardine can. Give your chicken space, or it’ll steam instead of fry, and we want crispy, remember?
- Impatient Flipping: You know who you are. The one who keeps poking and prodding. Let the chicken cook undisturbed for a good few minutes on each side to get that golden crust. Patience, grasshopper.
- Forgetting the Buttermilk Marinade: Skipping this step is like showing up to a party without a present. It just ain’t right, and your chicken will thank you for it.
- Not Seasoning Enough: Bland chicken is a culinary crime. Don’t be shy with the salt and pepper, or any of the other spices! Taste as you go (of the dry mix, not the raw chicken, **FYI**).
Alternatives & Substitutions
Feeling creative? Or maybe you just ran out of something key (we’ve all been there, friend). Here are some easy swaps:
- No Buttermilk? No Problem! Mix 1 cup of regular milk with 1 tablespoon of white vinegar or lemon juice. Let it sit for 5-10 minutes until it looks slightly curdled. Voila! Instant buttermilk.
- Gluten-Free Flour: Swap the whole wheat flour for an equal amount of gluten-free all-purpose flour blend or even almond flour (though texture might be slightly different).
- Spice It Up (or Down): Not a fan of cayenne? Leave it out! Love heat? Double it! Feel free to experiment with other spices like chili powder, cumin, or even a pinch of curry powder for a different flavor profile.
- Herb Variations: No dried thyme? Dried oregano or a general Italian seasoning blend would work wonderfully too.
- Air Fryer Option: Want even less oil? You can totally air fry these! Lightly spray the coated chicken with oil and air fry at 375°F (190°C) for 15-20 minutes, flipping halfway, until golden and cooked through. **Results will vary, but still tasty!**
FAQ (Frequently Asked Questions)
Got questions? I’ve got answers. Probably. Let’s dig in!
Q: Can I use chicken breasts instead of thighs?
A: Absolutely! Just be mindful that chicken breasts tend to dry out more easily. Cut them into similar-sized pieces and keep a close eye on them during cooking to avoid overdoing it.
Q: Do I really need to marinate the chicken?
A: Yes, my friend, you really, truly do. The buttermilk does magical things to tenderize the chicken and infuse it with flavor. It’s the secret sauce to making this “healthy” fried chicken taste anything but.
Q: Can I make a big batch and freeze it?
A: You can! Once cooked, let the chicken cool completely, then freeze in a single layer on a baking sheet before transferring to an airtight container or freezer bag. Reheat in the oven or air fryer for best results. It might lose a *tiny* bit of crispness, but it’ll still be delicious.
Q: What if I don’t have Panko breadcrumbs?
A: Regular breadcrumbs will work just fine! Panko just gives you an extra airy, crunchy texture, so if you have them, use them. If not, don’t sweat it, your chicken will still be amazing.
Q: Is this *actually* healthy fried chicken?
A: “Healthy” is subjective, isn’t it? But compared to traditional deep-fried chicken, which is practically swimming in oil, this pan-fried and oven-finished version uses significantly less fat. So, yes, relatively speaking, it’s a much healthier alternative! It’s all about balance, right?
Final Thoughts
And there you have it! Your very own, surprisingly healthy (and seriously delicious) fried chicken. See? I told you we could do it. Now you’ve got a fantastic recipe that hits all the comfort food notes without the heavy feeling afterward. Go on, pat yourself on the back, you culinary genius! Now go impress someone—or yourself—with your new skills. You’ve earned it!


