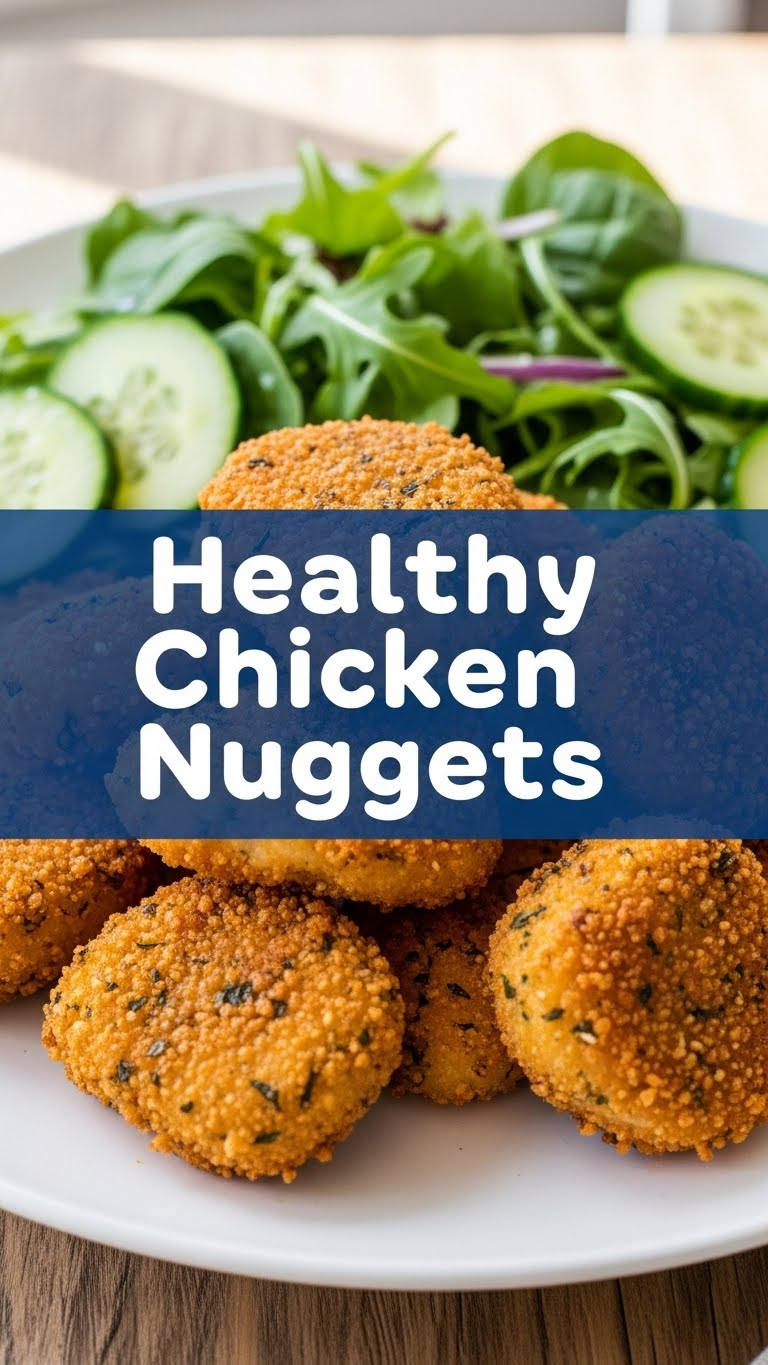
So you’re craving something tasty but too lazy to spend forever in the kitchen, huh? Same. We’ve all been there: staring into the fridge, feeling the void, and just *knowing* that only nuggets can fill it. But not just any nuggets – we’re talking about those golden, crispy, incredibly satisfying bites that somehow also make you feel like you’re winning at adulting. Because yes, my friend, healthy nuggets are not a myth! Buckle up, buttercup, because we’re about to make some magic happen.
Why This Recipe is Awesome
Okay, let’s be real. Most “healthy” versions of comfort food taste like disappointment. But not these bad boys! This recipe for healthy chicken nuggets is not only delicious, it’s also practically **idiot-proof**. Seriously, even I didn’t mess it up, and my kitchen skills sometimes involve burning water. Here’s the lowdown on why you’re gonna love this:
- They’re baked, not fried, which means less grease, fewer regrets, and more room for dipping sauces. Win-win-win!
- Super quick to throw together. We’re talking minimal prep, maximum payoff. Perfect for those weeknights when your brain is already checked out.
- Packed with actual chicken, so you know exactly what you’re eating. No mystery meat here, just pure, wholesome goodness.
- Customizable! Want more spice? Go for it! Got some herbs lingering in your fridge? Toss ’em in! You’re the boss.
Ingredients You’ll Need
Gather ’round, pantry warriors! Here’s your hit list. Don’t worry, nothing too fancy, just good old staples.
- 1 lb Boneless, Skinless Chicken Breast: The star of our show! Cut into nugget-sized pieces. Think bite-sized, not barbarian-sized.
- 1 Large Egg: Our sticky glue, making sure everything adheres perfectly.
- ½ cup Panko Breadcrumbs: Panko is king for that extra crispy texture. If you only have regular, that’s fine too, but **IMO**, Panko rules.
- ¼ cup All-Purpose Flour: Just a little dusting to get things started.
- 1 tsp Paprika: For a little color and warmth. Smoked paprika? Even better!
- ½ tsp Garlic Powder: Because everything is better with garlic. Don’t fight me on this.
- ¼ tsp Onion Powder: Garlic’s best friend, adding depth of flavor.
- Salt and Black Pepper: To taste, obvs. Don’t be shy, seasoning is key!
- 2 tbsp Olive Oil (or other cooking oil): Just a drizzle for the baking sheet.
- Your Favorite Dipping Sauce(s): Ketchup, honey mustard, BBQ sauce, sriracha mayo… choose your fighter!
Step-by-Step Instructions
Alright, let’s get down to business! Follow these simple steps and you’ll be munching on deliciousness in no time.
- Preheat your oven to a glorious 400°F (200°C). While it’s heating up, grab a large baking sheet and line it with parchment paper for easy cleanup. Give the parchment paper a light drizzle of olive oil, spreading it around evenly. This helps the nuggets get nice and crispy.
- Chop your chicken breast into roughly 1-inch pieces. Try to keep them somewhat uniform in size so they cook evenly. Nobody wants an undercooked nugget!
- Now, set up your dredging station! Grab three shallow bowls. In the first, put the flour. In the second, whisk the egg until it’s well beaten. In the third, combine the Panko breadcrumbs, paprika, garlic powder, onion powder, salt, and pepper. Mix it all up.
- Time to coat! Take each chicken piece and first dredge it in the flour, shaking off any excess. Then, dip it into the egg wash, letting any extra drip off. Finally, roll it in the seasoned breadcrumbs, pressing gently to make sure it’s fully coated. **Make sure each nugget is covered!**
- Place the coated chicken nuggets in a single layer on your prepared baking sheet. **Don’t overcrowd the pan!** They need their space to crisp up. If you have too many, use a second sheet.
- Bake for 15-20 minutes, flipping them halfway through, until they’re golden brown and cooked through. You want an internal temperature of 165°F (74°C). If you have a meat thermometer, use it!
- Take them out of the oven, let them cool for a minute (they’ll be hot!), and then serve immediately with your dipping sauce of choice. Enjoy your masterpiece!
Common Mistakes to Avoid
Even though this recipe is pretty foolproof, there are a few rookie errors that can derail your nugget dreams. Learn from my past culinary misadventures:
- Forgetting to Preheat the Oven: Listen, I get it, you’re hungry. But putting cold chicken into a cold oven just leads to soggy, sad nuggets. **Patience is a virtue, my friend!**
- Overcrowding the Baking Sheet: This is a big one! When nuggets are packed too tightly, they steam instead of crisping up. Give them room to breathe! They’re like introverts at a party; they need their space.
- Skipping the Seasoning: Just coating chicken in plain breadcrumbs is a crime against flavor. Don’t be afraid to season the breadcrumb mixture generously. Bland nuggets are… well, bland.
- Not Flipping Them: If you want all-over crispiness, you gotta flip ’em halfway. Otherwise, one side will be perfectly golden and the other will be… less so.
Alternatives & Substitutions
Feeling adventurous? Or just don’t have exactly what the recipe calls for? No sweat! Here are some ideas:
- Breadcrumb Swap: No Panko? Regular breadcrumbs work fine. For a gluten-free option, crushed cornflakes (yes, seriously!), almond flour, or a gluten-free breadcrumb mix are great. Crushed pork rinds work for a super low-carb version!
- Chicken Alternatives: You can absolutely use boneless, skinless chicken thighs for a juicier (but slightly fattier) nugget. Ground chicken or turkey can also be formed into nuggets, though the texture will be different.
- Spice It Up: Feeling fiery? Add a pinch of cayenne pepper to the breadcrumb mix. Want an Italian vibe? Throw in some dried oregano and basil. **FYI**, dried herbs work best here.
- Air Fryer Method: Got an air fryer? These nuggets are AMAZING in there! Cook at 375°F (190°C) for about 10-12 minutes, shaking the basket halfway through, until golden and cooked.
FAQ (Frequently Asked Questions)
Got questions? I’ve got answers! (Mostly.)
- Can I fry these instead of baking? Well, technically yes, but why ruin a good thing? The whole point of “healthy” is usually less oil! If you *must*, use a shallow pan with about an inch of oil and fry until golden. Just be prepared for a bit more cleanup.
- How do I store leftovers? Pop ’em in an airtight container in the fridge for up to 3-4 days. They’re great cold in a salad, or reheated in the oven or air fryer to get some crisp back.
- Can I freeze these? Absolutely! You can freeze them raw (flash freeze on a baking sheet, then transfer to a freezer bag) or cooked. If freezing cooked, reheat from frozen in the oven until heated through and crispy.
- What kind of dipping sauces are best? Oh, where to begin?! Classic ketchup is always a winner. Honey mustard, ranch, BBQ sauce, sriracha mayo, or even a simple Greek yogurt dip with herbs are all fantastic. **Don’t limit yourself!**
- My nuggets aren’t getting crispy, what gives? You probably overcrowded the pan or didn’t preheat your oven enough. Also, ensure your oil on the parchment paper is evenly distributed. A little extra drizzle can help!
- Are these good for meal prep? You betcha! Make a big batch at the beginning of the week and you’ve got quick protein for lunches or easy dinners.
Final Thoughts
There you have it, folks! Healthy chicken nuggets that actually taste like something you’d crave. You’ve just unlocked a superpower: making delicious, guilt-free comfort food without breaking a sweat (or the bank). Now go impress someone—or yourself—with your new culinary skills. You’ve earned it! Grab that plate, pile on the nuggets, and dip away. You deserve every crispy, golden bite!

