So, you’ve just realized that store-bought bread is, well, *fine*, but your soul is screaming for something warm, wholesome, and baked by *you*? And by “you,” I mean the version of you that likes to cook but also really enjoys Netflix, meaning the recipe better not be a full-day commitment. Good news, my friend! We’re diving into **Healthy Homemade Bread** that’s so easy, you might just wonder if you accidentally became a baker overnight. Spoiler: you didn’t, it’s just that good a recipe. 😉
Why This Recipe is Awesome
Let’s be real, most healthy bread recipes sound like they require an advanced degree in grain science and the patience of a saint. Not this one! This recipe is basically the culinary equivalent of putting on sweatpants: comfortable, forgiving, and utterly satisfying. Seriously, it’s pretty much **idiot-proof** – even I, a person known to burn water, haven’t messed it up yet. It’s packed with good-for-you ingredients, tastes divine, and will make your house smell like a bakery without you having to wake up at 4 AM. Plus, imagine the bragging rights! “Oh, this artisanal loaf? Just something I whipped up.” Casual flex, right?
Ingredients You’ll Need
Gather ’round, my little culinary apprentice, for the glorious bits and bobs you’ll need. Nothing fancy, promise!
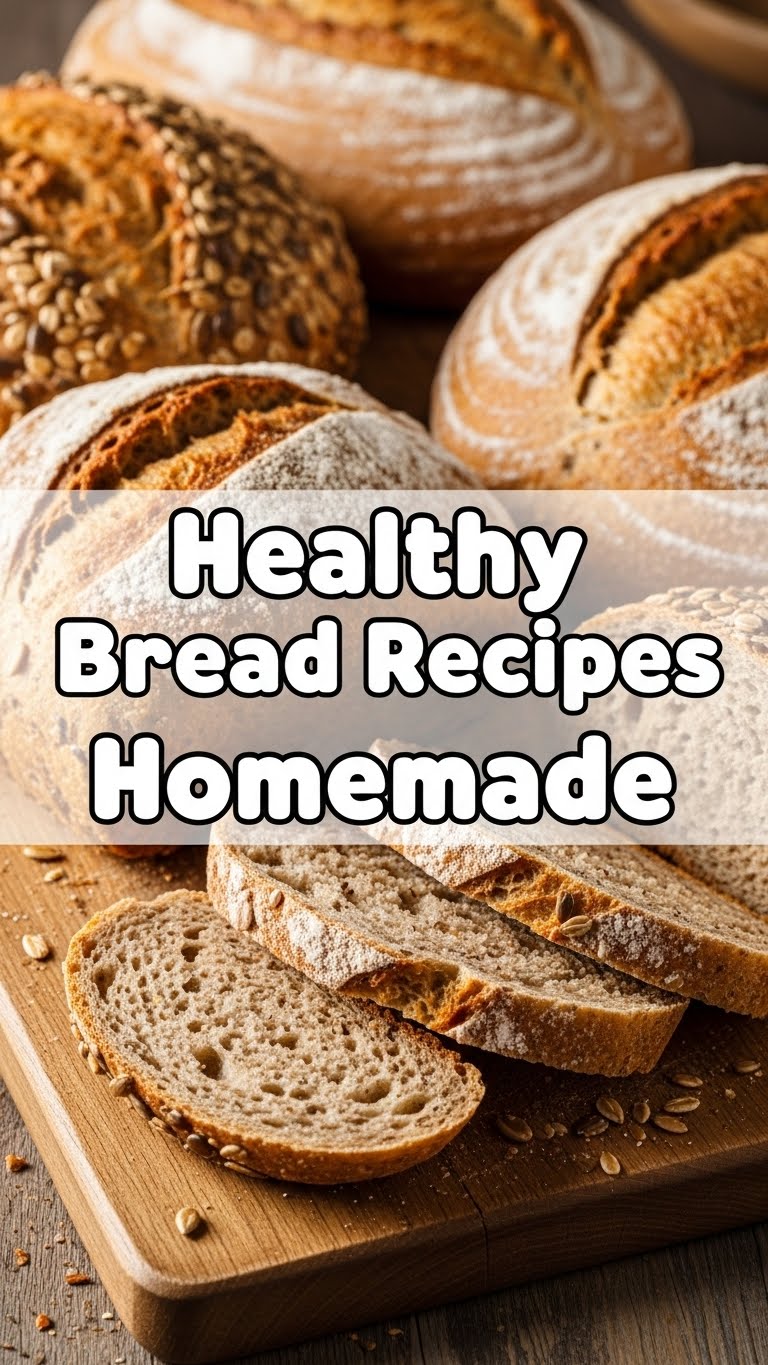
- **Whole Wheat Flour:** About 3 cups. This is our healthy hero. It brings the fiber, the nutrients, and a lovely nutty flavor.
- **Warm Water:** 1 ½ cups. Not hot, not cold, just a nice bath-like temperature for our yeast.
- **Active Dry Yeast:** 1 teaspoon. Our little magic makers! Make sure it’s not expired, unless you enjoy flat, sad bread.
- **Salt:** 1 teaspoon. Don’t skip this! It’s crucial for flavor and structure. Your bread will taste like cardboard without it.
- **Honey or Maple Syrup (optional):** 1 tablespoon. Just a touch to give the yeast a little pep talk and add a hint of sweetness.
- **Mixed Seeds (optional):** ¼ cup (think flax, chia, sunflower, pumpkin). For that extra health boost and a delightful crunch. Because why not?
Step-by-Step Instructions
- **Activate the Magic:** In a large bowl, whisk together your warm water and honey/maple syrup. Sprinkle the yeast over the top and let it sit for about 5-10 minutes. You want to see it get bubbly and foamy – that means it’s alive and ready to party!
- **Mix It Up:** Add the whole wheat flour and salt to the yeast mixture. If you’re using seeds, toss ’em in now too. Using a wooden spoon or a spatula, mix until everything comes together into a shaggy, sticky dough. No need to knead, my friend; this is the lazy baker’s dream!
- **Let It Rest:** Cover the bowl with plastic wrap or a damp kitchen towel. Pop it somewhere warm (but not hot!) for at least 1.5 to 2 hours, or until it has roughly doubled in size. This is your cue to go enjoy your life – read a book, binge a show, do whatever makes you happy.
- **Preheat Power:** About 30 minutes before your dough is done rising, preheat your oven to 450°F (230°C). If you have a Dutch oven or a heavy oven-safe pot with a lid, place it in the oven while it preheats. This creates a steamy environment that gives you that amazing crust.
- **Shape and Bake:** Once the dough has risen, gently scrape it out onto a lightly floured surface. Fold the edges towards the center a few times to form a somewhat round loaf. Don’t overwork it! Carefully remove the hot pot from the oven (use oven mitts, obviously!). Plop your dough into the hot pot, cover it with the lid, and bake for 30 minutes.
- **Golden Brown Goodness:** After 30 minutes, remove the lid and bake for another 10-15 minutes, or until the crust is beautifully golden brown and sounds hollow when you tap it.
- **Cool Down:** Transfer the bread to a wire rack and let it cool completely before slicing. This is the hardest part, IMO, because the smell will drive you absolutely wild. But patience, young padawan, patience!
Common Mistakes to Avoid
Nobody’s perfect, and neither is bread baking sometimes. Here are a few hilarious (and painful) blunders to dodge:
- **Using Old Yeast:** If your yeast doesn’t foam up in step 1, it’s dead, Jim. Don’t proceed; your bread will be a brick. Toss it and get fresh yeast!
- **Water Temperature Woes:** Too hot and you kill the yeast. Too cold and it won’t activate. Think lukewarm, like a cozy bath.
- **Not Preheating the Pot:** Thinking you don’t need to preheat your Dutch oven? **Rookie mistake.** That preheated pot is key to getting that crispy crust and even bake. Trust me on this one.
- **Cutting it Warm:** I know, I know, the smell is intoxicating. But cutting warm bread squishes the crumb and makes it gummy. Let it cool!
Alternatives & Substitutions
Feeling adventurous? Here are some ways to shake things up:
- **Flour Power:** While whole wheat is great, you can swap out ½ cup for **oat flour** or even a bit of rye flour for different flavors. Just be aware that different flours absorb water differently, so you might need a tiny splash more or less.
- **Sweeteners:** No honey or maple syrup? A teaspoon of granulated sugar works just fine to wake up that yeast.
- **Seed Sensations:** Go wild with your seeds! Poppy seeds, sesame seeds, chopped nuts – whatever floats your bread boat. A sprinkle of oats on top before baking also looks super rustic and fancy.
- **Herb Heaven:** Fancy a savory loaf? Add a teaspoon of dried rosemary or thyme to the dough for an herbaceous kick. Garlic powder also works wonders!
FAQ (Frequently Asked Questions)
Got questions? I’ve got answers (mostly, sometimes I just make stuff up, but not today!):
- **Can I use all-purpose flour instead of whole wheat?** Well, you *can*, but then it wouldn’t be “healthy” bread, would it? Plus, whole wheat adds so much character! If you must, try a 50/50 mix to keep some of that whole-grain goodness.
- **My dough didn’t rise, what went wrong?** Oh, the horror! Most likely culprit: dead yeast or water that was too hot/cold. Also, make sure your kitchen isn’t an icebox; yeast likes warmth!
- **How do I store this masterpiece?** Once cooled, store your bread in an airtight container or a bread bag at room temperature for 3-4 days. For longer storage, slice and freeze it!
- **Do I *have* to use a Dutch oven?** Nope, not absolutely! You can bake it on a baking sheet, but the crust won’t be as glorious. For a steamy effect without a Dutch oven, place a pan of hot water on the bottom rack of your oven while it bakes.
- **Can I add cheese to this?** You want cheese in your bread? You, my friend, are a genius. Yes! Add about ½ cup of shredded cheese (cheddar, Gruyere, Parmesan – your pick!) during the mixing stage. FYI, it’s dangerously delicious.
Final Thoughts
There you have it! A healthy, homemade bread recipe that doesn’t demand your firstborn or your sanity. Now go forth, impress your friends, annoy your family with the delicious smells, or simply enjoy a slice (or five) yourself. You’ve just created something truly awesome, and honestly, you deserve a medal. Or at least another slice. You’ve earned it!


