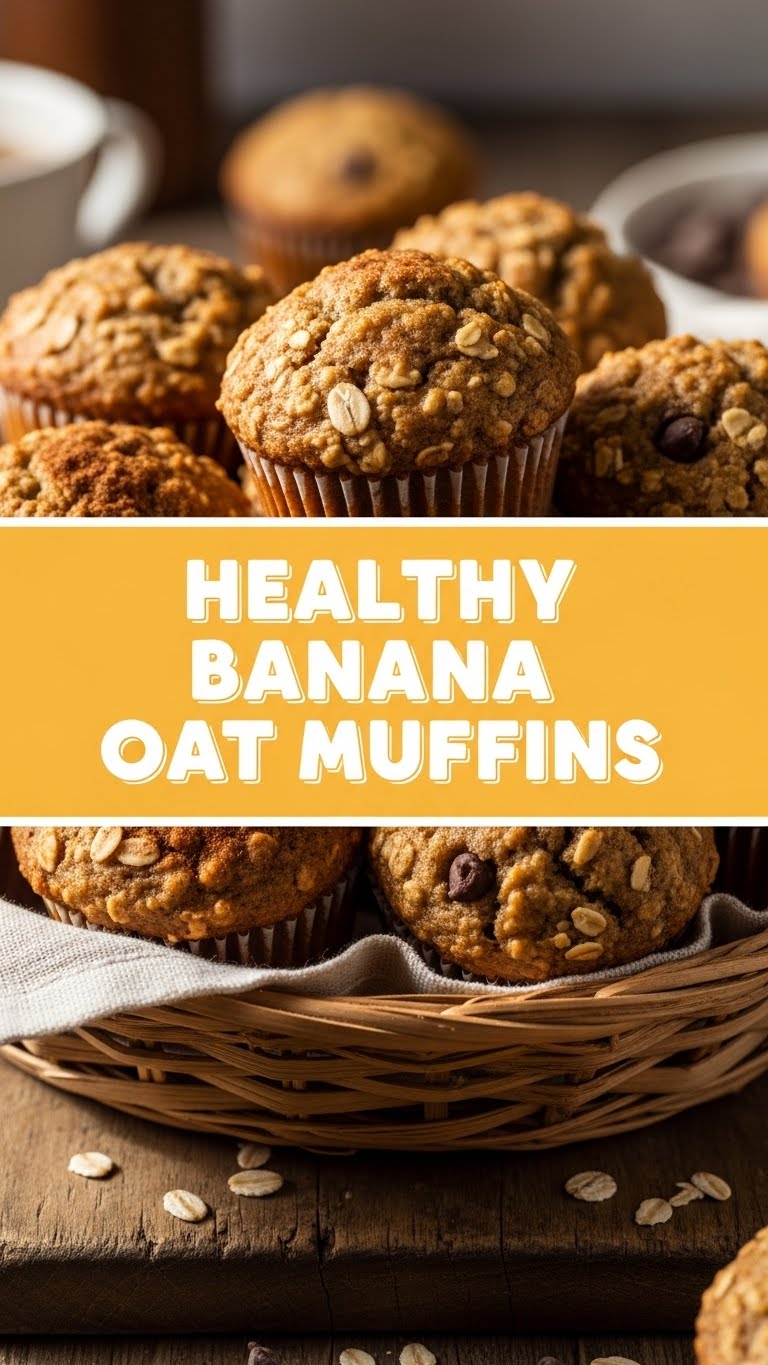
Okay, listen up, buttercup! Got some sad, spotty bananas giving you the side-eye from your fruit bowl? The kind that are practically screaming, “Eat me, or I’m turning into science experiment goo!” Yeah, those ones. We’re not letting them go to waste. Nope, not today, not on my watch! Today, we’re transforming those overripe beauties into pure, unadulterated muffin magic. And guess what? They’re secretly *good* for you. Shhh, don’t tell the kids (or your inner pastry chef who usually demands triple chocolate). We’re talking Healthy Banana Oat Muffins, and they’re about to become your new favorite obsession. Get ready to bake like a boss, with minimal fuss and maximum deliciousness!
Why This Recipe is Awesome
Because let’s be real, life is chaotic enough without complicated recipes, right? This isn’t some fussy, six-bowl, obscure-ingredient kind of deal. This is the “I rolled out of bed, remembered I had bananas, and now I’m making breakfast like a domestic goddess/god” kind of recipe. Seriously, it’s pretty much **idiot-proof**. Even I, the queen of kitchen mishaps, haven’t messed these up yet. Here’s the lowdown:
- **It’s Healthy-ish:** Packed with oats for fiber and naturally sweetened with those gloriously ripe bananas (and a touch of maple syrup/honey), these muffins are a guilt-free indulgence. Say goodbye to refined sugar crashes!
- **Super Easy & Quick:** We’re talking one-bowl action, people! Less cleanup, more muffin-eating. From zero to warm muffin in under 30 minutes. Boom!
- **Moist AF:** Thanks to the bananas and a little oil, these babies stay wonderfully moist for days. No dry, crumbly sadness here.
- **Totally Customizable:** Want chocolate chips? Go for it! Nuts? Be my guest! This recipe is a blank canvas for your muffin dreams.
- **Breakfast, Snack, Dessert – Pick Your Poison:** Versatile much? These are perfect for a grab-and-go breakfast, an afternoon pick-me-up, or a slightly virtuous late-night treat.
Ingredients You’ll Need
Gather ’round, my fellow food adventurers! Here’s your shopping list. Most of this stuff is probably already chilling in your pantry.
- 3 Ripe Bananas: The spottier, the better! We’re talking brown spots, not green. Those little specks of sweetness are crucial. If they look like they’re on their last legs, they’re perfect.
- 1 ½ Cups Rolled Oats: Not instant oats, unless you want mush. We’re going for texture here, my friend.
- 1 ½ Cups All-Purpose Flour: Your basic kitchen workhorse. Or use whole wheat pastry flour for an extra healthy kick.
- 2 Large Eggs: The binders that hold this deliciousness together.
- ½ Cup Melted Coconut Oil or Vegetable Oil: Or melted butter if you’re feeling fancy (and don’t mind a little extra indulgence).
- ½ Cup Maple Syrup or Honey: Nature’s candy! Adjust to your preferred sweetness level, but **don’t skimp entirely**, the sweetness really helps.
- 1 Teaspoon Baking Powder: For lift!
- 1 Teaspoon Baking Soda: More lift! These two are a power duo.
- ½ Teaspoon Salt: Just a pinch! It really makes all the other flavors sing.
- 1 Teaspoon Vanilla Extract: Because everything’s better with vanilla.
- Optional Add-ins (½ cup): Dark chocolate chips (my personal fave!), chopped walnuts, pecans, or a sprinkle of cinnamon. Go wild!
Step-by-Step Instructions
Alright, apron on (or not, I’m not judging), let’s get baking!
- Preheat & Prep: Preheat your oven to a cozy 375°F (190°C). Line a 12-cup muffin tin with paper liners. **Seriously, use liners!** It makes cleanup a breeze and prevents sticky situations.
- Mash the Bananas: In a large mixing bowl, go to town on those ripe bananas. Use a fork, a potato masher, or even your clean hands if you’re feeling primal. Get ’em nice and lumpy-smooth.
- Wet Ingredients Unite: To the mashed bananas, add the melted oil (or butter), eggs, maple syrup (or honey), and vanilla extract. Whisk it all together until just combined. Don’t overdo it, we’re not making meringue here.
- Dry Ingredients Dive In: Now, dump in the flour, rolled oats, baking powder, baking soda, and salt directly into the wet mixture. Gently stir with a spatula until *just* combined. A few streaks of flour are totally fine. **Remember: Do NOT overmix!** That’s how you get tough muffins.
- Fold in the Fun Stuff: If you’re adding chocolate chips or nuts, now’s the time! Gently fold them into the batter. This is where the magic happens, IMO.
- Fill ‘Em Up: Divide the batter evenly among the 12 muffin cups, filling each about **two-thirds full**. Don’t be shy, but don’t overfill, or you’ll have muffin tops merging into a giant muffin-slab.
- Bake ‘Em Beautiful: Pop that muffin tin into your preheated oven and bake for 18-22 minutes, or until golden brown and a toothpick inserted into the center of a muffin comes out clean.
- Cool Down (if you can wait): Let the muffins cool in the tin for about 5 minutes. This helps them firm up a bit. Then, transfer them to a wire rack to cool completely. Or, you know, eat one immediately while it’s still warm and gooey. Your house will smell amazing, FYI!
Common Mistakes to Avoid
Nobody’s perfect, but we can learn from past culinary mishaps, right? Here are a few “oopsies” to dodge:
- Using Under-Ripe Bananas: This is the cardinal sin of banana bread/muffin making. Green or yellow bananas won’t give you the sweetness or moisture you need. Seriously, wait for the spots!
- Overmixing the Batter: The absolute nemesis of tender muffins. Once you add the dry ingredients, mix just until combined. Lumpy batter is happy batter. Overmixing develops the gluten, making your muffins tough and chewy – nobody wants a rubber muffin.
- Forgetting to Line the Tin: You think you can just grease it, huh? Rookie mistake. Muffin liners are your best friend for easy removal and minimal mess. Trust me on this one.
- Opening the Oven Door Too Early: Patience, grasshopper! Constantly peeking lets heat escape, which can make your muffins sink in the middle. Give them at least 15 minutes before you even think about looking.
- Substituting All the Sweetener: While you can adjust the amount, drastically cutting down on the maple syrup/honey might impact the moisture and overall texture. It’s there for a reason!
Alternatives & Substitutions
Feeling creative? Here are some ways to shake things up and make these muffins uniquely yours:
- Flour Power: Not keen on all-purpose? Try whole wheat pastry flour for a denser but still tender crumb, or a 1:1 gluten-free flour blend for a GF option. If using oat flour, you might need a tiny bit more liquid.
- Sweet Swap: You can use agave nectar instead of maple syrup or honey. For a truly sugar-free option, you could try a granulated sugar substitute, but it might alter the texture slightly.
- Fat Facts: Applesauce can be swapped for half of the oil to reduce fat, but use sparingly as it can make them a bit gummy. A full swap isn’t recommended here.
- Add-in Adventures: Don’t limit yourself to chocolate chips! Think dried cranberries, blueberries, shredded coconut, or a generous sprinkle of cinnamon and nutmeg for a warm spice vibe.
- Make it Vegan: Use flax eggs (1 tbsp ground flaxseed + 3 tbsp water per egg, let sit 5 mins) instead of regular eggs.
FAQ (Frequently Asked Questions)
Got questions? I’ve got (mostly sarcastic) answers!
- **Can I use instant oats instead of rolled oats?** Well, you *can*, but your muffins might turn out a bit gummier and less textured. Rolled oats are definitely the VIPs here.
- **How long do these muffins last?** Stored in an airtight container at room temperature, they’re good for 3-4 days. In the fridge, maybe a week. But let’s be real, will they even last that long? Probably not.
- **Can I freeze these muffins?** Absolutely! Once completely cooled, wrap individual muffins in plastic wrap and then store them in a freezer-safe bag for up to 3 months. Thaw at room temp or give them a quick zap in the microwave.
- **My muffins didn’t rise much, what happened?** Likely culprit: old baking powder or baking soda. Check those expiration dates! Or, you might have overmixed the batter.
- **Can I add protein powder?** You can try adding a tablespoon or two, but be aware it might make the muffins a bit drier. You might need to add a splash more milk or oil to compensate. Experiment at your own risk!
- **What’s the trick to getting nice, domed muffin tops?** Filling the muffin cups about two-thirds full is key. Also, starting with a slightly higher oven temp for the first few minutes (like 400°F for 5 mins, then reducing) can sometimes help, but 375°F works great too.
- **Are these *actually* healthy? Like, can I eat three for breakfast?** They’re *healthier* than most store-bought or traditional muffins thanks to the oats, natural sweeteners, and lack of excessive butter. But moderation is still your friend. Unless it’s a Sunday. Then, go wild.
Final Thoughts
And there you have it, folks! You just whipped up a batch of delicious, wholesome, and seriously satisfying banana oat muffins. Give yourself a pat on the back, you culinary genius! These aren’t just muffins; they’re a testament to your ability to turn neglected fruit into pure joy. So go ahead, enjoy one (or two, I won’t tell!), share them with a friend, or hoard them all for yourself. You’ve earned it!
Now go impress someone—or yourself—with your new culinary skills. You’ve earned it!

