So you’re craving something warm, gooey, and utterly delicious but also, like, *adulting* and trying to be a smidge responsible, huh? Same, friend. Oh, so very same. Forget those rock-hard, bland “healthy” cookies of yesteryear. We’re making **Healthier Chocolate Chip Cookies** that actually taste like a hug from your favorite baker, without the post-cookie guilt spiral. Let’s get baking!
Why This Recipe is Awesome
Okay, let’s be real: calling a chocolate chip cookie “healthy” is a stretch. But “healthier”? Absolutely achievable! This recipe is your secret weapon for when you want to impress someone (or just yourself, because self-love, am I right?) without spending all day in the kitchen or blowing your entire sugar budget for the month. It’s got all the classic chewy edges and soft centers you adore, just with a few tweaks that make it feel a little less like a forbidden indulgence.
Plus, it’s practically **idiot-proof**. And I say that with love, as someone who once mistook salt for sugar in a moment of extreme sleep deprivation. If I can nail these, you absolutely can. No fancy equipment needed, just a bowl, a spoon, and your magnificent self. Ready to dive into deliciousness?
Ingredients You’ll Need
Gather your troops! Here’s what we’re wrangling for these healthier delights:
- 1/2 cup (1 stick) unsalted butter, softened. Your best friend in cookie-making, let it get nice and squishy.
- 1/4 cup granulated sugar. Just enough for that classic sweetness.
- 1/2 cup packed light brown sugar. Hello, chewiness! We’re not skimping on flavor here, just being smart.
- 1 large egg. The binder of dreams.
- 1 teaspoon vanilla extract. Don’t you dare skip this; it’s the soul of the cookie!
- 1 1/2 cups whole wheat pastry flour. Or regular all-purpose if you’re feeling less “healthier” and more “OMG COOKIE NOW.” The pastry flour gives a lighter texture.
- 1/2 teaspoon baking soda. For that perfect lift.
- 1/4 teaspoon salt. Because even sweet things need a little sass.
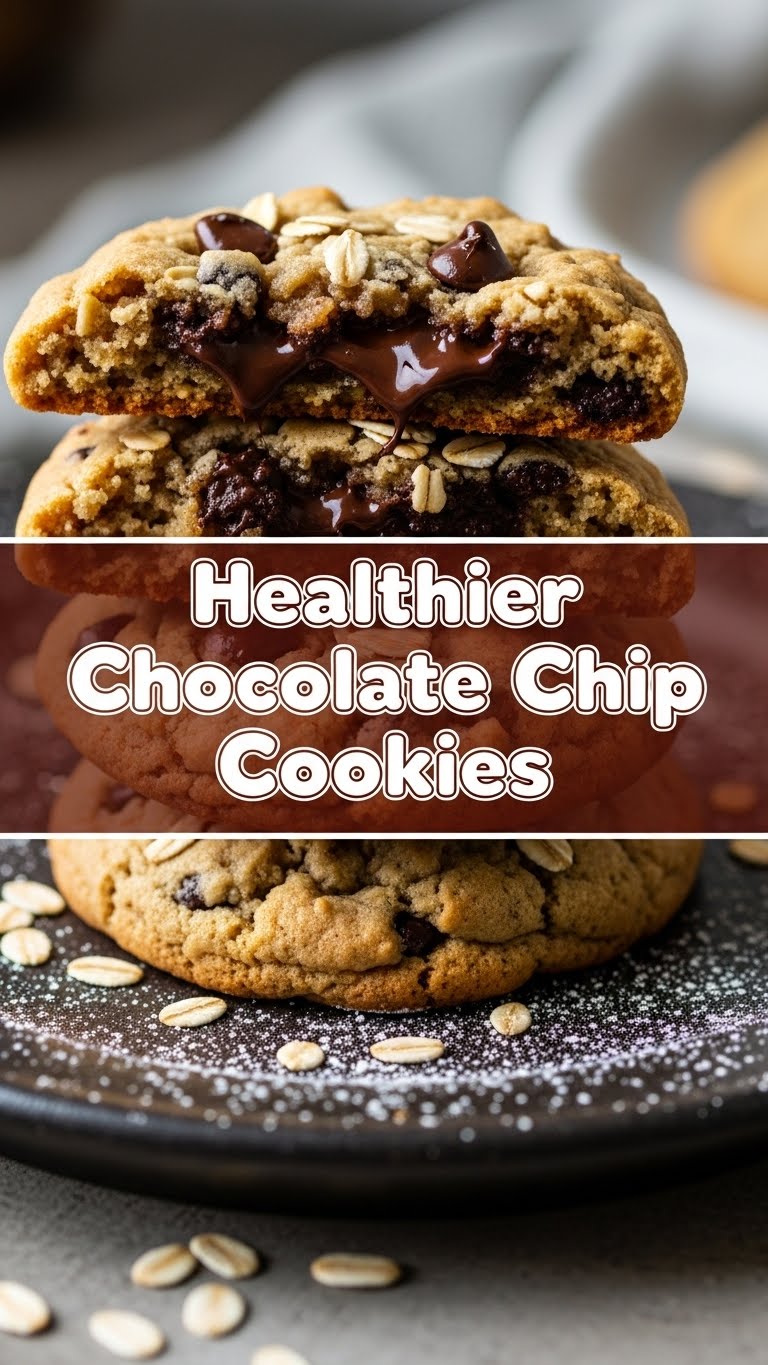
- 1 cup dark chocolate chips or chunks. The *most* important part. Go for at least 60% cacao for extra “health points” and a richer flavor.
- Optional: A pinch of cinnamon, or 1/2 cup rolled oats for extra texture and fiber.
Step-by-Step Instructions
Alright, apron on (or not, we don’t judge). Let’s make some magic happen!
- First things first, crank up that oven! Preheat to **375°F (190°C)**. Line a baking sheet with parchment paper. Rookie mistake? Not preheating!
- In a large bowl, cream together your softened butter, granulated sugar, and brown sugar until it’s light and fluffy. This usually takes a couple of minutes with a spoon or electric mixer.
- Beat in the egg until fully combined, then stir in that glorious vanilla extract. Make sure everything is well-integrated and looking smooth.
- In a separate, smaller bowl, whisk together your flour, baking soda, and salt. Give it a good whisk to ensure everything is evenly distributed.
- Gradually add the dry ingredients to the wet ingredients, mixing until *just* combined. **Important:** Stop mixing as soon as you don’t see any streaks of flour. Overmixing makes tough cookies, and nobody wants a tough cookie (unless it’s a person, maybe).
- Now, for the best part: gently fold in your chocolate chips. If you added oats or cinnamon, this is the time!
- Drop rounded tablespoons of dough onto your prepared baking sheet. Leave a little space between them; these beauties like their personal space.
- Bake for **9-11 minutes**, or until the edges are golden brown and the centers still look slightly soft. They’ll firm up as they cool, promise!
- Let them cool on the baking sheet for a few minutes before transferring them to a wire rack to cool completely (if you have that kind of willpower, that is).
Common Mistakes to Avoid
Even the pros make mistakes, but you don’t have to! Here are a few pitfalls to steer clear of:
- Using Cold Butter: Trying to cream butter straight from the fridge is a nightmare. It won’t incorporate properly, leading to uneven texture. **Always use softened butter!**
- Overmixing the Dough: I cannot stress this enough! Once you add the flour, mix *just* until it comes together. Too much mixing develops the gluten, making your cookies chewy in the wrong way—think rubbery, not delightful.
- Baking Too Long: A common mistake! If you bake them until they look perfectly done in the oven, they’ll be hard as rocks once cooled. Pull them out when the edges are set and golden, but the centers are still a bit soft and shiny.
- Not Preheating: Populating a cold oven with cookie dough is like asking a cold engine to run a marathon. Give your oven time to get to temp for even baking.
- Skipping Parchment Paper: Unless you love scraping burnt cookie bits off your baking sheet, don’t skip this step. It’s a lifesaver.
Alternatives & Substitutions
Feeling adventurous or just out of one particular ingredient? No worries, we can totally improvise!
- Flour Power: If whole wheat pastry flour isn’t your jam, feel free to use regular all-purpose flour. For a gluten-free version, a 1:1 gluten-free baking blend works wonders, but you might need a tiny splash of milk if the dough seems too dry.
- Sweet Swaps: Out of brown sugar? You can use all granulated sugar, but your cookies might be a tad crispier. For a truly healthier (but different-tasting) cookie, try coconut sugar or even maple syrup (you’ll need to slightly reduce other liquids if using syrup).
- Butterless Wonders: For a dairy-free option, good quality vegan butter sticks work perfectly. You could also try half butter, half unsweetened applesauce, but this will alter the texture a bit, making them cakier.
- Chocolate Adventures: Not a dark chocolate fan? Semi-sweet is totally fine! You can also chop up a good quality chocolate bar for varying sizes of chocolate goodness. Throw in some chopped nuts (walnuts or pecans!), dried cranberries, or even a sprinkle of sea salt on top for an extra flavor boost.
FAQ (Frequently Asked Questions)
Got questions? I’ve got (casual) answers!
Can I make these truly vegan?
Absolutely! Swap the butter for a good quality vegan butter stick and use a “flax egg” (1 tbsp ground flaxseed mixed with 3 tbsp water, let sit for 5 mins) instead of a regular egg. Just make sure your chocolate chips are dairy-free too!
How long do these healthier cookies last?
If they survive that long, they’ll stay fresh in an airtight container at room temperature for about 3-4 days. But let’s be real, they rarely last past day one.
Can I freeze the cookie dough?
OMG, YES! Scoop the dough onto a parchment-lined baking sheet and freeze until solid. Then transfer the frozen dough balls to a freezer-safe bag. When a craving hits, bake from frozen, adding an extra 2-3 minutes to the baking time. Future you will thank you profusely.
Are these *actually* healthy, though?
Let’s stick with “healthier.” We’ve made some smart swaps (whole wheat flour, less sugar, dark chocolate), but at the end of the day, it’s still a cookie! A delicious, slightly-less-guilty cookie, IMO.
Why are my cookies flat as a pancake?
Several culprits here: your butter might have been too soft (or melted!), your baking soda could be expired, or your oven might not be at the correct temperature. Make sure your butter is soft, not melted, and always check that baking soda’s expiration date!
Can I use a stand mixer for this recipe?
Totally! Just make sure not to overmix, especially once the flour goes in. A good rule of thumb: mix on low speed, and stop as soon as it’s combined.
Final Thoughts
There you have it, folks! Your new go-to recipe for when you want a warm, comforting, and just-a-little-bit-better-for-you chocolate chip cookie. You’ve navigated the ingredients, mastered the steps, and even dodged common mistakes like a pro. Now go impress someone—or yourself—with your new culinary skills. You’ve earned it! Grab a glass of milk (or your preferred beverage) and enjoy every single delightful bite. Happy baking!


