
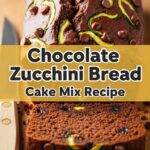
Ever have one of those days where only a slice of pure, unadulterated bliss can fix everything? Yeah, me too. And let’s be honest, that bliss usually involves chocolate. But what if we level up that chocolate with the nutty, toasty hug of hazelnuts? *Mind blown, right?* This isn’t some fancy, “call your grandma for ancient techniques” kind of recipe. This is a “throw it together while binge-watching your favorite show” kind of recipe. You’re welcome.
Why This Recipe is Awesome
Okay, real talk. This Hazelnut Chocolate Cake isn’t just a cake; it’s a mood enhancer, a crowd-pleaser, and frankly, a minor miracle. Why? Because it’s **ridiculously moist**, bursting with chocolate and hazelnut flavor, and looks way more impressive than the effort it actually takes. It’s practically idiot-proof – even I didn’t mess it up on my first try, and I once accidentally put salt instead of sugar in my coffee (don’t ask). Plus, it uses common pantry staples, so no frantic searches for obscure ingredients. You get maximum deliciousness for minimum fuss. Win-win, if you ask me!
Ingredients You’ll Need
Get ready to raid your kitchen! Here’s what you’ll need to whip up this gloriousness:
- For the Cake:
- 1 ¾ cups (210g) all-purpose flour (the regular stuff)
- 1 ¾ cups (350g) granulated sugar (sweetness!)
- ¾ cup (60g) unsweetened cocoa powder (the darker, the better, IMO)
- 1 ½ teaspoons baking soda (our leavening MVP)
- 1 teaspoon salt (enhances all those sweet flavors)
- 2 large eggs (straight from the fridge is fine)
- 1 cup (240ml) buttermilk (or make your own: 1 cup milk + 1 tbsp vinegar/lemon juice, let sit 5 mins)
- ½ cup (120ml) vegetable oil (for that glorious moisture)
- 1 teaspoon vanilla extract (because everything needs vanilla)
- 1 cup (240ml) hot water or hot brewed coffee (trust me on the coffee, it makes the chocolate *sing*)
- ½ cup (60g) toasted, chopped hazelnuts (the star of the show!)
- For the Hazelnut Chocolate Frosting:
- 1 cup (226g) unsalted butter, softened (leave it out for a bit!)
- 3-4 cups (360-480g) powdered sugar (sifted, if you’re fancy and hate lumps)
- ½ cup (40g) unsweetened cocoa powder
- ¼ cup (60ml) milk or heavy cream (your choice, cream is richer)
- 1 teaspoon vanilla extract
- ½ cup (150g) hazelnut chocolate spread (hello, Nutella!)
- ¼ cup (30g) extra toasted, chopped hazelnuts for sprinkling (for maximum impact)
Step-by-Step Instructions
Alright, apron on! Let’s get baking!
- Preheat & Prep: Preheat your oven to **350°F (175°C)**. Grease and flour two 8-inch round cake pans. Or, if you’re a genius, line them with parchment paper circles.
- Mix the Dry Stuff: In a large bowl, whisk together the flour, sugar, cocoa powder, baking soda, and salt. Give it a good whisk to break up any lumps and ensure everything’s evenly distributed.
- Add the Wet Stuff (Mostly): Add the eggs, buttermilk, oil, and vanilla extract to the dry ingredients. Beat with an electric mixer on medium speed for about 2 minutes, scraping down the sides of the bowl as needed.
- The Secret Ingredient: Carefully pour in the hot water or hot coffee. The batter will be quite thin, and that’s **totally normal**. This is what gives us that super moist crumb. Stir it in until just combined. Fold in the ½ cup of chopped hazelnuts.
- Bake It Up: Divide the batter evenly between your two prepared cake pans. Bake for 30-35 minutes, or until a wooden skewer inserted into the center comes out clean.
- Cool Down: Let the cakes cool in the pans for about 10-15 minutes. Then, carefully invert them onto a wire rack to cool completely. Patience, young padawan!
- Make the Frosting: While the cakes are chilling (literally), beat the softened butter in a large bowl with an electric mixer until creamy. Add the powdered sugar, cocoa powder, milk/cream, and vanilla extract. Beat on low speed until combined, then increase to high and beat until light and fluffy. Stir in the hazelnut chocolate spread until well mixed.
- Assemble Your Masterpiece: Once the cakes are **completely cool**, place one layer on your serving plate. Spread a generous amount of frosting on top. Place the second cake layer on top and frost the entire cake, top and sides.
- The Grand Finale: Sprinkle the remaining ¼ cup of toasted, chopped hazelnuts all over the top and sides of the cake. Stand back and admire your work!
Common Mistakes to Avoid
Listen, we all make mistakes. But let’s try to avoid these rookie errors, shall we?
- Not Preheating the Oven: This isn’t a suggestion, it’s a command! A cold oven messes with baking times and rise. Don’t be that person.
- Overmixing the Batter: Once you add the wet to the dry, mix until just combined. Overmixing develops the gluten too much, leading to a tough, dense cake. We want light and fluffy, not a hockey puck.
- Opening the Oven Door Too Soon: Curiosity killed the cake! Opening the door before the cake is set can cause it to sink. Resist the urge for at least 25 minutes.
- Frosting a Warm Cake: This is a one-way ticket to “melted, sliding frosting” town. **Always let your cakes cool completely.** I mean it.
- Forgetting to Toast the Hazelnuts: Un-toasted hazelnuts are fine, but toasted hazelnuts are next-level. That deep, nutty flavor and extra crunch? Non-negotiable, IMHO.
Alternatives & Substitutions
Life happens, and sometimes you don’t have exactly what the recipe calls for. No worries, we can totally improvise!
- No Buttermilk? No Problem! As mentioned, just add 1 tablespoon of white vinegar or lemon juice to a measuring cup, then fill it up to 1 cup with regular milk. Let it sit for 5 minutes. Voila! Instant buttermilk.
- Gluten-Free Flour: You can absolutely swap out the all-purpose flour for a 1:1 gluten-free baking blend. Just make sure it contains xanthan gum!
- Coffee-Averse? If you absolutely detest coffee (though you won’t taste it, I promise!), just use hot water instead. The cake will still be delicious.
- Nutella Shortage? (Gasp! How dare you let that happen?) Any other chocolate-hazelnut spread will work. Or, if you just want a rich chocolate frosting, skip the spread and maybe add an extra tablespoon of cocoa powder and a splash more milk to keep the consistency right.
- No Hazelnuts? You could swap them for almonds, walnuts, or even pecans. Or, if nuts aren’t your jam, just omit them for a simply fabulous chocolate cake!
FAQ (Frequently Asked Questions)
Got questions? I’ve got answers (mostly)!
Q: Can I make this cake ahead of time?
A: Absolutely! The unfrosted cake layers can be wrapped tightly in plastic wrap and kept at room temperature for up to 2 days, or frozen for up to 2 months. Frosting can be made a day ahead and refrigerated, then re-whipped before use. The assembled cake is best within 2-3 days.
Q: Why do you recommend coffee instead of water? Will my cake taste like coffee?
A: Ah, the magic of coffee! It doesn’t make the cake taste like coffee; it **deepens and enhances the chocolate flavor**, making it richer and more complex. It’s a secret weapon for chocolate desserts!
Q: My cake turned out dry! What went wrong?
A: Oh no! The usual culprits are overbaking (keep an eye on that skewer!) or incorrect measurements of ingredients, especially flour. Too much flour can really dry things out. Make sure your oven temperature is accurate!
Q: Can I use margarine instead of butter for the frosting?
A: Well, technically yes, but why hurt your soul like that? Butter provides a far superior flavor and texture to frosting. Margarine can result in a greasier, less creamy frosting. Do your taste buds a favor and stick to butter.
Q: Do I really need to toast the hazelnuts? It feels like an extra step.
A: YES, you really do! Toasted hazelnuts have a much richer, deeper, more intense flavor and a better crunch than raw ones. Just spread them on a baking sheet and toast them in a 350°F (175°C) oven for about 8-10 minutes, stirring once, until fragrant. It’s worth the 10 minutes, trust me!
Q: Can I make this as cupcakes instead?
A: You betcha! This recipe makes about 24 cupcakes. Line muffin tins with paper liners, fill about two-thirds full, and bake for 18-22 minutes, or until a skewer comes out clean. Adjust frosting as needed.
Final Thoughts
So there you have it, folks! You just leveled up your baking game and created something truly magnificent. This Hazelnut Chocolate Cake is destined to become your go-to whenever you need a little chocolatey, nutty hug in your life. Now, go impress someone—or better yet, just yourself—with your new culinary skills. You’ve earned it! And remember, life’s too short for boring cake. Enjoy every glorious bite!

