Okay, confession time: sometimes I want something mind-blowingly delicious without, you know, actually blowing my mind (or my kitchen) trying to make it. So you’re craving something tasty but too lazy to spend forever in the kitchen, huh? Same. That, my friend, is where the legendary Hawaiian Roll Cinnamon Rolls swoop in like a delicious, sugary superhero.
Why This Recipe is Awesome
Because let’s be real, life is too short for complicated recipes unless you’re, like, a Michelin star chef (which, let’s assume, neither of us are, no offense). This recipe? It’s genius. It’s practically **idiot-proof**—even I didn’t mess it up, and my track record with baking can be… questionable. You get all the warm, gooey, cinnamon-y goodness of homemade rolls but with about 1/10th of the effort. Plus, those Hawaiian rolls? They bring a subtle sweetness and an incredible fluffiness that traditional dough just can’t always match. It’s a breakfast, brunch, or ‘oops-I-ate-them-all’ snack that comes together faster than you can say “more frosting, please!”
Ingredients You’ll Need
Gather ’round, my fellow culinary adventurers. Here’s what you’ll need to make some magic happen:
- 1 (12-count) package Hawaiian Sweet Rolls: The star of our show! Don’t skimp, get the good stuff.
- 1/2 cup (1 stick) unsalted butter: Because everything’s better with butter. Duh.
- 1/2 cup packed light brown sugar: The cozy, caramelly sweetness.
- 2 teaspoons ground cinnamon: The essential spice. Don’t be shy!
- 1/2 cup powdered sugar: For that dreamy frosting.
- 2 tablespoons milk (or heavy cream): To loosen up that frosting.
- 1/4 teaspoon vanilla extract: A little whisper of fancy.
- Optional: 2 tablespoons softened cream cheese: If you want to elevate that frosting from “good” to “OMG!” (And trust me, you do.)
Step-by-Step Instructions
Get ready for the easiest baking adventure of your life. Seriously, you’ll be patting yourself on the back in no time.
- Preheat & Prep: First things first, get your oven to **350°F (175°C)**. While it’s heating, grab an 8×8 inch (or similar) baking dish and give it a quick spray with non-stick spray. Nobody likes a stuck roll!
- Slice ‘Em Up: Carefully remove the Hawaiian rolls from their package. Leave them connected! Now, using a serrated knife, slice the entire block of rolls in half horizontally, like you’re making a giant sandwich.
- Butter Up the Bottom: Place the bottom half of the rolls cut-side up in your prepared baking dish.
- Make the Filling: In a small, microwave-safe bowl, melt the butter. Stir in the brown sugar and cinnamon until it forms a delicious, gooey paste.
- Spread the Goodness: Evenly spread that glorious cinnamon-sugar mixture over the bottom half of the rolls. Don’t miss any spots!
- Top it Off: Gently place the top half of the rolls back on, cut-side down, creating a neat little sandwich.
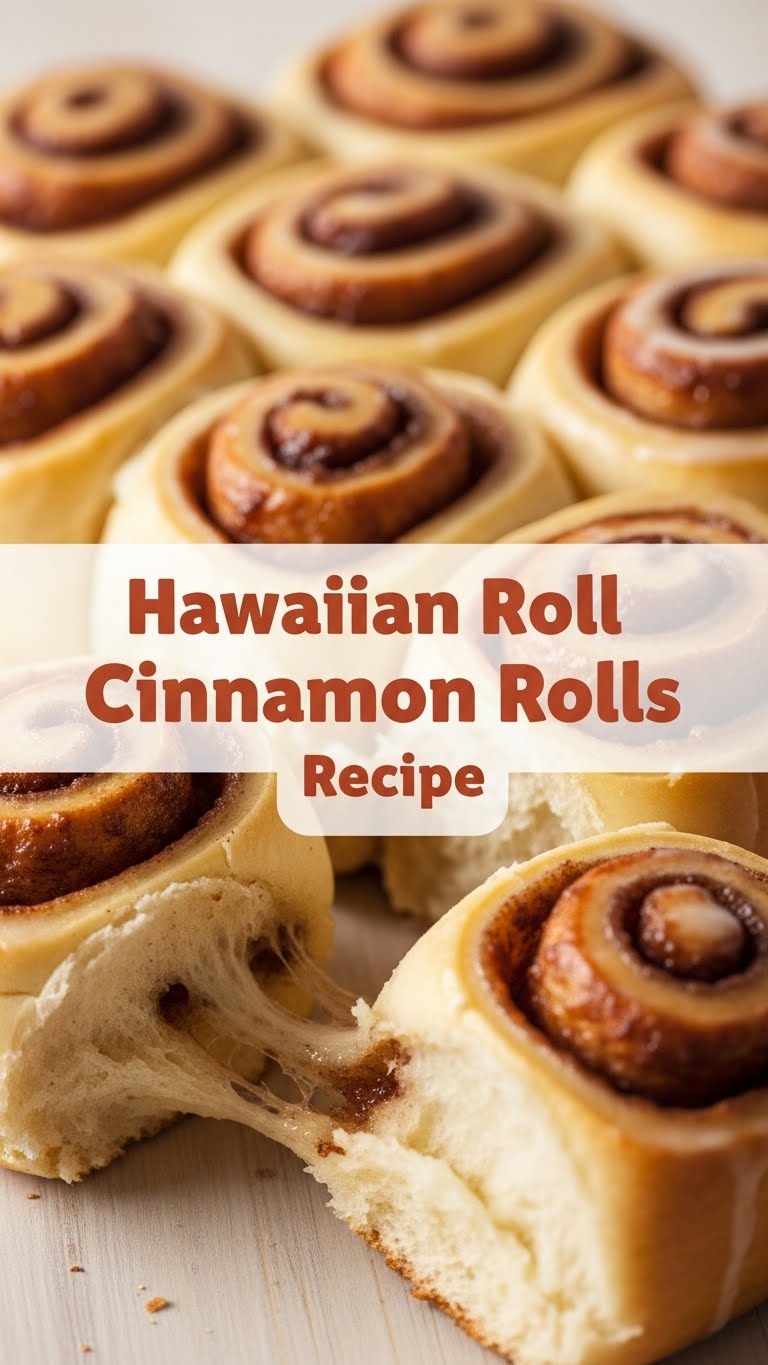
- Bake Time! Pop that dish into your preheated oven and bake for **15-18 minutes**. You’re looking for golden brown edges and bubbly filling. Your kitchen is about to smell AMAZING, FYI.
- Whip Up the Frosting: While the rolls are baking, whisk together the powdered sugar, milk (or cream), and vanilla extract in a small bowl. If you’re using cream cheese, add it in and beat until smooth and creamy. Adjust with more milk if it’s too thick, or more powdered sugar if it’s too thin.
- Frost & Devour: Once the rolls are out of the oven, let them cool for just a minute or two (don’t wait too long, warm frosting is divine!). Drizzle or spread that luscious frosting all over. Pull them apart and enjoy!
Common Mistakes to Avoid
Even the simplest recipes have their quirks. Here’s how to steer clear of disaster (or at least, minor inconvenience):
- Thinking you don’t need to preheat the oven: Rookie mistake! Cold ovens lead to uneven baking and sad, underdeveloped rolls. **Always preheat!**
- Not melting the butter enough for the filling: You want a smooth, spreadable paste, not chunky butter. Melt it fully, friend.
- Over-baking the rolls: These little guys bake fast! Keep an eye on them after the 15-minute mark. You want them soft and gooey, not dry and crusty.
- Forgetting the non-stick spray: Unless you enjoy scraping deliciousness off your baking dish, do not skip this step.
Alternatives & Substitutions
Feeling creative? Or just missing an ingredient? No stress, we can totally improvise!
- No brown sugar? You can totally use white granulated sugar, but add an extra teaspoon of cinnamon and maybe a tiny splash of maple syrup to the butter mixture for that deeper flavor. IMO, brown sugar is king here, but do what you gotta do!
- No vanilla extract? It’s not the end of the world. A pinch of salt in the frosting can help balance the sweetness, or just skip it.
- Want a different frosting? A simple glaze of powdered sugar and lemon juice is surprisingly zesty and delicious. Or, if you’re feeling extra decadent, melt some cream cheese frosting (the canned kind, no judgment!) and drizzle that on.
- Add-ins: For extra pizzazz, sprinkle some chopped pecans or walnuts into the cinnamon sugar filling. Or, a few chocolate chips? Don’t mind if I do!
FAQ (Frequently Asked Questions)
Got questions? I’ve got answers (mostly, don’t ask me about astrophysics).
- Can I prepare these ahead of time? Absolutely! You can assemble the rolls with the filling in the baking dish, cover them, and pop them in the fridge overnight. In the morning, just let them sit at room temp for 15-20 minutes while your oven preheats, then bake as usual. **Do not add the frosting until serving!**
- What if I don’t have an 8×8 dish? A pie plate, an 11×7, or even a small loaf pan can work. Just make sure the rolls fit snugly. You might need to adjust baking time slightly.
- Can I use margarine instead of butter? Well, technically yes, but why hurt your soul like that? Butter just tastes better, it’s a fact. But if it’s all you have, it’ll work.
- How long do leftovers last? If you manage to have any, they’re best on day one. You can store them covered at room temperature for a day, or in the fridge for up to 3 days. Reheat gently in the microwave or a warm oven.
- My rolls look a little dry. What went wrong? Most likely, they were over-baked. Keep an eye on them next time! Also, ensure your oven temperature is accurate. A separate oven thermometer can be a game-changer.
Final Thoughts
See? I told you it was easy! You just whipped up a batch of warm, gooey, utterly delightful cinnamon rolls using Hawaiian bread, proving that sometimes the best things in life are also the simplest. So go on, bask in the glory of your culinary prowess. Share them with friends (or don’t, I won’t tell). Now go impress someone—or yourself—with your new culinary skills. You’ve earned it! Happy baking, friend!


