So you’re craving something warm, gooey, and utterly delicious, but the thought of spending hours kneading dough makes you want to curl up and cry, huh? Been there, friend. Like, every Sunday morning. But what if I told you there’s a magical shortcut to cinnamon roll heaven that even your cat could probably manage?
Why This Recipe is Awesome
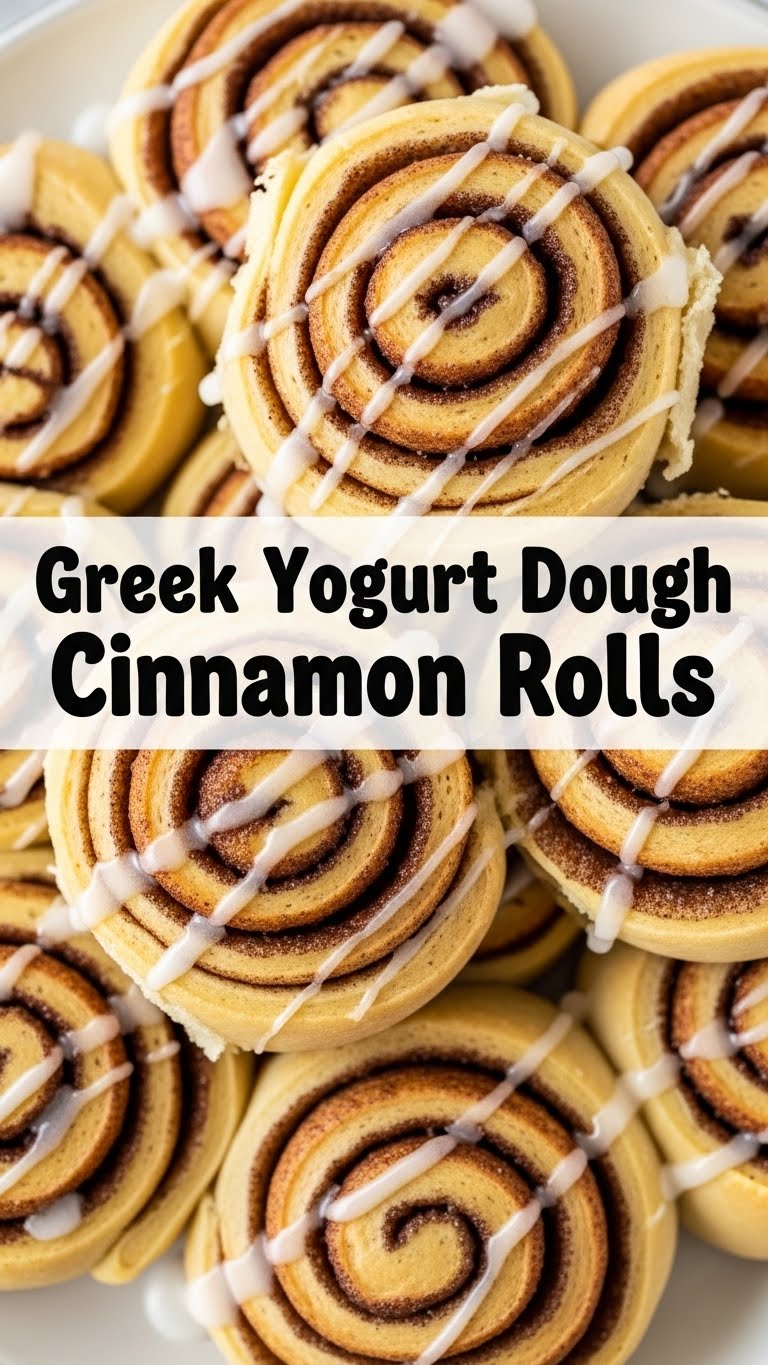
Okay, let’s be real. Traditional cinnamon rolls? They’re a project. A love letter to yeast and patience. But this recipe? It’s like the cheeky, rebellious younger sibling who gets all the glory without all the fuss. We’re talking no yeast, no waiting around for dough to rise, and honestly, it’s pretty much idiot-proof. Seriously, even I managed not to screw it up, which is saying something because my kitchen often doubles as a disaster zone. You get that fluffy-yet-chewy texture, that sweet, cinnamon-y swirl, and all without needing to call your grandma for advice. It’s a game-changer, trust me. Plus, Greek yogurt dough? It’s practically health food…ish. Don’t fact-check me on that.
Ingredients You’ll Need
- For the Dough (the Real MVP):
- 1 ½ cups self-rising flour (the hero that does all the work for you; FYI, no need for baking powder/soda here!)
- 1 cup plain Greek yogurt (full-fat is my jam, but whatever you’ve got works. Just make sure it’s plain—unless you want strawberry cinnamon rolls, which, actually, hmm…)
- For the Filling (the Gooey Goodness):
- ¼ cup unsalted butter, melted (because everything’s better with butter, duh)
- ½ cup packed light brown sugar (don’t even think about using white sugar here, you rebel)
- 1 tablespoon ground cinnamon (the spicier, the better, IMO)
- For the Icing (the Crown Jewel):
- ½ cup powdered sugar (also known as confectioners’ sugar, because fancy)
- 1-2 tablespoons milk (any kind, even oat milk if you’re feeling plant-based)
- ¼ teaspoon vanilla extract (a little goes a long way for that extra oomph)
Step-by-Step Instructions
- Preheat & Prep: Get your oven sizzling to 375°F (190°C). Lightly grease an 8×8 inch baking dish. Don’t skip this, unless you want your precious rolls cemented to the pan.
- Whip Up the Dough: In a medium bowl, combine the self-rising flour and Greek yogurt. Mix it with a spoon until it starts coming together, then use your hands to knead it gently for about 3-5 minutes on a lightly floured surface. You’re aiming for a smooth, cohesive dough. If it’s too sticky, add a tiny bit more flour; too dry, a tiny splash of yogurt.
- Roll It Out: Grab that beautiful dough and roll it into a rectangle, roughly 12×8 inches. Try to keep it somewhat even. No need for a ruler, just eyeball it. We’re having fun here, not taking an exam.
- Butter Up: Brush your melted butter all over that dough rectangle, leaving about a ½-inch border on one of the longer sides (this helps seal it later). Make sure to get it to the edges!
- Cinnamon Sugar Shower: In a small bowl, mix your brown sugar and cinnamon. Now, sprinkle this glorious mixture evenly over the buttered dough. Press it down gently so it sticks. Yum!
- Roll ‘Em Up: Starting from the long side opposite your unbuttered border, tightly roll the dough into a log. Once rolled, pinch the seam closed along that unbuttered edge. Make sure it’s snug!
- Slice & Dice: Using a sharp knife or even unflavored dental floss (yes, really!), slice your log into 8-9 equal pieces. About 1 ½ inches thick is usually perfect.
- Arrange & Bake: Place your sliced rolls cut-side up in your prepared baking dish. Don’t worry if they’re a little snug; they’ll puff up! Bake for 20-25 minutes, or until they’re golden brown and smell absolutely heavenly.
- Whip Up the Icing: While your rolls are doing their thing, whisk together the powdered sugar, milk, and vanilla extract until smooth. Start with 1 tablespoon of milk and add more, a tiny bit at a time, until you get a nice, pourable consistency.
- Drizzle & Devour: Once the rolls are out of the oven, let them cool for just 5-10 minutes (otherwise, the icing will just melt into oblivion). Then, go wild drizzling that glorious icing all over them. Serve warm and bask in the glory!
Common Mistakes to Avoid
- Using flavored yogurt: Unless you want raspberry-swirl cinnamon rolls (which, okay, might not be terrible), stick to plain. Trust me, the texture and flavor are better for this.
- Over-kneading the dough: This isn’t a sourdough starter, folks. A few minutes until it’s cohesive is all you need. Over-kneading will make it tough, and nobody wants a tough roll.
- Skipping the butter or not pressing the filling: Those cinnamon sugar bits need something to cling to. Lack of butter or a gentle press means your filling might just fall out, and that’s a tragedy.
- Rolling too loosely: A loose roll will fall apart. Aim for snug, but not so tight it rips. It’s like swaddling a baby, but tastier.
- Not preheating the oven: Rookie move! Cold ovens lead to uneven baking and sad, deflated rolls. Give your oven time to get to temp.
- Icing immediately out of the oven: Patience, grasshopper! Let them cool a *little* or that beautiful icing will just disappear into the rolls, and where’s the fun in that?
Alternatives & Substitutions
Got a dietary restriction or just feeling experimental? No sweat, I got you.
- Flour: If you don’t have self-rising flour, you can totally make your own! Just combine 1 ½ cups all-purpose flour with 2 ¼ teaspoons baking powder and a ½ teaspoon salt. Voila!
- Yogurt: While Greek yogurt gives the best texture, regular plain yogurt (whole milk works best) can be used in a pinch. Just be aware the dough might be a bit stickier, so you might need a tiny bit more flour.
- Butter: Vegan butter works perfectly for the filling. For the icing, you can omit it if you’re trying to go dairy-free, or use a tiny bit of vegan butter substitute.
- Spice it Up: Want to get fancy? Add a pinch of nutmeg or cardamom to your cinnamon sugar mixture. Trust me, it’s a game-changer.
- Cream Cheese Icing (Because, duh): My personal fave! Instead of the simple powdered sugar icing, whip together 2 oz softened cream cheese, ¼ cup softened butter, 1 cup powdered sugar, and ½ teaspoon vanilla extract. Add a splash of milk if needed to get it to your desired consistency. You’ll thank me later.
FAQ (Frequently Asked Questions)
- Can I make these ahead of time? Absolutely! You can roll the dough, fill it, and slice it, then place the rolls in your baking dish, cover, and refrigerate overnight. Just pull them out 30 minutes before baking to come to room temp, then bake as usual. Pro tip: The fresher, the better though, for that ultimate fluffiness.
- My dough is too sticky/dry, what do I do? Ah, the joys of baking! If it’s too sticky, dust with a *little* more flour. If it’s too dry and crumbly, add a *tiny* splash more yogurt. Go slow, you can always add more, but you can’t take away!
- Do I *have* to use full-fat Greek yogurt? Nope, not *have* to, but it does yield a richer, softer dough. Lower fat options will still work, just know the texture might be slightly less… indulgent. Your call!
- What if I don’t have self-rising flour? Are you even reading this?! Kidding! (Mostly). I mentioned it under “Alternatives,” but seriously, 1 ½ cups all-purpose flour + 2 ¼ tsp baking powder + ½ tsp salt. Write it down, memorize it.
- Can I freeze these? You sure can! Freeze baked, un-iced rolls for up to a month. Thaw, warm in the oven, then ice. Or, freeze the unbaked rolls and bake from frozen (might need an extra 5-10 mins).
- Is it possible to make a smaller batch? Oh, you mean you don’t want 8-9 glorious cinnamon rolls all to yourself? Weirdo! But yes, easily halve the recipe for a smaller serving.
Final Thoughts
And there you have it, folks! Your new secret weapon for when you need a little sweet pick-me-up without the existential dread of traditional baking. These Greek Yogurt Dough Cinnamon Rolls are ridiculously easy, seriously delicious, and will have everyone asking for your recipe (don’t worry, you can take all the credit). Now go impress someone—or yourself, which is arguably more important—with your new culinary superpowers. You’ve earned those warm, gooey hugs. Happy baking!


