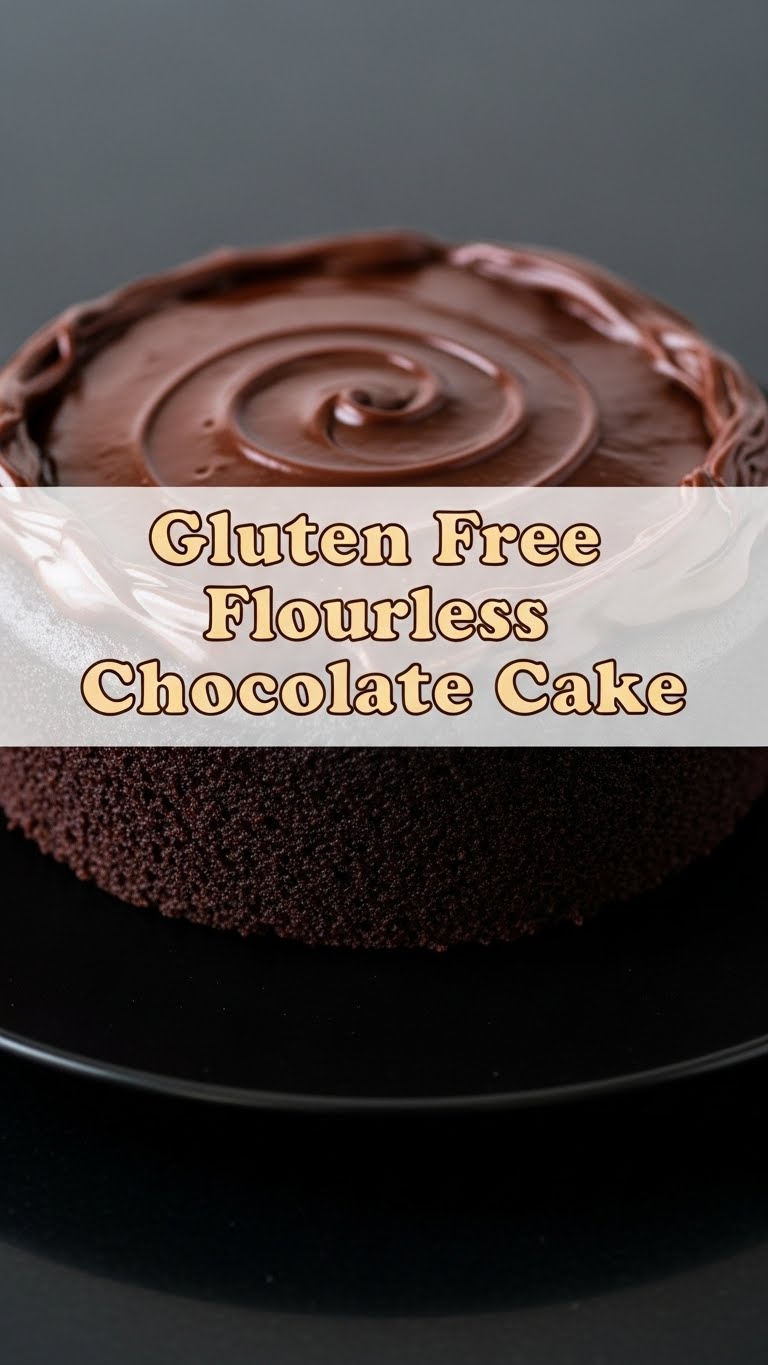
So, you’re craving something seriously decadent, chocolatey, and impressive, but the thought of sifting flours and dealing with complicated baking instructions makes you want to just order takeout? Yeah, me too. But what if I told you there’s a cake so ridiculously easy, so naturally gluten-free, and so utterly delicious it’ll make you question all your life choices (in a good way, obviously)? Meet your new best friend: The Flourless Chocolate Cake. Prepare to have your mind blown and your taste buds sing.
Why This Recipe is Awesome
Okay, buckle up, buttercup, because this isn’t just any cake. This is *the* cake. First off, it’s naturally gluten-free. No weird specialty flours, no expensive blends, just pure chocolatey goodness. FYI, it’s also incredibly rich, fudgy, and moist – basically, everything a good chocolate cake should be, but without any of the fuss. You know those fancy patisserie cakes that look like they took a team of culinary geniuses a week to make? This is that, but you can whip it up in about an hour, including bake time. It’s practically idiot-proof. Seriously, if I can make it without setting off the smoke detector, you definitely can. Plus, the ingredient list is so short, you probably have most of it already. Minimal effort, maximum reward. What’s not to love?
Ingredients You’ll Need
- Good Quality Dark Chocolate: Around 8-10 ounces (225-280g) of the good stuff. Think 60-70% cacao. No, those chocolate chips you’ve had in the back of the pantry since last Christmas probably won’t cut it. Treat yourself!
- Unsalted Butter: 1 stick (1/2 cup or 113g). Because butter makes everything better, duh.
- Granulated Sugar: 1 cup (200g). Just enough to sweeten the deal without making it cloyingly sweet.
- Large Eggs: 5 of ’em. These are the unsung heroes giving our cake its structure and glorious texture.
- Unsweetened Cocoa Powder: 2 tablespoons. For an extra chocolatey kick. Think of it as chocolate’s hype man.
- Pinch of Salt: Seriously, just a tiny pinch. It enhances all those amazing chocolate flavors. Don’t skip it!
- Vanilla Extract (Optional but Recommended): 1 teaspoon. A little splash for warmth and depth.
Step-by-Step Instructions
- Get Your Gear Ready: Preheat your oven to 350°F (175°C). Grab an 8-inch springform pan. Grease it well and line the bottom with parchment paper. This is crucial unless you want a cake stuck to the pan, which is just sad.
- Melt the Good Stuff: In a heatproof bowl set over a pot of simmering water (or in the microwave in 30-second bursts), melt your chopped dark chocolate and butter together. Stir until it’s smooth, shiny, and irresistible. Let it cool for a few minutes.
- Whisk Away: In a separate large bowl, whisk together the sugar and eggs until they’re light, pale, and slightly foamy. You’re basically aerating them, which sounds fancy but just means you’re introducing air.
- Combine Forces: Gently fold the cooled chocolate mixture into the egg mixture. Don’t go crazy with the whisk; just fold until it’s combined. Then, sift in your cocoa powder and salt (and vanilla if using). Fold again until just incorporated. Overmixing is a no-no!
- Pour and Bake: Pour your glorious batter into the prepared springform pan. Pop it into the preheated oven and bake for 30-35 minutes. The edges should be set, but the center will still be a bit jiggly. That’s good! It means fudgy perfection.
- Cool Down: Remove the cake from the oven and let it cool completely in the pan on a wire rack. As it cools, the center will sink slightly – this is totally normal and gives it that classic flourless cake look. Once cool, you can carefully remove the springform sides.
Common Mistakes to Avoid
- Forgetting to Grease/Line the Pan: Rookie mistake! Your beautiful cake will become one with the pan. Don’t do it.
- Overbaking: If you bake it until it’s completely firm, you’ll end up with a dry cake, not the fudgy masterpiece we’re aiming for. Remember: a little jiggle is your friend.
- Using Low-Quality Chocolate: This cake is all about the chocolate, so don’t skimp! A cheap chocolate will give you a cheap-tasting cake. You deserve better.
- Overmixing the Batter: Once you add the dry ingredients, gentle folding is key. Too much mixing develops gluten (even in flourless cakes, through the eggs) and can make your cake tough.
- Cutting it Warm: Patience, young padawan! Let it cool completely, otherwise, it might crumble. Trust the process.
Alternatives & Substitutions
Feeling adventurous? Or just out of an ingredient? No stress, we got you:
- Dairy-Free: Swap the butter for a good quality dairy-free butter alternative (like Miyoko’s Kitchen or Earth Balance sticks).
- Boozy Kick: A tablespoon of your favorite liqueur (like Kahlúa, Grand Marnier, or even a good whiskey) can be added with the vanilla extract for an adult twist. Just sayin’.
- Orange Zest: For a bright, citrusy note, add a teaspoon of fresh orange zest to the melted chocolate mixture. Chocolate and orange are a match made in heaven.
- Different Chocolate Percentages: If you prefer it less intense, you can go with 50-60% cacao. If you’re a dark chocolate fanatic, push it to 75% or even 80% (but you might want to add an extra tablespoon of sugar).
FAQ (Frequently Asked Questions)
Got questions? I’ve got answers (mostly humorous, of course).
- Can I use milk chocolate? Well, technically yes, but why hurt your soul like that? This cake thrives on dark chocolate. Milk chocolate will make it too sweet and less “grown-up” fudgy. Stick to the dark side.
- How do I know when it’s done? The edges will be set and slightly puffed, but the center will still have a slight wobble when you gently shake the pan. If it’s firm all the way through, you’ve gone too far!
- How long does it keep? Covered tightly at room temperature, it’s great for 2-3 days. In the fridge, it’ll last up to a week. Just bring it back to room temp before serving for the best texture.
- Can I freeze this cake? Absolutely! Wrap individual slices or the whole cooled cake tightly in plastic wrap, then foil. It’ll keep for up to a month. Thaw in the fridge overnight.
- My cake cracked on top, is it ruined? Nope, not at all! It’s super common for flourless cakes to crack as they cool and sink. Just embrace its rustic charm! A dusting of cocoa powder or powdered sugar will hide a multitude of “sins.”
- What if I don’t have a springform pan? You can use a regular 8 or 9-inch round cake pan, but be sure to grease and line the bottom AND sides with parchment paper, leaving an overhang to help you lift the cake out once cooled. It’s a bit trickier, but doable.
Final Thoughts
See? That wasn’t so scary, was it? You just made a ridiculously impressive, utterly delicious, and naturally gluten-free chocolate cake. Pat yourself on the back, give yourself a high-five, and maybe do a little happy dance. This cake is perfect on its own, with a scoop of vanilla ice cream, a dollop of whipped cream, or some fresh berries. It’s fancy enough for a dinner party, but easy enough for a Tuesday night “treat yo’self” moment. Now go impress someone – or yourself – with your new culinary skills. You’ve earned it!

