So, you’ve got tiny humans buzzing around, maybe a weekend that feels a little too long, and a sudden, undeniable craving for something sweet and adorable? You, my friend, are in the right place. Forget those Pinterest-perfect, hours-long baking projects. We’re talking *fun*, *easy*, and *kid-approved* cupcakes that look like a party even if you’re just celebrating Tuesday.
Why These Cupcakes Are Awesome (Seriously)
Because let’s be real, life is chaotic enough. This isn’t about becoming a pastry chef overnight; it’s about whipping up some magic without needing a degree in advanced baking. These cupcakes? They’re practically idiot-proof. I’ve made them after a long day, before my first coffee, and even with a small, sprinkle-obsessed assistant, and guess what? They turned out fab every single time. Plus, the decorating part is where the real fun (and minimal adult supervision) happens. It’s like a tiny, edible art project! You get to unleash your inner child, and your actual child gets to make a delicious mess. Win-win, IMO.
Ingredients You’ll Need
Alright, let’s gather our edible weapons of mass delight. Don’t worry, nothing too fancy here. You probably have most of this stuff lurking in your pantry already.
- All-Purpose Flour: About 1 ½ cups. The backbone of our deliciousness.
- Granulated Sugar: 1 cup. Because sweet things are happy things.
- Baking Powder: 1 ½ teaspoons. Our little magic potion to make them rise.
- Salt: ½ teaspoon. Just a pinch to make everything taste better. Don’t skip it!
- Unsalted Butter: ½ cup (1 stick), softened. Room temperature, please! Not melted, not rock hard.
- Large Eggs: 2, at room temperature. Happy eggs make happy cupcakes.
- Whole Milk: ½ cup, at room temperature. Or whatever milk you have, really.
- Vanilla Extract: 1 teaspoon. The soul of a good vanilla cupcake. Don’t be shy with quality here.
- Powdered Sugar (Confectioners’ Sugar): About 3-4 cups for frosting. The fluffy cloud maker.
- More Unsalted Butter: ½ cup (1 stick), softened, for frosting.
- Splash of Milk or Cream: 2-3 tablespoons for frosting. To get that perfect spreadable consistency.
- Food Coloring: (Optional, but highly recommended for fun!) Gel colors work best.
- Your Fun Arsenal: Sprinkles (all the sprinkles!), candy eyes, mini chocolate chips, gummy worms, crushed cookies (Oreos are great for ‘dirt’ or ‘ears’), mini marshmallows, M&Ms, fruit snacks, edible glitter – basically, anything colorful and tiny that sparks joy.
Step-by-Step Instructions
Get ready to bake like a boss! We’re breaking this down so even your cat could follow along (if it had opposable thumbs, of course).
- Preheat & Prep: First things first, turn your oven to 350°F (175°C). Then line a 12-cup muffin tin with paper liners. Do not skip this. Your future self will thank you.
- Whisk the Dry Stuff: In a medium bowl, whisk together the flour, granulated sugar, baking powder, and salt. Give it a good swish so everything is combined.
- Cream the Wet Stuff: In a larger bowl, using an electric mixer (or a strong arm!), cream the softened butter until it’s light and fluffy. Add the eggs one at a time, beating well after each addition. Stir in that glorious vanilla extract.
- Combine & Conquer: Now for the magic. Add about a third of your dry ingredients to the wet ingredients, mix until just combined. Then add half the milk, mix. Repeat with another third of dry, then the rest of the milk, and finally the last of the dry. Don’t overmix! Mix until just combined, a few lumps are totally fine.
- Fill ‘Em Up: Divide your batter evenly among the 12 cupcake liners. Fill each about two-thirds full. Don’t be greedy, or they’ll overflow like a delicious, buttery volcano.
- Bake Time! Pop them in the preheated oven for 18-22 minutes, or until a wooden skewer inserted into the center comes out clean.
- Cool Down: Let them cool in the muffin tin for a few minutes, then transfer them to a wire rack to cool completely. This is crucial for frosting! Seriously, wait until they’re totally cool.
- Frosting Frenzy: While your cupcakes are chilling out, beat the softened butter for the frosting until creamy. Gradually add the powdered sugar, one cup at a time, alternating with splashes of milk/cream, until you have a smooth, spreadable frosting. Add vanilla extract. Want different colors? Divide the frosting into smaller bowls and add a drop or two of food coloring to each. Mix well!
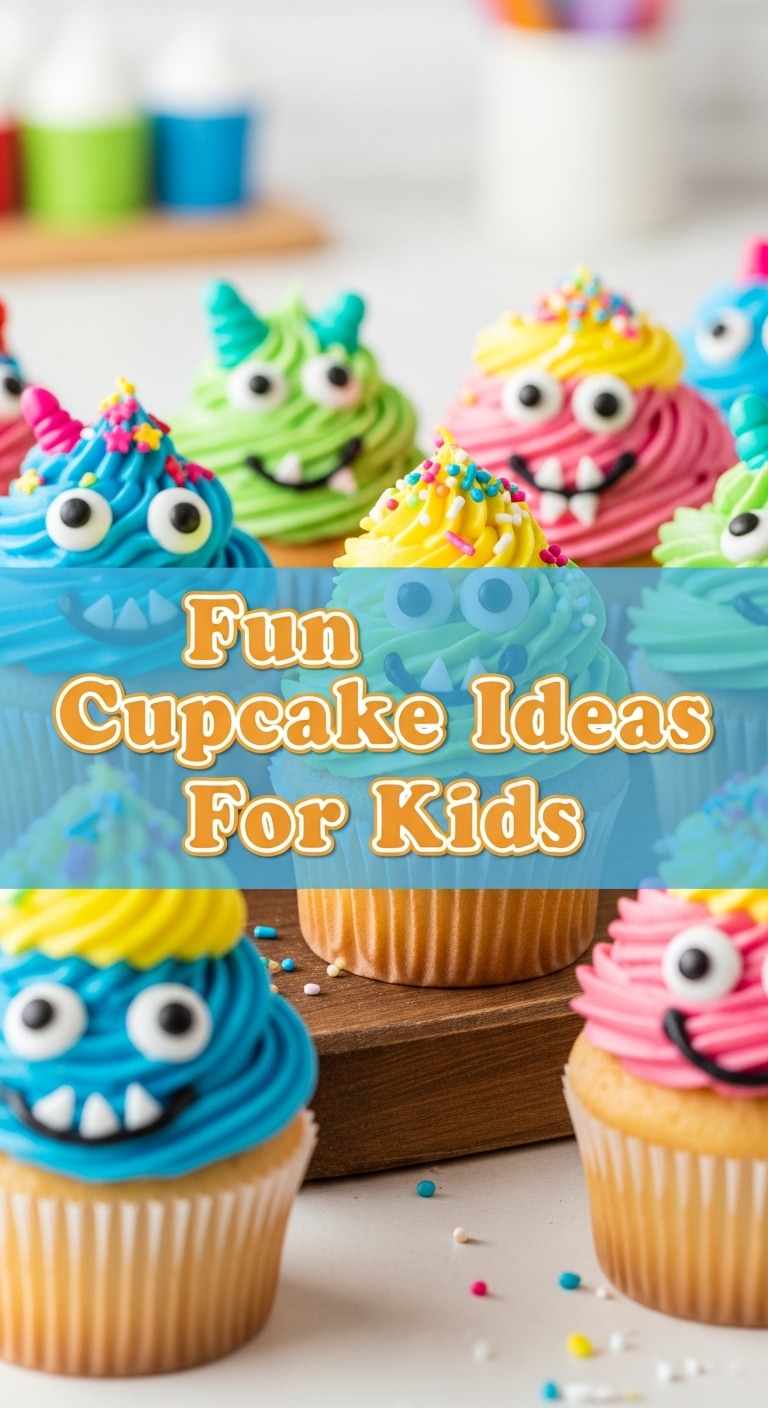
- Decorating Party! Once the cupcakes are cool, the real fun begins! Spread or pipe your colorful frosting onto each cupcake. Then let the kids (or your inner child) go wild with the sprinkles, candy eyes, mini chips, and all those fun toppings. Think monster faces, rainbow explosions, or tiny garden scenes. The messier, the better!
Common Mistakes to Avoid
Listen, we’ve all been there. Baking mishaps are a rite of passage. But you can sidestep some of the usual pitfalls with these pro (ish) tips:
- The “Cold Ingredients” Fiasco: Trying to cream rock-hard butter or mix in straight-from-the-fridge eggs. Room temperature ingredients are key for a smooth, cohesive batter. Don’t rush it.
- The Overmixing Menace: Whirling and twirling that batter until it’s super smooth. Newsflash: overmixing develops gluten, which leads to tough, chewy cupcakes. Nobody wants that. Mix until just combined, and be at peace with a few tiny lumps.
- The “Oops, Overflow!” Trap: Filling your cupcake liners to the brim. Resist the urge! Two-thirds full is the sweet spot. Otherwise, you get muffin tops that look like they’re trying to escape their paper prison.
- The Warm Frosting Disaster: Trying to frost warm cupcakes. Oh, honey, no. You’ll end up with a sad, melted puddle of frosting. Patience, grasshopper. Let them cool completely.
- The Sprinkle Avalanche: Letting kids handle the full container of sprinkles unsupervised. Unless you *want* sprinkles on every surface of your kitchen (and possibly the dog), give them small portions in little bowls. Trust me on this one.
Alternatives & Substitutions
Feeling adventurous? Or just out of something? Here are a few swaps that won’t totally derail your cupcake dreams:
- Milk Matters: Don’t have whole milk? Skim, 2%, or even a non-dairy milk like almond or oat will work in a pinch. The texture might be *slightly* different, but still delicious.
- Butter Swaps: For the cupcakes, butter is king for flavor and texture. For the frosting, if you’re out, margarine *can* work, but your frosting might be a little softer and the flavor won’t be as rich. Stick to butter for the best result.
- Flavor Frenzy: Want chocolate cupcakes? Reduce the flour by ¼ cup and add ¼ cup unsweetened cocoa powder to your dry ingredients. Lemon? Add a tablespoon of lemon zest to the batter and a squeeze of lemon juice to the frosting. So many possibilities!
- Gluten-Free Gang: You can absolutely use a 1:1 gluten-free baking flour blend in place of all-purpose flour. Just make sure it includes xanthan gum.
- Cream Cheese Frosting: Not a fan of traditional buttercream? Swap half the butter for softened cream cheese in the frosting recipe. Oh, my goodness. Game changer.
FAQ (Frequently Asked Questions)
Got questions? I’ve got (mostly sarcastic) answers!
- Can I make these ahead of time? Absolutely! Baked, unfrosted cupcakes can hang out in an airtight container at room temp for up to 2 days, or frozen for a couple of months. Frosting can be made ahead too!
- My frosting is too thick/thin, help! Is it a brick? Add a tiny bit more milk or cream (like, ½ teaspoon at a time). Is it soup? Add more powdered sugar, a tablespoon at a time, until it firms up. It’s a delicate dance!
- Can kids *really* help with this? Yes! They can measure dry ingredients (with supervision for accuracy), put liners in the tin, stir the batter (gently!), and most importantly, they are the supreme commanders of the decorating station. Prepare for sprinkles everywhere.
- What kind of sprinkles are best for kids? The ones they like! But generally, jimmies, nonpareils, and shape sprinkles (stars, hearts, etc.) are easy for little hands to manage. Edible glitter is also a huge hit.
- Do I need fancy piping bags? Nah! A simple butter knife or offset spatula for spreading works perfectly. If you want a fancier swirl, cut a corner off a Ziploc bag and use that. Easy peasy!
- How long do these last once decorated? If they manage to last past the initial devouring, they’re best eaten within 2-3 days when stored in an airtight container at room temperature. But let’s be honest, they probably won’t make it that long.
- Can I use margarine instead of butter? Well, technically yes, but why hurt your soul like that? Butter just tastes better, period. But if it’s all you’ve got and the craving is real, go for it!
Final Thoughts
Phew! You made it. You’ve now unlocked the secret to fun, fuss-free cupcakes that will bring smiles (and possibly sticky fingers) to everyone involved. Whether you’re a seasoned baker or just dipping your toes into the sweet world of cupcakes, remember the goal here is fun, not perfection. So, crank up some tunes, get those little hands involved, and create some delicious memories. Now go impress someone—or yourself—with your new culinary skills. You’ve earned it!


