So you’re craving something tasty but too lazy to spend forever in the kitchen, huh? Same. 🙂 I get it. Life’s too short for bland desserts and complicated instructions. That’s why I’ve whipped up (literally!) this recipe for fudgy brownies with frosting that’s so ridiculously easy, even your cat could probably supervise you and not screw it up. Get ready to unleash your inner baking ninja!
Why This Recipe is Awesome
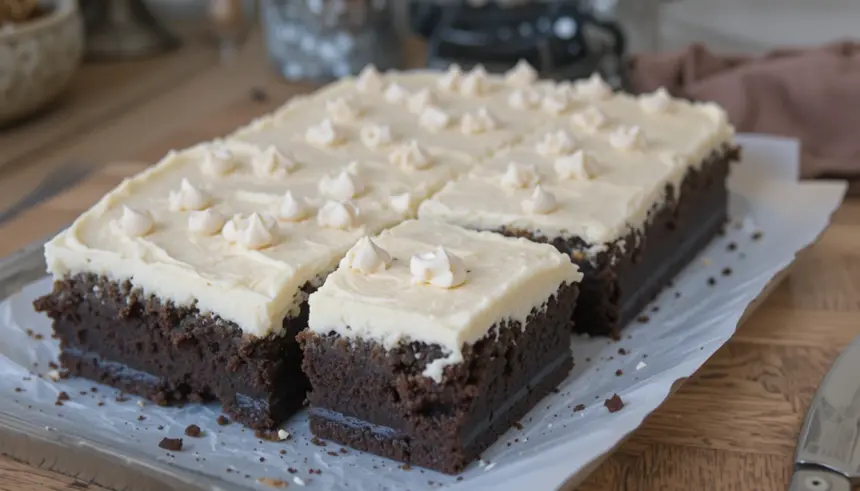
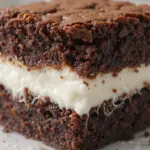
Okay, let’s be real. What’s not to love? These brownies are the stuff dreams are made of: intensely chocolatey, wonderfully fudgy, and topped with a frosting so smooth it’ll make you question all your life choices. And the best part? It’s virtually foolproof. Seriously, I’ve made these in my sleep (almost), and they still turn out amazing. It’s the perfect balance of effort and ridiculously delicious reward. You get all the brownie glory without the kitchen meltdown.
Ingredients You’ll Need
- 1 cup (2 sticks) unsalted butter, melted (because anything less is just… sad)
- 2 cups granulated sugar (the sweet stuff, duh)
- 4 large eggs, room temperature (no one likes cold eggs in their batter)
- 1 teaspoon vanilla extract (the secret weapon of deliciousness)
- 1 cup all-purpose flour (not too much, we want fudgy, not cakey!)
- 1 cup unsweetened cocoa powder (the darker, the better, IMO)
- 1/2 teaspoon baking powder (just a little lift, we’re not making balloons)
- 1/4 teaspoon salt (to make all those chocolate flavors sing)
- For the Frosting:
- 1/2 cup (1 stick) unsalted butter, softened (the magic ingredient for creamy goodness)
- 2 cups powdered sugar (sifted, please, unless you enjoy lumpy frosting)
- 1/4 cup unsweetened cocoa powder (more chocolate never hurt anyone)
- 1/4 cup milk (or cream for extra decadence)
- 1 teaspoon vanilla extract (yep, again!)
Step-by-Step Instructions
- Preheat your oven to 350°F (175°C). Grease and flour a 9×13 inch baking pan, or line it with parchment paper for easy cleanup. Nobody likes scrubbing burnt bits.
- In a large bowl, whisk together the melted butter and sugar until they look like a dreamy, glossy puddle.
- Beat in the eggs one at a time, followed by the vanilla extract. Don’t overmix, we’re not trying to develop gluten here.
- In a separate medium bowl, whisk together the flour, cocoa powder, baking powder, and salt. Get all those dry ingredients cozy.
- Gradually add the dry ingredients to the wet ingredients, mixing until just combined. Seriously, **stop when you don’t see any dry streaks**. Overmixing is a brownie’s worst enemy.
- Pour the batter into your prepared pan and spread it evenly. Give it a little shake to level it out.
- Bake for 25-30 minutes, or until a toothpick inserted into the center comes out with a few moist crumbs attached. **Don’t overbake!** That’s the express train to dry brownie town.
- Let the brownies cool completely in the pan on a wire rack. This is the hardest part, I know. Patience, grasshopper.
- While the brownies are cooling, whip up the frosting. In a medium bowl, beat the softened butter until creamy.
- Gradually add the powdered sugar and cocoa powder, alternating with the milk, beating until smooth and spreadable. Stir in the vanilla.
- Once the brownies are *completely* cool (I can’t stress this enough!), frost them generously. Go wild. You’ve earned it.
Common Mistakes to Avoid
- Overmixing the batter: This leads to tough, cakey brownies, and we want fudgy, dense goodness. Gentle mixing is key!
- Overbaking: Seriously, watch that toothpick test like a hawk. A few moist crumbs are a good thing! They’ll continue to bake as they cool.
- Cutting them too soon: As tempting as it is, waiting for them to cool completely makes for cleaner cuts and less frustration.
- Skipping the salt: It might seem small, but salt enhances the chocolate flavor and balances the sweetness. Don’t be a hero and leave it out!
Alternatives & Substitutions
Feeling adventurous? Or maybe you’re missing a key ingredient? No sweat!
- Chocolate Chips: Throw in a cup of chocolate chips (milk, dark, or semi-sweet) into the batter for extra chocolatey explosions. My personal favorite is a mix of dark and milk chocolate.
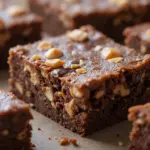
- Nutty Goodness: Add a cup of chopped nuts like walnuts or pecans for a delightful crunch. Toast them first for an even better flavor boost!
- Frosting Variations: Feel free to play with the frosting! Add a tablespoon of instant coffee granules for a mocha kick, or swirl in some peanut butter for a decadent combo.
- Flour Power: If you’re gluten-free, you can try a good quality 1:1 gluten-free baking flour. Results may vary, but it’s worth a shot!
FAQ (Frequently Asked Questions)
Got questions? I’ve got (mostly) sensible answers!
- Can I use margarine instead of butter for the brownies? Well, technically yes, but why hurt your soul like that? Butter gives you the best flavor and texture. Margarine can sometimes make them a bit oily or affect the fudginess. Stick with butter for the best results.
- Can I make these dairy-free? You bet! Use a good quality vegan butter substitute for both the brownies and the frosting. For the milk in the frosting, a splash of almond or oat milk will work just fine.
- My brownies look a little pale. What did I do wrong? Most likely, you didn’t use enough cocoa powder, or your cocoa powder might be old and not very flavorful. Make sure you’re using unsweetened cocoa powder and a generous amount!
- How do I store these delicious creations? Store them in an airtight container at room temperature for up to 3 days. If they last that long, you’re a stronger person than I am.
- Can I freeze these? Absolutely! Wrap them well in plastic wrap and then foil, and they’ll keep in the freezer for up to 3 months. Thaw them overnight at room temperature.
- Why is my frosting so thin/thick? If it’s too thin, add more powdered sugar a tablespoon at a time. If it’s too thick, add a tiny bit more milk (like, half a teaspoon at a time) until it reaches your desired consistency.
Final Thoughts
And there you have it! Your ticket to brownie nirvana. These fudgy delights are perfect for any occasion – birthdays, Tuesdays, or just because. Now go impress someone—or yourself—with your new culinary skills. You’ve earned it! Don’t forget to lick the frosting bowl. It’s practically a rite of passage. Happy baking!
