So you’re craving something tasty but too lazy to spend forever in the kitchen, huh? Same, friend, same. We’ve all been there: staring into the fridge, wishing a magical dessert would just *poof* into existence. Well, buckle up, buttercup, because today we’re making something that’s almost as easy as magic, super customizable, and ridiculously fun: **Frozen Yogurt with Colorful Candies!** Get ready to unleash your inner child and your inner chef (the lazy one, obvs).
Why This Recipe is Awesome
Let’s be real, this isn’t just a recipe; it’s a lifestyle choice. Why is it awesome? First off, it’s practically **idiot-proof**. Seriously, even I, a seasoned pro at burning toast, have never messed this up. Second, it’s quick. Like, “I need dessert NOW” quick (minus the freezing time, but that’s passive effort, so it doesn’t count, right?). Third, you get to play with your food! We’re talking vibrant colors, exciting textures, and a treat that screams “happy place.” It’s also a *slightly* healthier alternative to ice cream, so you can tell yourself it’s practically health food. Don’t worry, your secret’s safe with me. 😉
Ingredients You’ll Need
- **Plain Yogurt:** Go for full-fat Greek yogurt if you can. It’s thicker, creamier, and just all-around better for froyo. Think of it as the Beyoncé of yogurts.
- **Sweetener of Choice:** Granulated sugar, honey, maple syrup, agave – whatever makes your tastebuds sing. Start with a little, taste, and add more. We’re not judging your sweet tooth here!
- **Vanilla Extract:** A splash makes everything better. It’s like the secret weapon of desserts. Don’t skip it!
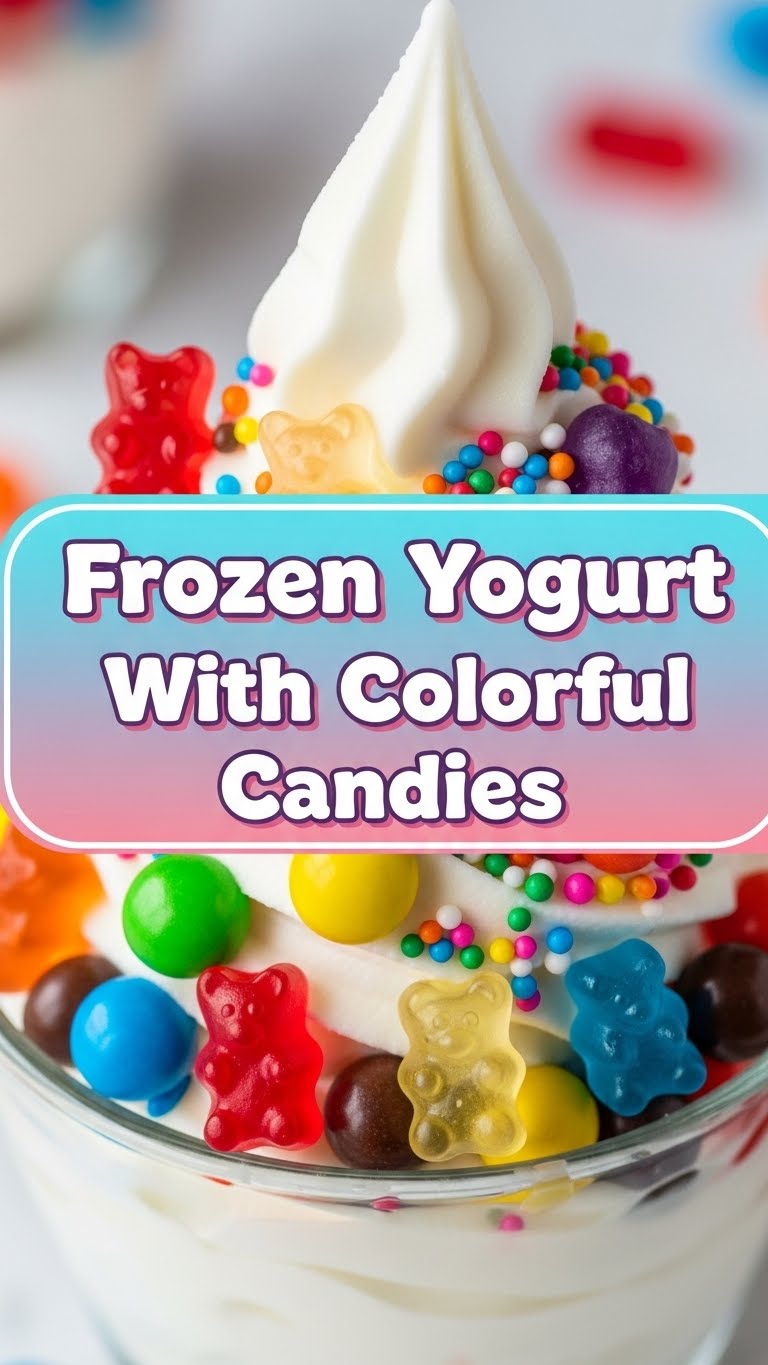
- **Colorful Candies:** This is where the party starts! M&M’s, sprinkles, gummy bears (chopped if they’re huge), crushed Oreos, mini chocolate chips – whatever brings you joy. **The more color, the better, IMO!**
- **Optional Fruit:** A handful of berries (strawberries, blueberries) or sliced bananas can add a lovely fresh tang.
Step-by-Step Instructions
- **Mix it Up:** In a medium bowl, combine your plain yogurt, sweetener, and vanilla extract. Stir it really well until everything is smoothly incorporated and the sweetener is dissolved. Taste and adjust. Does it need more sweetness? More vanilla? You’re the chef!
- **Chill Out (Literally):** Pour your yogurt mixture into a shallow, freezer-safe container. Think baking dish or a metal loaf pan. The shallower it is, the faster it freezes. Cover it tightly with a lid or plastic wrap to prevent ice crystals from forming (nobody wants crunchy froyo).
- **Freeze Until Firm-ish:** Pop that bad boy into the freezer for at least **3-4 hours**. You want it firm around the edges but still a little soft in the middle. If you have an ice cream maker, follow its instructions for churning at this point! If not, don’t fret; we’re going old school.
- **Stir and Scrape (No Ice Cream Maker Method):** Every 45 minutes to an hour, take the container out of the freezer. Use a fork or a sturdy spoon to scrape the frozen parts from the edges into the center and stir vigorously. Break up any large ice chunks. Do this 2-3 times until it reaches a soft-serve consistency. **This is key for a creamy texture!**
- **Candy Time!** Once your froyo is at that glorious soft-serve stage, stir in your colorful candies and any optional fruit. Don’t be shy here; this is your moment to shine!
- **Serve or Store:** Scoop it into bowls immediately for a soft, dreamy treat. If you prefer it firmer, pop it back in the freezer for another 30 minutes to an hour.
Common Mistakes to Avoid
- **Using Watery Yogurt:** You want that thick, creamy Greek yogurt. Regular low-fat or non-fat yogurt will result in an icier, less satisfying froyo. Don’t do it to yourself.
- **Not Stirring During Freezing (If No Ice Cream Maker):** Skipping those periodic stirs will leave you with a solid block of icy yogurt, not creamy froyo. **Patience is a virtue here, my friend.**
- **Adding Candies Too Early:** If you add them at the very beginning, some candies might get soggy or bleed their colors into the yogurt. Wait until the end!
- **Over-freezing Before Serving:** If it becomes rock-solid, just let it sit on the counter for 10-15 minutes to soften up slightly. No biggie, but planning ahead means less waiting.
Alternatives & Substitutions
This recipe is your canvas, so get creative!
- **Sweeteners:** Swap sugar for honey, maple syrup, or even a sugar substitute if that’s your jam. Just adjust to taste.
- **Flavor Boosts:** Instead of vanilla, try almond extract for a nutty twist, or a tiny bit of lemon zest for a bright, fresh flavor. A spoonful of cocoa powder can turn it into chocolate froyo – **OMG, yes!**
- **Mix-ins Galore:** Beyond candies, think chopped nuts, granola, coconut flakes, mini marshmallows, or even a swirl of jam or fruit puree. The world is your oyster… or, well, your froyo.
- **Yogurt Base:** While Greek yogurt is king, you can experiment with other dairy-free yogurts (like coconut or almond-based) if you have dietary restrictions. Just ensure they’re thick!
FAQ
- **Can I really make this without an ice cream maker?** Absolutely! That’s what the “stir and scrape” method is for. It takes a little more elbow grease but yields fantastic results.
- **How long does homemade froyo last in the freezer?** It’s best eaten within 1-2 days for optimal creaminess. After that, it tends to get a bit icier, but it’ll still be edible for up to a week.
- **What if my yogurt isn’t Greek yogurt?** You can try straining regular plain yogurt through a cheesecloth-lined sieve for a few hours in the fridge. This removes excess whey, making it thicker and more suitable for froyo. **FYI, it’s worth the effort!**
- **Can I make a big batch ahead of time for a party?** You can, but remember it’s best fresh. If serving for a party, make it the day before and let it soften for a bit before serving. Have toppings on the side so people can customize!
- **My froyo is too hard after freezing. Help!** No worries! Just let it sit on your counter for 10-15 minutes (or zap it in the microwave for literally 10-15 seconds) to soften it up before scooping.
Final Thoughts
There you have it! A super simple, ridiculously fun, and utterly delicious way to satisfy your sweet tooth without turning your kitchen into a disaster zone. This frozen yogurt with colorful candies is proof that sometimes, the best things in life are also the easiest. Now go impress someone—or just yourself—with your new culinary skills. You’ve earned it (especially after all that “stir and scrape” action)! Enjoy your vibrant, creamy creation!


