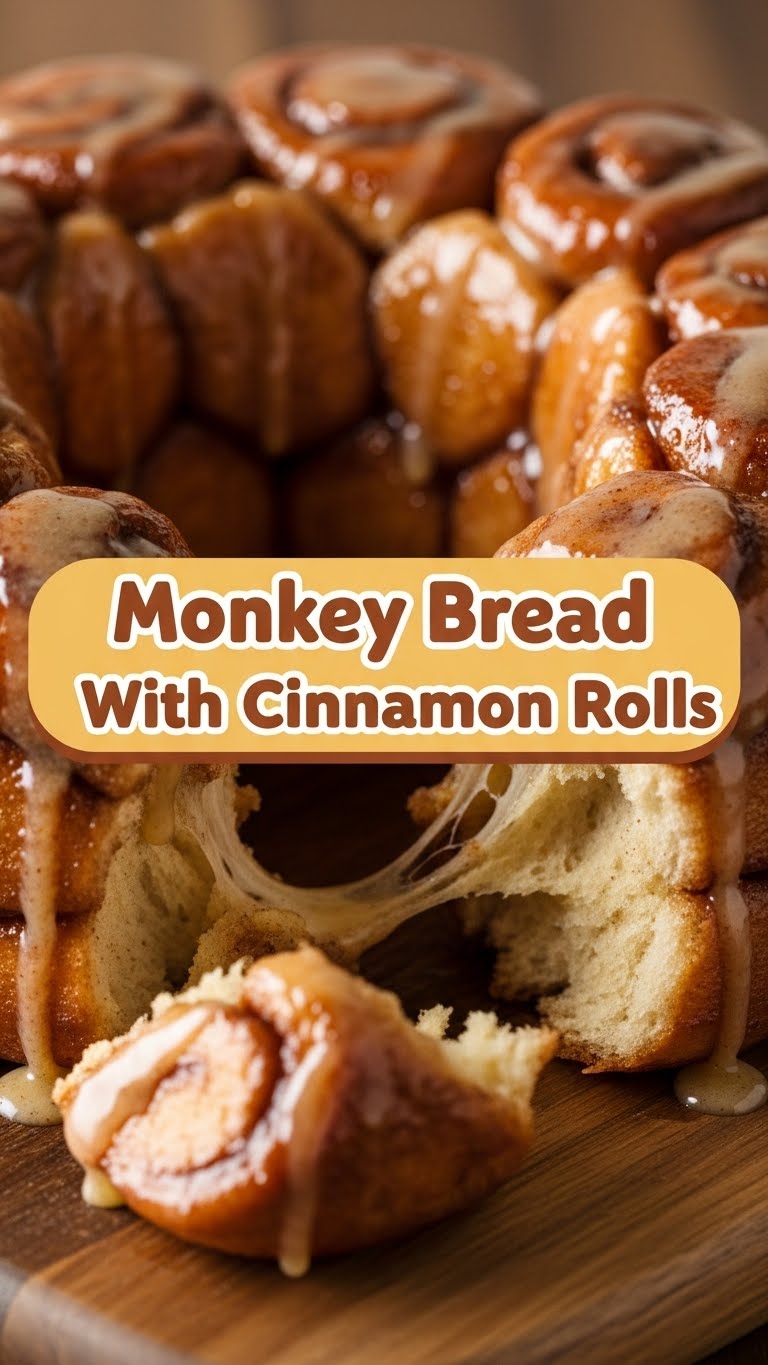
Okay, friend, let’s talk about cinnamon rolls. Not just *any* cinnamon rolls, but the kind that make you wonder why you ever settled for plain. You know, the kind you *actually* want to make, even on a Tuesday when your motivation is currently on vacation in Tahiti. We’re about to hack our way to flavored cinnamon roll glory, and trust me, it’s easier than deciding what to watch on Netflix.
Why This Recipe is Awesome
Because it’s a cheat code, plain and simple. This isn’t your grandma’s all-day yeast project (unless your grandma was a speed demon). We’re talking maximum flavor, minimum fuss, and a result that tastes like you spent hours kneading and proofing. Nope! We’re using a secret weapon that lets us focus on the fun part: infusing these bad boys with whatever deliciousness our heart desires. **Seriously, if I can do it without setting off the smoke detector, you can too.** It’s fast, customizable, and pretty much idiot-proof. Plus, your kitchen will smell divine, which is a win in itself, right?
Ingredients You’ll Need
Get ready for a shockingly short list!
- Pillsbury Crescent Roll Dough (or similar brand): Our magical shortcut. Grab two tubes if you want a bigger batch. Don’t judge, we’re here for flavor, not a baking marathon.
- Unsalted Butter: About 1/4 cup (half a stick), melted. The good stuff. Because everything’s better with butter.
- Brown Sugar: 1/2 cup, packed. For that deep, caramel-y sweetness.
- Ground Cinnamon: 1 tablespoon. The OG MVP. Don’t skimp!
- Your Chosen Flavor Enhancer: This is where the magic happens! Pick 1-2 teaspoons of finely grated orange zest, a dash of cardamom, pumpkin pie spice, espresso powder, or even a spoonful of unsweetened cocoa powder. Pick your fighter!
- Powdered Sugar (Confectioners’ Sugar): About 1 cup, for the dreamy glaze.
- Milk (any kind): 2-3 tablespoons, just a splash for the glaze.
- Vanilla Extract: 1/2 teaspoon. A tiny hug in a bottle.
- **(Optional) Pinch of Salt:** Balances the sweetness in the filling. Trust me on this.
Step-by-Step Instructions
- Preheat & Prep: Get that oven going! Check your crescent roll package, but it’s usually 375°F (190°C). Lightly grease an 8×8 or 9×9 inch baking dish. We don’t want any sticking situations.
- Unroll & Flatten: Unroll your crescent dough onto a lightly floured surface or a piece of parchment paper. Don’t separate the triangles! Pinch those seams together firmly to form one large, happy rectangle. Repeat with the second tube if you’re making more.
- Butter Up: Brush the melted butter evenly over the entire surface of the dough. Don’t be shy; butter is your friend here!
- Sugar & Spice & Everything Nice: In a small bowl, mix your brown sugar, cinnamon, your chosen flavor enhancer (like orange zest!), and that optional pinch of salt. Sprinkle this glorious mixture generously and evenly over the buttered dough.
- Roll ‘Em Up: Starting from one of the long sides, carefully roll the dough into a tight log. **Tight is key here!** Loose rolls unravel, and nobody wants that kind of drama.
- Slice & Dice: Use a sharp knife (or even unflavored dental floss for super clean cuts—seriously, try it!) to slice the log into 9-12 equal pieces, about 1-inch thick.
- Arrange & Bake: Place the rolls cut-side up in your prepared baking dish. They can be snuggled close together; they love company. Bake for 12-17 minutes, or until they’re golden brown and puffy. Keep an eye on them!
- Whip Up Glaze: While your rolls are getting cozy in the oven, whisk together the powdered sugar, milk, and vanilla extract in a small bowl until smooth. Add more milk if needed for a thinner glaze, or more powdered sugar for a thicker one. Want extra flavor? Add a tiny bit of your chosen enhancer here too!
- Glaze & Devour: Once out of the oven, let them cool for just a few minutes (so the glaze doesn’t completely melt away). Drizzle (or totally drown, no judgment) with that delicious glaze. Serve warm and immediately claim your spot on the couch.
Common Mistakes to Avoid
- Not Pinching Seams: If you don’t really press those crescent dough seams together, your rolls might try to escape and separate in the oven. It’s not a disaster, but they’ll look a bit… free-spirited.
- Under-Rolling the Log: A loose log means your spirals won’t hold their shape. Think of it like a perfectly wrapped gift; you want it tight and neat.
- Over-baking: These little gems cook quickly. Over-baking will make them dry and tough, which is a travesty. **A slightly underbaked roll is better than an overbaked one, IMO.** Golden brown is your cue!
- Forgetting to Preheat the Oven: Rookie mistake! Your oven needs to be at the correct temperature from the get-go for even baking. Don’t rush it.
Alternatives & Substitutions
This recipe is all about flexibility, baby!
- Dough Swap: Can’t find crescent roll dough? While it’s my top pick, puff pastry works in a pinch for a flakier (but less bready) roll. Just adjust baking time according to package directions.
- Butter: Vegan butter works just fine for a dairy-free version. You could even use coconut oil, but that’ll impart a different flavor profile, FYI.
- Sugar: Want less sugar? Just use less brown sugar, but don’t skip it entirely; it’s part of the gooey magic. You could also try a touch of maple syrup in the filling for a different kind of sweetness, but it might get a bit messier.
- Flavor Frenzy: The sky’s the limit here! Try lemon zest and poppy seeds, finely chopped nuts (pecans or walnuts) mixed into the filling, a sprinkle of ground ginger, or even a tiny pinch of cayenne for a sweet-heat kick. Experiment and find your favorite combo!
FAQ (Frequently Asked Questions)
- Can I use store-bought cinnamon roll dough instead? Well, technically you *could*, but those usually come pre-cut and pre-rolled, which defeats the purpose of adding *your* custom flavor to the filling. You’re trying to level up, remember?
- What if I don’t have parchment paper for rolling? No worries, a lightly floured countertop or even a very well-greased baking sheet will do just fine for rolling out the dough. For the baking dish, just grease it well.
- My rolls look a bit messy. Did I fail? Absolutely not! They’re homemade, not factory-made. Imperfection is charming. As long as they taste good, you’ve succeeded. It’s about the journey, not just the perfectly symmetrical spiral, right?
- Can I make these ahead of time? You clever cookie! Yes, you can assemble the rolls, place them in the baking dish, cover tightly with plastic wrap, and refrigerate overnight. Then just bake them in the morning, adding a few extra minutes to the baking time. Best wake-up call ever!
- How do I store leftovers? Leftovers? What are those? Kidding! Keep them in an airtight container at room temp for a day or two, or in the fridge for up to 4 days. Reheat briefly in the microwave or oven for that fresh-baked feel.
- Why bother with the custom flavor? Aren’t regular cinnamon rolls good enough? “Good enough”? My friend, we aim for *great*! This is about making them *yours*, adding that little something extra that makes them memorable. It’s like wearing socks with sandals—some things are just better with a personal touch (okay, maybe not socks with sandals, but you get the idea).
- Can I use margarine instead of butter? Well, technically you *could*, but why hurt your soul like that? Butter just tastes better. Trust me on this one, for the sake of your taste buds and the general deliciousness of the rolls.
Final Thoughts
See? Told you it was easy! Now you’ve got a secret weapon in your baking arsenal, ready to deploy deliciousness at a moment’s notice. You’ve unlocked the next level of cinnamon roll perfection, and all without breaking a sweat (or spending all day in the kitchen). Go on, share them with friends, impress a date, or just hoard them all for yourself. You deserve it, champ! Happy baking!
