Hey there, superstar baker! Got a birthday coming up and wanna whip up something that screams “I put effort into this!” but actually took minimal brain power? Same. Let’s craft a cake that’s pretty as a picture but easy enough you won’t need a post-baking therapy session. Get ready to impress!
Why This Recipe is Awesome
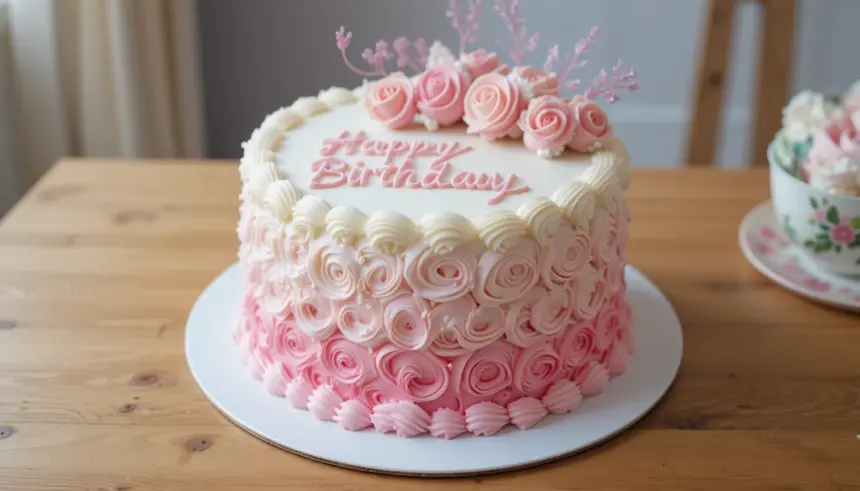
Okay, let’s be real. This isn’t just *any* cake. This is like the LBD (Little Black Dress) of cakes: effortlessly chic, universally loved, and looks amazing with minimal effort. It’s truly **idiot-proof**, I swear. I even managed to not set off the smoke detector, which, for me, is a major win. Plus, it’s a classic vanilla bean cake, so everyone from your picky Aunt Carol to the pickiest toddler will adore it. And the fluffy pink buttercream? So fetch! Seriously, this cake is a vibe.
Ingredients You’ll Need
Gather ’round, my friend. Here’s what you’ll need for your masterpiece. Pro tip: having everything measured and ready before you start (that’s “mise en place” for the fancy folks) makes life SO much easier.
- All-Purpose Flour: 2 ½ cups. Because we’re not fancy enough for cake flour today.
- Granulated Sugar: 1 ¾ cups. For that sweet, sweet bliss.
- Baking Powder: 1 ½ tablespoons. The lift-off secret!
- Salt: ½ teaspoon. Just a pinch, because balance, darling.
- Unsalted Butter: 1 cup (2 sticks), softened. Don’t even *think* about using cold butter; we’re not savages.
- Large Eggs: 3, at room temperature. See a pattern here with the room temp stuff? It’s important, trust me.
- Whole Milk: 1 cup, at room temperature. Skim milk has no place in a birthday cake, IMO.
- Vanilla Extract: 2 teaspoons. The good stuff! Don’t skimp here; it makes all the difference.
For the Dreamy Pink Buttercream:
- Unsalted Butter: 1 cup (2 sticks), softened. Yup, more butter. Don’t judge.
- Powdered Sugar: 4 cups (or more!), sifted. The secret to fluffy, smooth frosting. Get a big bag.
- Heavy Cream or Milk: 3-4 tablespoons. Just a splash to get that perfect consistency.
- Vanilla Extract: 1 teaspoon. More vanilla? Always.
- Pink Gel Food Coloring: A tiny drop or two. Gel is best for vibrant colors, unless you’re going for pastel sadness (no judgment if you are!).
Step-by-Step Instructions
- Get Ready to Bake: Preheat your oven to 350°F (175°C). Seriously, do it now. Grease and flour two 8-inch round cake pans. Or, even better, line the bottoms with parchment paper, then grease and flour.
- Mix the Dry Stuff: In a large bowl, whisk together the flour, granulated sugar, baking powder, and salt. Give it a good whisk to make sure everything’s evenly distributed.
- Cream the Butter & Sugar: In another large bowl (or your stand mixer), beat the softened butter until it’s light and fluffy, about 2-3 minutes. Add the granulated sugar gradually, beating until the mixture is pale and fluffy. This step is crucial for an airy cake!
- Add the Eggs: Beat in the eggs one at a time, making sure each is fully incorporated before adding the next. Scrape down the sides of the bowl as needed.
- Alternate Wet & Dry: With the mixer on low speed, gradually add the dry ingredients to the wet mixture in three additions, alternating with the milk in two additions. **Start and end with the dry ingredients.** For example: ⅓ dry, ½ milk, ⅓ dry, ½ milk, ⅓ dry. Mix *just* until combined; don’t overmix!
- Divide and Bake: Divide the batter evenly between your two prepared cake pans. Bake for 28-32 minutes, or until a wooden skewer inserted into the center comes out clean.
- Cool Down: Let the cakes cool in their pans on a wire rack for about 10-15 minutes. Then, carefully invert them onto the wire rack to cool completely. **This part is important!** Don’t try to frost warm cakes unless you want a melted mess.
- Make the Dreamy Buttercream: While the cakes cool, beat the softened butter in a large bowl until creamy. Gradually add the sifted powdered sugar, alternating with the heavy cream or milk, beating until smooth and fluffy. Stir in the vanilla extract.
- Pink Perfection: Add a tiny drop of pink gel food coloring to the buttercream. Mix until you get your desired shade of gorgeous pink. Start small; a little goes a long way!
- Assemble Your Masterpiece: Once the cakes are completely cool, place one layer on your serving plate or cake stand. Spread about a third of the buttercream over the top. Place the second cake layer on top, then frost the top and sides of the entire cake with the remaining buttercream. Decorate with sprinkles, fresh berries, or edible flowers if you’re feeling extra!
Common Mistakes to Avoid
We’ve all been there. Here are a few traps to steer clear of:
- Not Preheating the Oven: Rookie mistake! Your cake won’t rise evenly, and we want symmetry, honey. Always preheat!
- Overmixing the Batter: Once you add the flour, mix *just* until combined. Overmixing develops the gluten too much, giving you a tough, chewy cake. Nobody wants a jaw workout on their birthday.
- Frosting a Warm Cake: This is a one-way ticket to a soupy, sliding mess. **Patience, grasshopper.** Let those cakes cool completely.
- Using Cold Ingredients: Remember those “room temp” notes for butter, eggs, and milk? They weren’t just for show. Cold ingredients don’t emulsify properly, leading to lumpy batter and a less airy cake.
- Eyeballing Ingredients: While I advocate for a relaxed approach, baking is a science, FYI. Use measuring cups and spoons accurately, especially for flour.
Alternatives & Substitutions
Feeling creative? Here are some ideas to mix things up:
- Buttermilk Bonanza: You can totally substitute the whole milk with buttermilk for a slightly tangier, even more moist cake. It adds a little *zing* that’s delish!
- Flavor Frenzy: Swap out half of the vanilla extract for almond extract, lemon extract, or even a touch of rosewater for a different vibe. Rosewater is super “feminine” if you’re leaning into that theme!
- Color Your World: Don’t want pink? No problem! Use any color food coloring you fancy, or skip it entirely for a beautiful, classic white cake. Adorn with fresh berries or delicate edible flowers for natural elegance.
- Frosting Fantasies: Not a buttercream fan? A simple cream cheese frosting (reduce the sugar a bit) is always a winner. Or, for something lighter, a whipped cream frosting would be divine, though it needs to be kept chilled.
- Gluten-Free Goodness: For a gluten-free option, use a good quality 1:1 gluten-free baking flour blend. Make sure it contains xanthan gum.
FAQ (Frequently Asked Questions)
- Can I use margarine instead of butter? Well, technically yes, but why hurt your soul like that? Butter just tastes better, plain and simple. For the best flavor and texture, stick with good old butter.
- My cake sank in the middle, help! Oh no! Did you open the oven door too early? Or maybe over-mix the batter? It happens to the best of us! Ensure your baking powder isn’t expired too.
- How do I get perfectly flat cake tops? **Cake strips** are your best friend here! You soak them in water and wrap them around your cake pans, which helps the cakes bake more evenly. Or, just level them with a serrated knife after cooling—no one will ever know!
- Can I make this dairy-free? You absolutely can! Use plant-based butter (like Miyoko’s or Earth Balance sticks), a non-dairy milk (almond or oat milk work well), and ensure any sprinkles or decorations are dairy-free.
- How long does this cake last? About 3-4 days at room temperature, covered tightly. If it even lasts that long, let’s be real. It usually disappears faster than a free sample at Costco.
- Can I make the cake layers ahead of time? Yes! Once cooled, wrap them tightly in plastic wrap and store at room temp for up to 2 days, or freeze for up to 2 months. Thaw before frosting!
Final Thoughts
See? Not so scary, right? Now you’ve got a gorgeous, delicious “feminine” birthday cake that looks way more complicated than it actually was. Go ahead, bask in the glory! You’ve officially leveled up your baking game and probably earned some serious brownie points (pun intended). Now go impress someone—or yourself—with your new culinary skills. You’ve earned it! Don’t forget to send me a slice… or at least a pic!


