
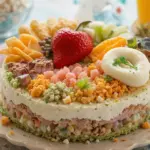
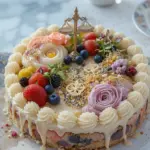
Alright, folks, Father’s Day is sneaking up on us, and what better way to celebrate the main man than with something sweet, personal, and *not* requiring you to rent out a professional bakery? We’re talking **Bento Cakes**, baby! These adorable mini cakes are all the rage, and they’re basically a tiny canvas for your love (and frosting skills). So, if you’ve decided to tackle Father’s Day with more than just a tie this year, excellent choice. Let’s get baking!
Why This Recipe is Awesome
Why is this particular recipe the Beyoncé of Father’s Day desserts? For starters, it’s **small**. Meaning less chance of overeating (maybe) and way less intimidating than a giant layer cake. It’s also super customizable, so you can really nail Dad’s vibe, whether he’s a golf fanatic, a grill master, or just really, *really* into napping. Plus, it looks fancy without the fancy effort. Honestly, even I, a notorious kitchen-destroyer, managed this. You’ve got this. It’s practically **idiot-proof**, I swear.
Ingredients You’ll Need
Gather your baking squad! Here’s what we’ll need for our delightful mini masterpiece:
- For the Cake:
- 1 ½ cups (190g) All-purpose flour: The backbone of all things delicious. Don’t skip it, unless you’re aiming for a pancake.
- 1 ½ teaspoons baking powder: Our little lift-off agent.
- ¼ teaspoon salt: Just a pinch to balance things out.
- ½ cup (113g) unsalted butter, softened: Crucial. Salted butter is a whole different vibe, and we’re not going there today.
- 1 cup (200g) granulated sugar: For sweetness, because Dad deserves it (and so do you).
- 2 large eggs: Bring ’em to room temp, it helps with emulsification, fancy pants.
- 1 teaspoon vanilla extract: Essential flavor. Don’t cheap out here.
- ½ cup (120ml) whole milk: Also room temp, please.
- For the Buttercream Frosting:
- 1 cup (226g) unsalted butter, softened: Again, softened is key!
- 3-4 cups (360-480g) powdered sugar, sifted: Sifting is non-negotiable for smooth frosting. Seriously.
- 2-3 tablespoons heavy cream or milk: For desired consistency.
- 1 teaspoon vanilla extract: More yummy vanilla!
- Pinch of salt: To cut the sweetness.
- Food coloring (gel preferred): For turning your cake into a masterpiece!
- For Decoration (Optional, but highly encouraged!):
- Sprinkles, chocolate shavings, fresh berries, edible markers, mini candy bars. Get creative!
Step-by-Step Instructions
- Preheat & Prep: Get your oven fired up to 350°F (175°C). Lightly grease and flour two 4-inch round cake pans. If you only have one, no worries, just bake in batches. You can also use a standard cupcake pan and just trim the tops flat, if you’re feeling adventurous.
- Whisk the Dry Stuff: In a medium bowl, whisk together your flour, baking powder, and salt. Set aside.
- Cream it Up: In a larger bowl, using an electric mixer, cream the softened butter and granulated sugar together until it’s light and fluffy. This usually takes about 2-3 minutes.
- Eggs & Vanilla Time: Beat in the eggs, one at a time, making sure each is fully incorporated before adding the next. Stir in that glorious vanilla extract.
- Alternate Wet & Dry: Now for the fun part! Gradually add the dry ingredients to the wet ingredients, alternating with the milk. Start and end with the dry ingredients. Mix until just combined – **do not overmix**, or your cake will be tough. We want tender, not rubber.
- Bake ‘Em Small: Divide the batter evenly between your prepared mini cake pans. Bake for 18-22 minutes, or until a toothpick inserted into the center comes out clean.
- Cool Down: Let the cakes cool in their pans for about 10 minutes, then gently invert them onto a wire rack to cool completely. **This is crucial.** Warm cake + frosting = sad, melty mess. Patience, young padawan.
- Whip Up the Frosting: While the cakes cool, make your buttercream. In a large bowl, beat the softened butter until creamy. Gradually add the sifted powdered sugar, a cup at a time, alternating with the cream/milk and vanilla. Beat until light, fluffy, and smooth. Add a pinch of salt to cut the sweetness.
- Color & Decorate: Divide your frosting into separate bowls if you want different colors. Add gel food coloring a tiny bit at a time until you reach your desired shade. Now, get creative! Frost your cooled cakes, stack ’em up, add sprinkles, pipe a cute message, or draw a mini golf course. It’s your edible canvas!
Common Mistakes to Avoid
We’ve all been there. Learn from my (many) past kitchen mishaps:
- **Thinking you don’t need to preheat the oven:** Rookie mistake. Your cakes won’t rise properly, and they’ll cook unevenly. Just do it.
- **Eyeballing ingredients:** Baking is science, folks. Not like cooking, where a “pinch of this” works. Get those measuring cups and spoons out! Seriously, precision matters here, IMO.
- **Overmixing the batter:** You want a tender cake, not a rubber puck. Mix until just combined, then stop. Little lumps of flour? Probably fine. Overmixed gluten strands? Not fine.
- **Impatience with frosting:** If your butter isn’t softened, or your powdered sugar isn’t sifted, you’re gonna have a bad time. Lumps are not your friend, and neither is grainy frosting.
- **Cutting corners on cooling:** As mentioned, warm cake + cold frosting = disaster. **Allow your cakes to cool completely.** Seriously, go watch an episode of something.
Alternatives & Substitutions
Feeling a little wild? Here are some simple swaps to make this cake even more “Dad-tastic”:
- Cake Flavor Swap:
- **Chocolate Lover Dad?** Replace ¼ cup of flour with ¼ cup of unsweetened cocoa powder. Boom, chocolate cake.
- **Lemon Zest Dad?** Add the zest of one lemon to the batter for a bright, tangy twist.
- Frosting Fun:
- **Cream Cheese Frosting:** Substitute half the butter for cream cheese for a tangy, less-sweet option. Make sure both are super soft!
- **Ganache Glaze:** If Dad’s a chocolate purist, a simple chocolate ganache poured over the top is super elegant and easy.
- Dietary Considerations:
- **Dairy-Free:** Use plant-based milk (almond, soy, oat) and a good quality vegan butter. FYI, vegan butters have come a long way!
- **Gluten-Free:** Swap the all-purpose flour for a 1:1 gluten-free baking blend.
- Decoration Explosion: Don’t limit yourself to sprinkles! Think mini chocolate tools, edible logos of his favorite sports team, or even just some fresh berries for a lighter touch.
FAQ (Frequently Asked Questions)
- **How small is ‘bento cake’ small?** Think lunchbox-sized, usually 4-6 inches in diameter. Perfect for one very happy Dad (or two, if he’s feeling generous).
- **Can I make this ahead?** Absolutely! Cakes can be baked a day or two in advance, wrapped tightly in plastic wrap, and stored at room temp (or frozen for longer). Frosting can also be made ahead and stored in the fridge, just give it a good whip before using.
- **My frosting is too thin/thick, help!** Too thin? Add more sifted powdered sugar, a tablespoon at a time. Too thick? A tiny splash of milk or cream. Start small, you can always add more. Don’t panic!
- **What if I don’t have mini cake pans?** Get creative! You can bake in a standard 8-inch round pan and use a round cookie cutter (around 4-5 inches) to cut out your mini cakes. Be warned, you’ll have some ‘scraps’ (chef’s treat!).
- **Can I use a box mix?** Okay, listen. We’re going for homemade charm here. BUT, if you’re in a *super* rush or just feeling lazy (no judgment!), a good quality box mix can work. Just don’t tell Dad I said that.
- **Why unsalted butter? Does it really matter?** Yes, butter fiend, it matters! Unsalted gives *you* complete control over the salt content in your recipe. Baking is precise, remember? We’re not free-styling here.
- **How do I make my frosting smooth for writing?** After making your buttercream, take a small amount and put it through a fine-mesh sieve with the back of a spoon. This extra step removes any tiny lumps, giving you a super smooth consistency for piping fine details.
Final Thoughts
And there you have it! Your very own, totally awesome, Father’s Day Bento Cake. Whether it’s picture-perfect or beautifully “rustic” (read: slightly messy but made with love), Dad will absolutely adore it because *you* made it. It’s the thought, the effort, and the deliciousness that counts. Now go impress someone—or yourself—with your new culinary skills. You’ve earned those bragging rights! Happy Father’s Day, and happy baking!
