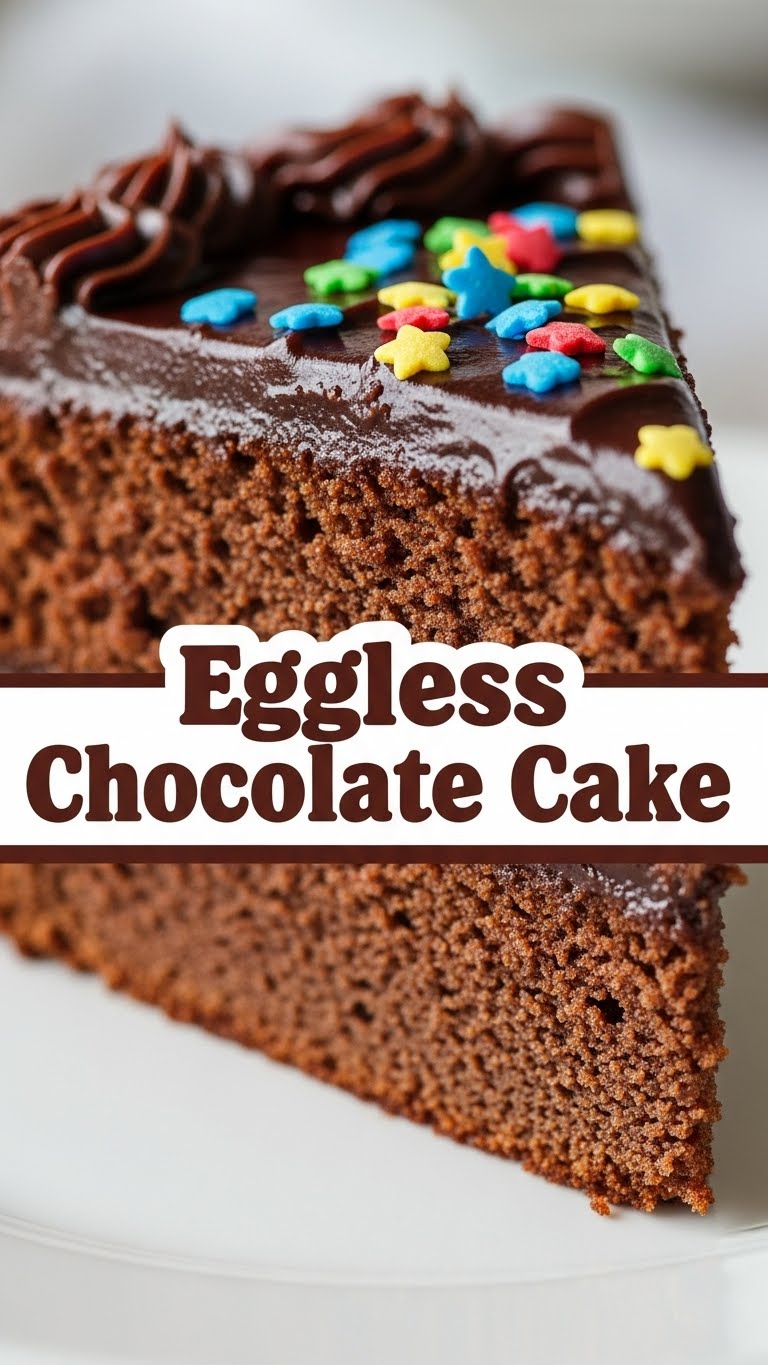
So you’re craving something warm, fudgy, and utterly divine, but the thought of cracking eggs feels like a whole commitment, huh? Or maybe your fridge is just… egg-free. Been there, done that, baked the cake! If you’re looking for an excuse to dive headfirst into a chocolatey dream without all the fuss (or the eggs), you’ve landed in the perfect spot. Get ready, because we’re about to make some magic!
Why This Recipe is Awesome
Listen up, buttercup! This isn’t just *any* eggless chocolate cake. This is THE eggless chocolate cake. It’s so simple, even your pet goldfish could probably guide you through it (okay, maybe not, but you get the drift). No fancy gadgets, no weird ingredients, and zero eggs to worry about. Plus, it’s fudgy, moist, and ridiculously delicious. Seriously, I’ve seen people fight over the last slice. It’s practically idiot-proof. You’re welcome.
Ingredients You’ll Need
Gather ’round, my fellow kitchen adventurer! Here’s your shopping list for pure chocolate bliss:
- 1 ½ cups All-purpose flour: The unsung hero, the base of all good things.
- 1 cup Granulated sugar: Sweet, sweet magic. Don’t skimp, unless you’re into less sweet things, then you do you.
- ½ cup Unsweetened cocoa powder: Go for the good stuff, your taste buds will thank you. Darker the better, IMO.
- 1 teaspoon Baking soda: Our little leavening agent. Don’t skip it!
- ½ teaspoon Salt: Just a pinch to make everything pop and balance the sweetness.
- ½ cup Vegetable oil: Or any neutral oil you have lurking around (canola, sunflower work great!).
- 1 tablespoon White vinegar: Sounds weird, but trust the process. It’s the secret to fluffiness!
- 1 teaspoon Vanilla extract: Because what’s cake without a little vanilla hug?
- 1 cup Cold water: Yep, just plain ol’ H2O. No fancy milks needed here!
Step-by-Step Instructions
- Get Your Oven & Pan Ready: Preheat your oven to 350°F (175°C). Grease and flour an 8×8 inch square pan (or a 9-inch round one if you’re feeling circular).
- Whisk the Dry Stuff: In a large mixing bowl, combine the flour, sugar, cocoa powder, baking soda, and salt. Give it a good whisk until everything is nice and uniform. We’re looking for smooth operators here.
- Add the Wet Wonders: Now, make three little wells in your dry mixture. Pour the vegetable oil into one, the white vinegar into another, and the vanilla extract into the last one. Finally, pour the cold water over everything.
- Mix, Don’t Mangle: With a spatula or whisk, gently mix everything until just combined. A few lumps are totally okay, even desirable! Overmixing is the enemy of a tender cake, FYI.
- Bake It Up: Pour the batter into your prepared pan and pop it into the preheated oven. Bake for about 30-35 minutes, or until a toothpick inserted into the center comes out clean.
- Cool & Conquer: Let the cake cool in the pan for about 10-15 minutes before transferring it to a wire rack to cool completely. Or, if you’re impatient like me, just dig in when it’s still warm and gooey. No judgment here!
Common Mistakes to Avoid
We all make mistakes, darling. But with this wisdom, you won’t have to make these ones:
- Overmixing: This isn’t a workout, folks! Mix until *just* combined or you’ll end up with a tough, sad cake. Resist the urge to keep stirring!
- Not Preheating the Oven: A classic rookie mistake. Your oven needs to be hot and ready to party for that perfect rise and even bake. Plan ahead!
- Ignoring the Vinegar: I know, it sounds odd, but it reacts with the baking soda and gives you that perfect, fluffy rise. Don’t skip it thinking it won’t matter! It’s our secret weapon.
- Opening the Oven Door Too Soon: Patience, young padawan! Resist the temptation to peek before at least 25 minutes, or your cake might deflate.
Alternatives & Substitutions
Feeling adventurous? Or just working with what you’ve got? Here are some simple swaps:
- Oil: Can you use melted butter? Yes, you can, but IMO, oil keeps it super moist for longer. Your call!
- Water: Feel free to swap with cold coffee for an even deeper, more sophisticated chocolate flavor. Or any plant-based milk (almond, soy, oat) if you’re feeling fancy, but it truly works perfectly with just water.
- Flour: Want to go gluten-free? A 1:1 gluten-free flour blend should work just fine, but results might vary slightly in texture.
- Sweetener: If you’re out of granulated sugar, brown sugar can work for a slightly different, more molasses-y flavor.
FAQ (Frequently Asked Questions)
- Can I add chocolate chips? Absolutely! Who says no to more chocolate? Stir in about ½ cup of your favorite chocolate chips with the dry ingredients.
- How long does it keep? If it even lasts that long (unlikely in my house!), wrapped tightly at room temperature, it should be good for 3-4 days. You can also freeze slices for later!
- Why cold water? It helps control the reaction between the vinegar and baking soda, giving a more sustained and better rise, leading to a wonderfully fluffy cake.
- Can I make cupcakes with this recipe? Yep! Just divide the batter into 12 lined cupcake tins and adjust baking time, usually 20-25 minutes, or until a toothpick comes out clean.
- Do I *have* to use vinegar? Well, no, but the texture might be a bit denser and the rise less impressive. It’s like skipping leg day—you *can*, but should you? For the best results, stick with it!
Final Thoughts
And there you have it, my friend! Your ticket to chocolatey bliss without the egg-stra fuss. This cake is proof that sometimes, the simplest things are the most satisfying. Now go impress someone—or yourself—with your new culinary skills. You’ve earned it! Don’t forget to send me a slice (or at least a pic!). Happy baking!
