So, you’ve got that classic craving, that deep-seated desire for something comforting, buttery, and utterly delicious? But also, you’re human and probably don’t want to spend your entire afternoon trying to bake something that looks like it belongs in a fancy French bakery. Right? Same, friend, same. That’s why we’re making the **Easy Moist Pound Cake** today. No stress, maximum yum!
Why This Recipe is Awesome
Let’s be real, some recipes act like they need a Ph.D. in baking to pull off. Not this one! This isn’t just a pound cake; it’s *the* pound cake. It’s **idiot-proof**, I swear. Even if your oven usually only sees frozen pizzas, you can nail this. It’s super moist (yeah, I said the M-word, deal with it), has that perfect golden crust, and is dense enough to feel substantial but still light enough to devour a second slice without judgment. Plus, it uses ingredients you probably already have lying around. No obscure spices or fancy flours required. It’s the kind of cake that screams “I tried a little, but mostly I’m just naturally talented.”
Ingredients You’ll Need
Time to gather your baking squad. These are the unsung heroes of moist deliciousness:
- 1 cup (2 sticks) unsalted butter, softened: Don’t even THINK about using it cold. Softened means soft enough to indent with your finger, not melted. Patience, young Padawan.
- 2 cups granulated sugar: Our sweet, sweet friend.
- 4 large eggs, at room temperature: Room temperature eggs mix better and create a smoother batter. It’s science!
- 1 teaspoon vanilla extract: Go for the good stuff here. It makes a difference. Trust me, your taste buds will thank you.
- 3 cups all-purpose flour: The backbone of our cake. No need for fancy stuff.
- 1 teaspoon baking powder: Just a tiny bit to give it a lift without making it airy. We want density!
- 1/2 teaspoon salt: Balances the sweetness. Don’t skip it; it’s a flavor enhancer.
- 1 cup whole milk or heavy cream: For ultimate moisture. If you only have 2%, it’ll work, but whole milk or cream is the VIP ticket to moist-ville.
Step-by-Step Instructions
Okay, apron on? Let’s get baking! Don’t overthink it, just follow along.
- Get things ready: Preheat your oven to 325°F (160°C). Seriously, preheat it. Then, grease and flour a 9×5 inch loaf pan or a 10-12 cup Bundt pan. Don’t be shy with the flour; we want that cake to slide right out!
- Cream the butter and sugar: In a large bowl, using an electric mixer, beat the softened butter and sugar together until it’s light and fluffy. This usually takes about 3-5 minutes. It should look pale yellow and airy, like a cloud.
- Add the eggs: Add the eggs one at a time, beating well after each addition. Make sure each egg is fully incorporated before adding the next. Scrape down the sides of the bowl as needed.
- Vanilla time: Stir in the vanilla extract. Take a moment to enjoy that amazing smell.
- Dry ingredients unite: In a separate bowl, whisk together the flour, baking powder, and salt. Give it a good whisk to make sure everything is evenly distributed.
- Alternate additions: Now, add the dry ingredients to the wet mixture in three additions, alternating with the milk (or cream) in two additions. Start and end with the dry ingredients. So, dry, wet, dry, wet, dry. Mix on low speed just until combined. **DO NOT OVERMIX!** Overmixing develops the gluten and can lead to a tough cake.
- Into the pan: Pour the batter into your prepared pan. Smooth the top with a spatula. If using a loaf pan, you can create a slight ridge down the center of the batter for that classic crack.
- Bake it up: Bake for 60-75 minutes for a loaf pan, or 70-85 minutes for a Bundt pan. The cake is done when a wooden skewer or toothpick inserted into the center comes out clean or with just a few moist crumbs.
- Cool down: Let the cake cool in the pan for about 10-15 minutes before inverting it onto a wire rack to cool completely. This helps prevent it from sticking and ensures it doesn’t get soggy.
Common Mistakes to Avoid
We’ve all been there, staring at a baking disaster. Learn from my (and others’) mistakes!
- Using cold butter/eggs: Seriously, this is a biggie. Cold ingredients don’t emulsify properly, leading to a lumpy batter and a denser, less tender cake. **Plan ahead!**
- Overmixing the batter: As mentioned, once you add the flour, mix *just* until it’s combined. If you keep mixing, you’ll develop the gluten, and your moist, tender cake dream turns into a tough, chewy nightmare.
- Opening the oven door constantly: Resist the urge! Every time you open that door, the temperature drops, which can cause your cake to sink in the middle. Be patient and wait until near the end of the baking time to check.
- Not greasing AND flouring your pan properly: There’s nothing sadder than a beautiful cake stuck in its pan. **Grease every nook and cranny, then lightly flour, tapping out the excess.**
Alternatives & Substitutions
Feeling fancy, or just out of an ingredient? Here are some simple swaps:
- Flavor Boost: Instead of just vanilla, try adding a teaspoon of almond extract for a marzipan-like twist, or a hint of lemon zest (about 1 tbsp) for a bright, fresh flavor. Orange zest is also divine!
- Buttermilk Bonanza: Don’t have whole milk? If you have buttermilk, use it! It adds incredible tang and moisture. If you don’t have buttermilk, you can make a quick substitute: add 1 tablespoon of lemon juice or white vinegar to a measuring cup, then fill the rest with regular milk until you reach 1 cup. Let it sit for 5-10 minutes until it slightly curdles. Voila!
- Gluten-Free: You can often swap out regular all-purpose flour for a 1:1 gluten-free baking blend. Just make sure it contains xanthan gum, or add 1/2 tsp if it doesn’t. Results might vary slightly, but it’s worth a shot!
- Add-ins: Fold in a cup of fresh berries (tossed in a tablespoon of flour to prevent sinking), chocolate chips, or chopped nuts at the very end of mixing the batter.
FAQ (Frequently Asked Questions)
Got questions? I’ve got answers (mostly humorous ones).
- Why is my pound cake dense? Isn’t it supposed to be light? Pound cake *is* dense, my friend! It’s in the name! It’s traditionally made with a pound each of butter, sugar, eggs, and flour, giving it that characteristic substantial texture. If it’s *too* dense, you might have overmixed.
- Can I use margarine instead of butter? Well, technically yes, but why hurt your soul like that? Butter provides superior flavor and texture that margarine just can’t replicate. **For the best result, stick to butter.**
- How do I store this masterpiece? Once cooled, wrap it tightly in plastic wrap or aluminum foil. It stays fresh at room temperature for 3-4 days. In the fridge, it’ll last up to a week.
- Can I freeze pound cake? Absolutely! It freezes beautifully. Wrap cooled slices or the whole cake tightly in plastic wrap, then a layer of foil. It’ll keep for up to 3 months. Just thaw at room temperature.
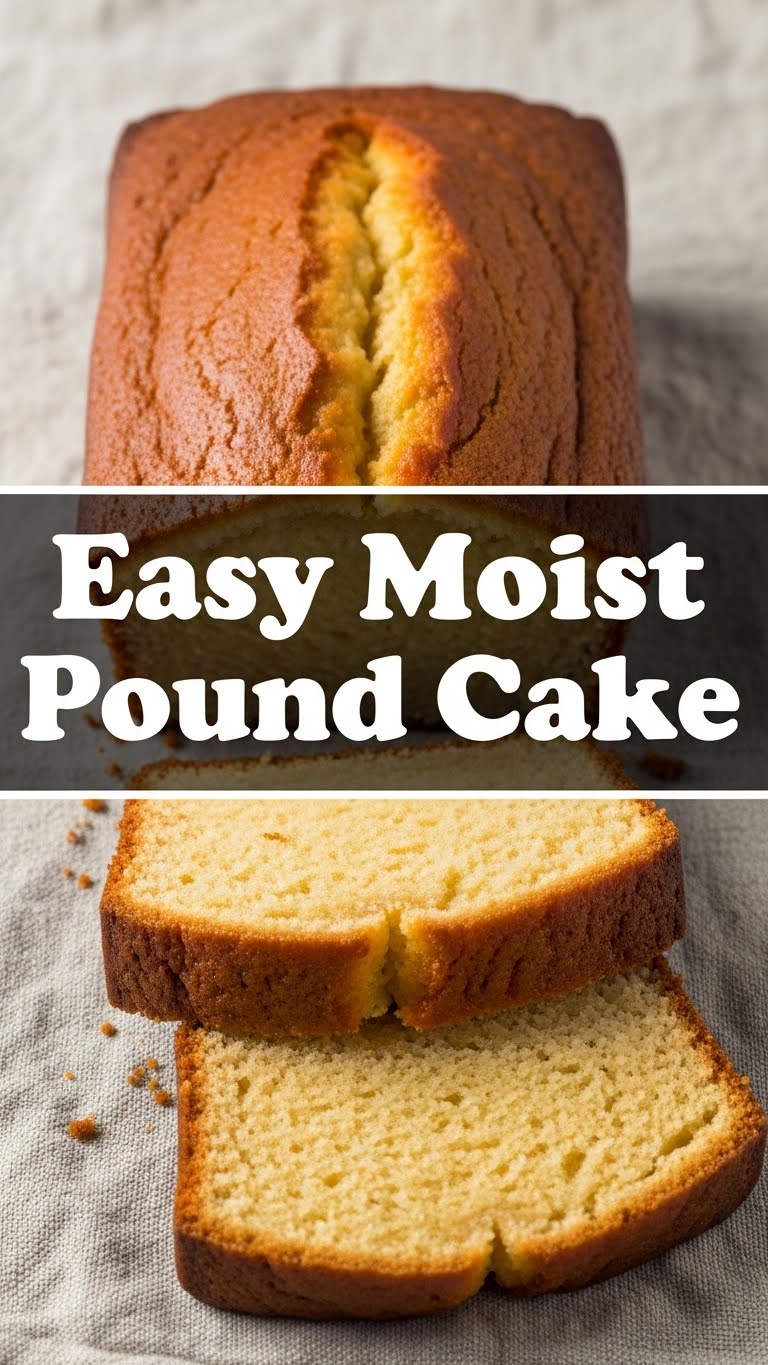
- My cake cracked on top, is it ruined? Not at all! A beautiful crack down the center is actually a classic sign of a well-baked pound cake. It just means your oven’s doing its job and the top cooked a little faster. Embrace the crack!
- Should I glaze it? A simple lemon glaze (powdered sugar + lemon juice) is always a good idea, but it’s totally optional. This cake is delicious all on its own.
Final Thoughts
There you have it! An utterly delicious, surprisingly simple, and wonderfully moist pound cake. It’s the perfect companion for coffee, tea, or, let’s be honest, just a fork on its own. You’ve just created something amazing from scratch, and without losing your mind in the process. Now go impress someone—or yourself—with your new culinary skills. You’ve earned it!


